KIP PrintNET
This information is solely for use of KIP Personnel and KIP Authorized Dealers. No part of this publication may be copied,
reproduced or distributed in any form without express written permission from KIP America, Inc. 2011 KIP America, Inc.
- 3 -
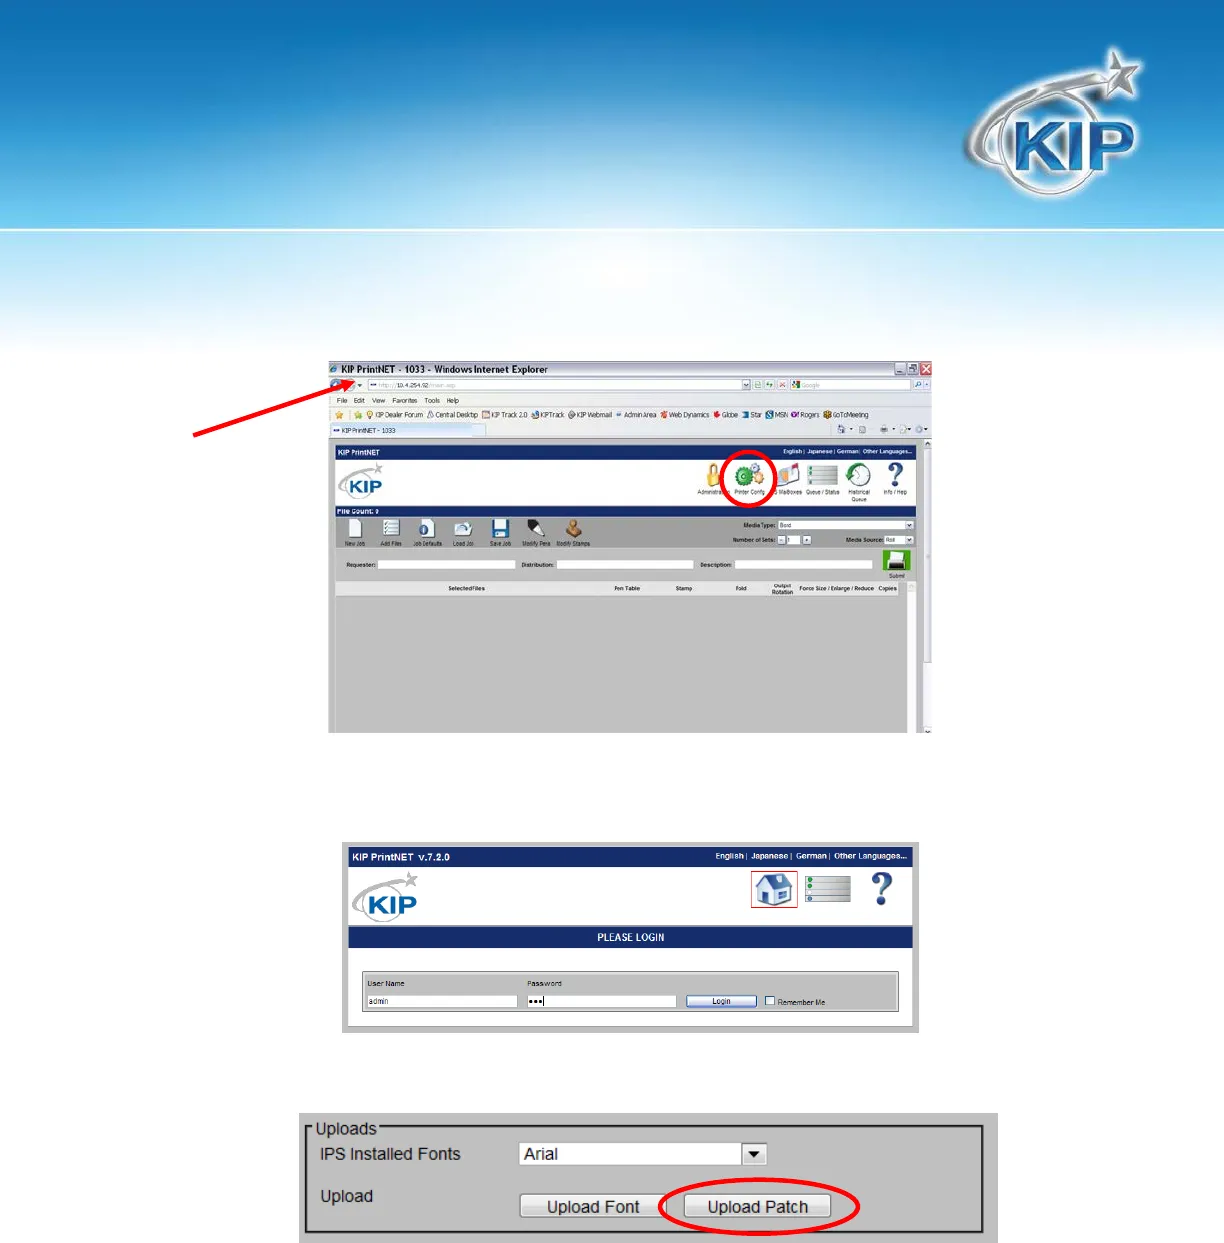
4. KIP models are web browser enabled. From your web browser on your desktop, simply enter the IP
address of the KIP printer to launch KIP PrintNET. And then click on the “Printer Config” page.
5. Enter the “admin” user name and password. (contact your local administrator for credentials for the KIP
system or reference the system’s user guide)
6. Scroll down the web page until “Upload” is located. Click on “Upload Patch”
7. Browse for the file that was extracted in step #2.
8. Select “Save”. This will transfer the Web App software to the KIP system.
9. At the printer the touch screen will display a message “Please wait Updating IPS” and the system will
restart. (this can take up to ten minutes)
10. Once the KIP printer has restarted, KIP Web App is ready for final configuration as noted in the following
pages.


