Fax Driver 3-15
Setting up the fax driver (Windows)
3
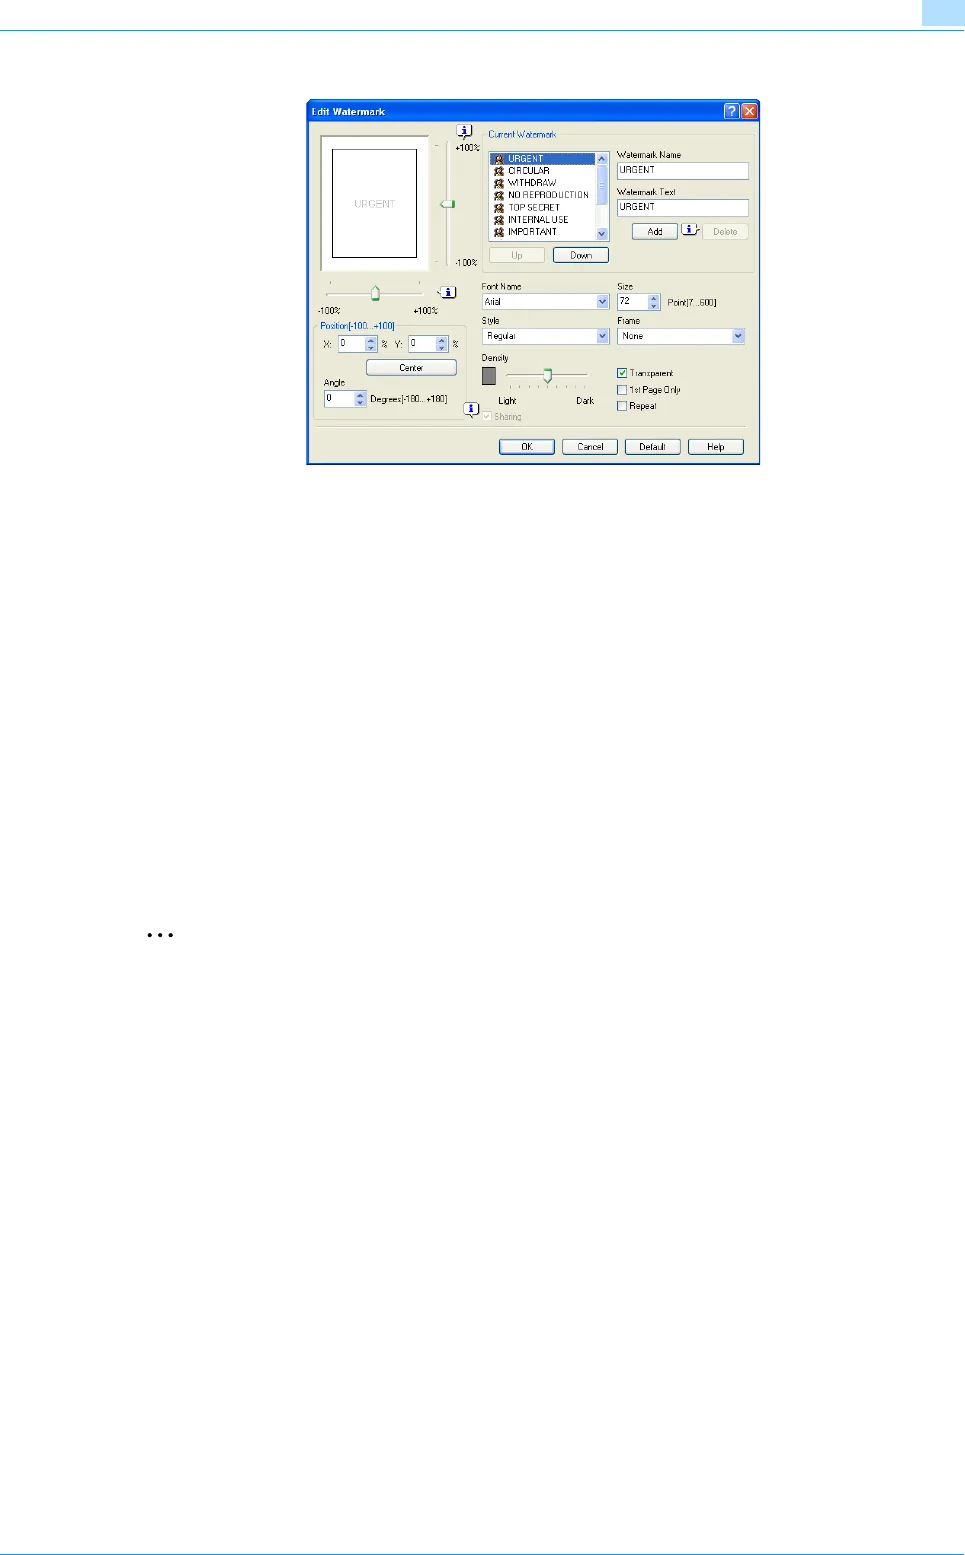
5 Specify settings for the following:
– Watermark Name: Enters the name of the watermark.
– Watermark Text: Enters the text that is to be printed as a watermark.
– [Add]: Click to create a new watermark.
– [Delete]: Click to delete the selected watermark.
– Position: Specifies the vertical and horizontal positions. The watermark position can also be
specified by using the horizontal and vertical sliders in the dialog box.
– Angle: Specifies the watermark print angle.
– Font Name: Specifies the font.
– Size: Specifies the size.
– Style: Specifies the font style.
– Frame: Specifies the frame style.
– Density: Specifies the density of the text.
– Sharing: Specifies whether to register the watermark as public or private.
– Transparent: Prints the watermark as a transparent image.
– 1st Page Only: Prints the watermark on the first page only.
– Repeat: Prints several watermarks on a single page.
6 Click the [OK] button.
2
Note
Up to 30 watermarks can be registered with the shared setting, and up to 20 watermarks can be
registered with the private setting.
Only the administrator can select a setting under "Sharing".


