15
Final Leveling
1. Check to make sure that adjacent drawers and
cupboards can be opened when the dishwasher
door is open. Reposition the dishwasher if
necessary.
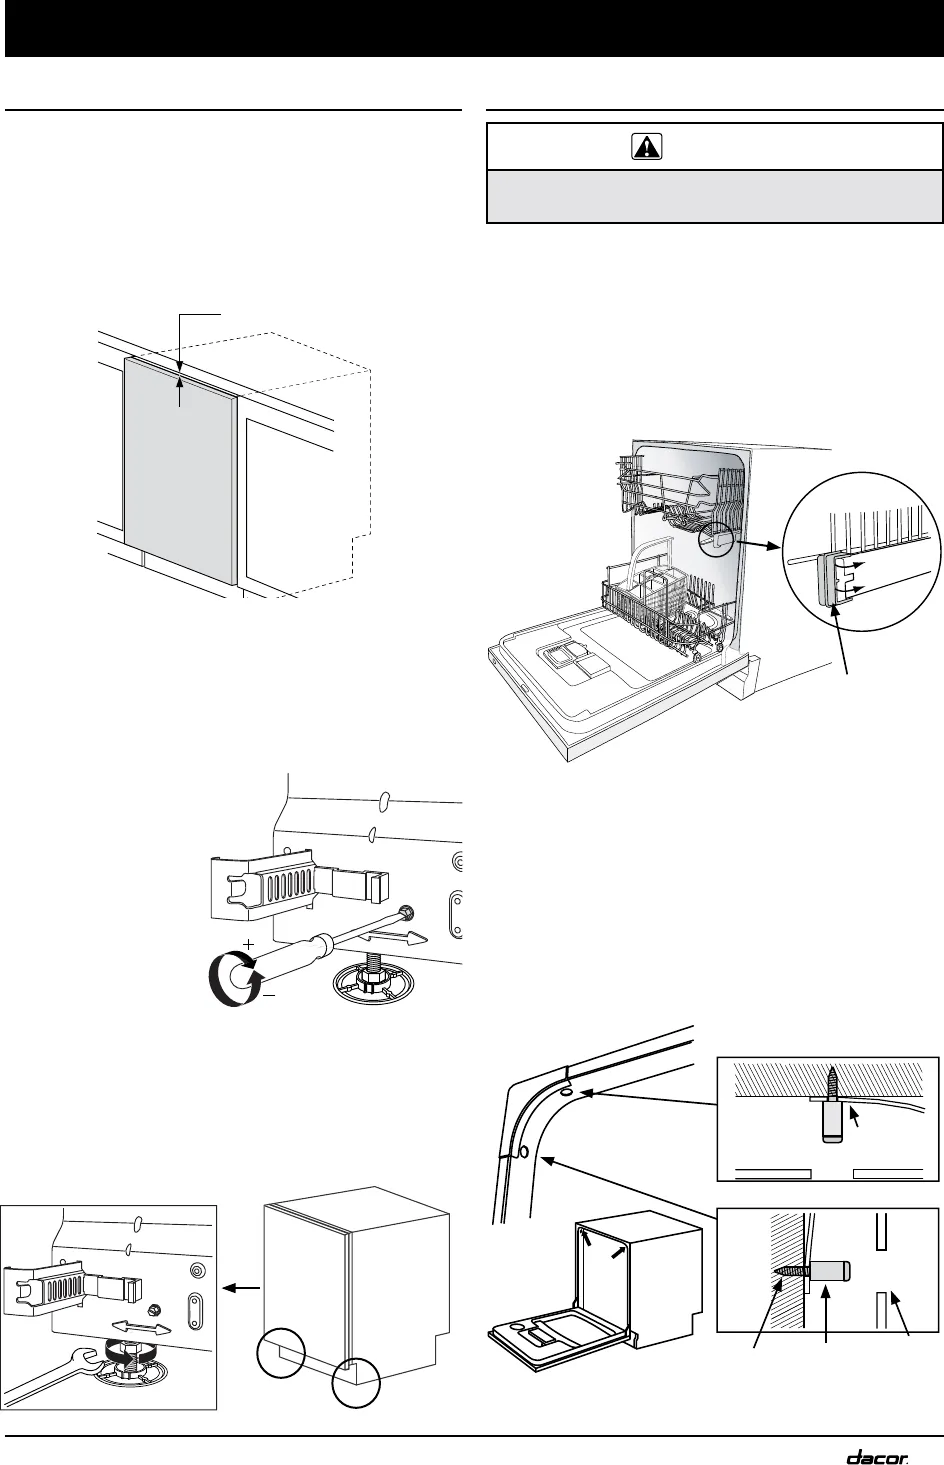
2. Check that there is a 1/8” (3.0 mm) space
between the top of the dishwasher door and the
underside of the cabinet.
3. If necessary adjust the front leveling legs until the
dishwasher is the correct height. Both front legs
must contact the floor solidly.
4. Check to make sure the unit is level side to side
and front to back. Readjust the leveling legs as
necessary while making sure all legs contact the
floor securely
and the 1/8”
space at top is
maintained. Use
a screwdriver to
adjust the rear
leg adjustment
screw. The
unit may have
an inclination
of 3/16” (5.0
mm) maximum
without affecting
performance.
5. Once level, hand tighten the front leg retaining
nuts. Tighten them into place using a crescent
wrench.
Installation Instructions
Attaching the Anti-tip Brackets
CAUTION
Make sure to anchor one anti-tip bracket on each
side of the dishwasher.
1. The anti-tip brackets protect against possible
tipping caused by heavy bottom rack loads on
the door. Use only the stainless steel screws
provided with the machine.
2. Open the door and remove the top rack. Pull the
rack out. Turn both rack stops outwards on the
rack mounting rails (see diagram). Pull the rack
toward you to remove.
3. The anti-tip brackets may be secured either
through the top or the sides. Installations
with a hard material (like granite) may require
attachment through the sides.
4. When installing the screws, place the included
spacer over the screw. Insert the screws into the
holes in the anti-tip brackets through the access
holes in the top or sides of the door jamb as
shown below. Tighten the screws in place.
5. Replace the top rack.
Access
hole
Spacer
Screw
Anti-tip
bracket
Attachment methods
or
Rack
stop
1/8” (3.0 mm)
Rear Leg Height
Adjustment


