10
Installation Instructions
Custom Door Panel Installation (cont.):
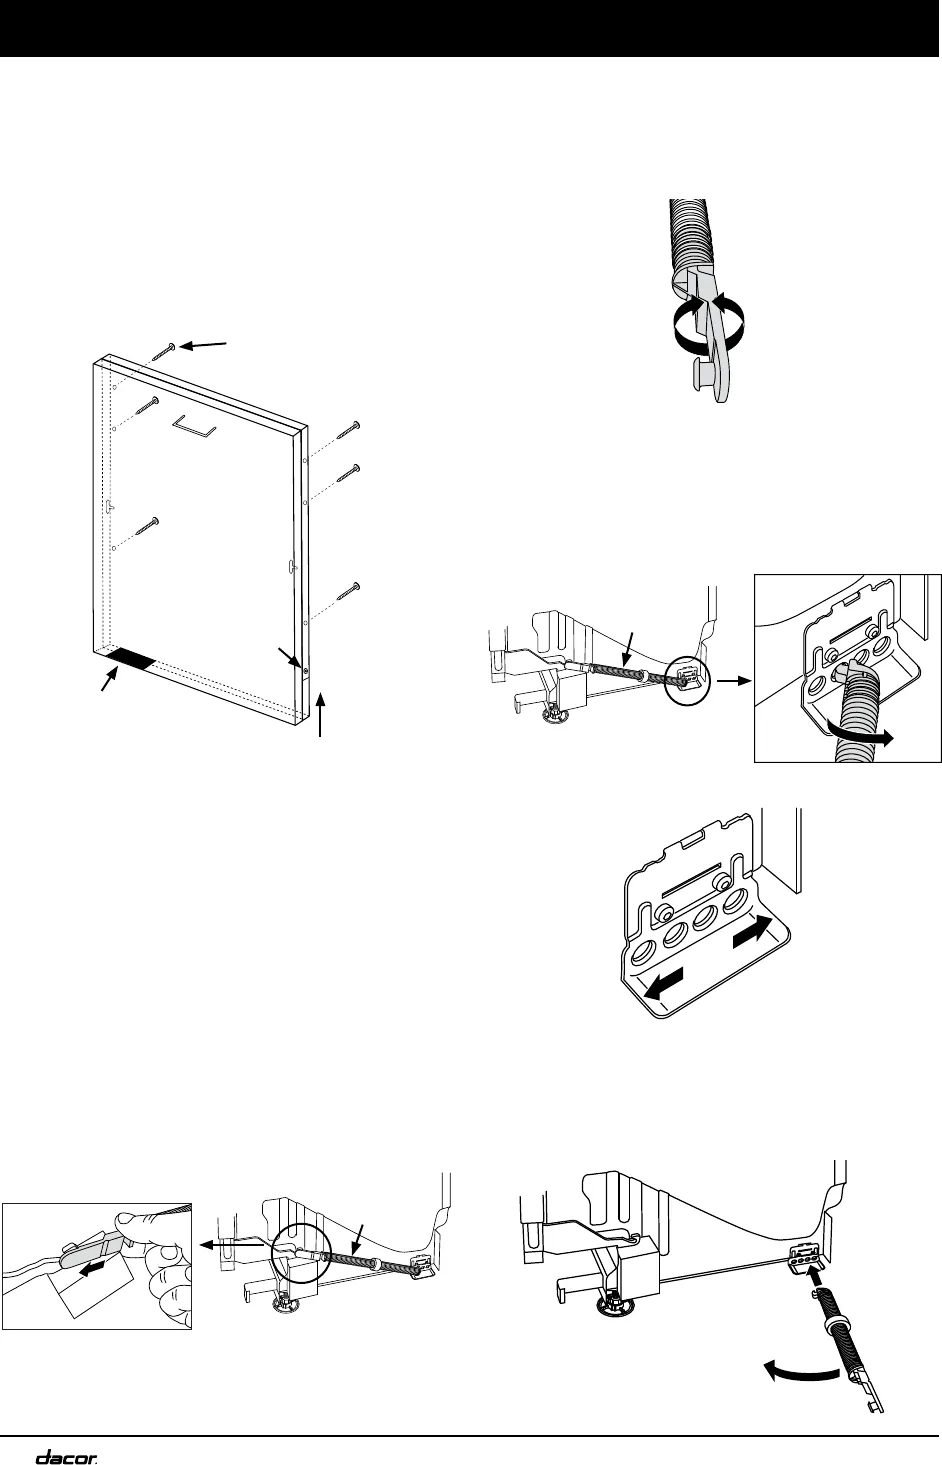
5. Open the door slightly and use the six (6)
supplied 1 3/4” screws to secure the panel to the
door through the back.
6. Slide the bottom of the door frame up until the
black trim around the exhaust vent just touches
the panel. To prevent damage to the dishwasher
or panel, make sure the exhaust vent is not
blocked. Tighten both screws.
Adjust the Door Springs
Before installation, open the door to check the
door springs. If the door tends to fall open or pull
shut quickly on its own, adjust the springs. If the
door opens and closes properly, skip to Level the
Dishwasher on page 11.
IMPORTANT: On model RDW24I, if the door panel
is between 15 and 23 lbs., the optional heavy duty
spring kit (PN 701385) is required.
The door springs are on the sides of the dishwasher.
If adjustment is necessary, try making small
adjustments on only one side first.
1. Be sure the door is closed.
2. Grab the front end of the spring and pull it up and
forward to release it from the forward mount.
3. To make small tension adjustments to the
spring, hold the back end of the spring with one
hand and turn the front part one or more times.
Turn it clockwise to increase spring tension,
counterclockwise to reduce tension.
4. To make larger tension adjustments to the door
springs, remove the back of the springs from the
dishwasher by turning them outwards.
Move them one hole farther back or forward, then
make small adjustments as outlined in step 3 as
necessary.
5. To reinstall the back end of the spring, hold it at
a right angle to the side of the dishwasher and
push the end into the hole, then turn the spring
in, toward the front of the dishwasher.
Side of dishwasher
Door
spring
Increase spring
tension
Decrease
spring tension
Increase spring
tension
Decrease
spring tension
Side of dishwasher
Door
spring
Step 6:
Slide door
frame up,
tighten
screws
Exhaust vent,
do not block
Screw
Step 5:
Attach custom panel with
1 3/4” screw through
back of door, 6 places


