Using the Base
Base LEDs
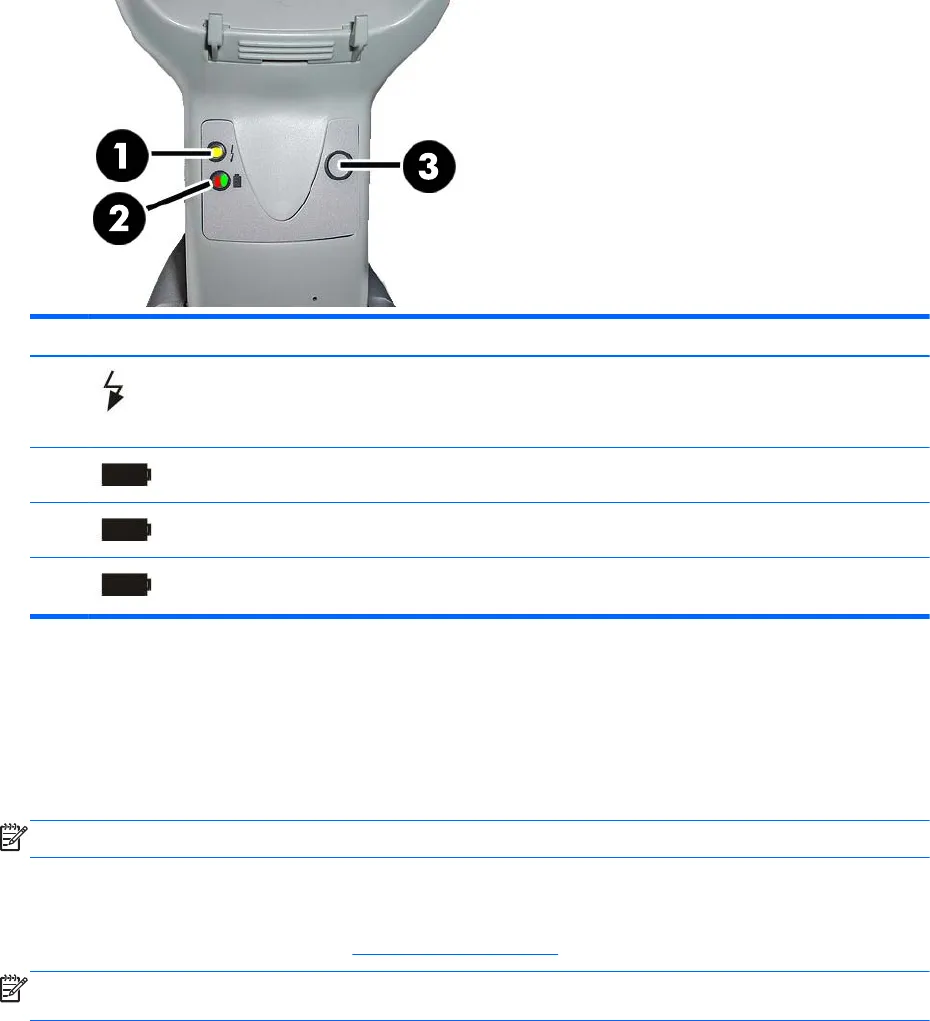
LEDs on the Base provide information about the Base as well as battery charging status, as shown
below.
Figure 4-7 Base LEDs
No. Icon LED STATUS
1
Power on / Data Yellow On = Base is powered.
Yellow Blinking = Base receives data and commands from the Host or
the Reader.
2
Charging Red On = the Battery is charging.
2
Charge completed Green On = the Battery is completely charged.
2
Charging + Charge
completed
Red and Green Blinking together = the Reader is not correctly placed
onto the Base.
The button (3) can be used to force device connection via the HP Scanner Configuration Software
tool, to force a Bluetooth disconnect, and for paging the scanner when it is activated. Refer to the HP
Wireless Barcode Scanner Programming Reference Guide (PRG) for a more detailed explanation.
Charging the Batteries
NOTE: Battery replacement should be done only by a trained technician.
To charge the battery, simply insert the scanner into the base. When the scanner is fully seated in the
cradle, it will sound a “chirp” to indicate that the cradle has detected the scanner connection.
The LEDs on the base (as shown in
Base LEDs on page 13) will indicate the status of the battery.
NOTE: Before using the Battery, read “Battery Safety” in the following section. HP recommends
annual replacement of rechargeable battery packs to ensure maximum performance.
Charging the Batteries 13


