Chapter 2 Installation
2.1 Hardware Setup
Follow the instructions below to complete the hardware setup.
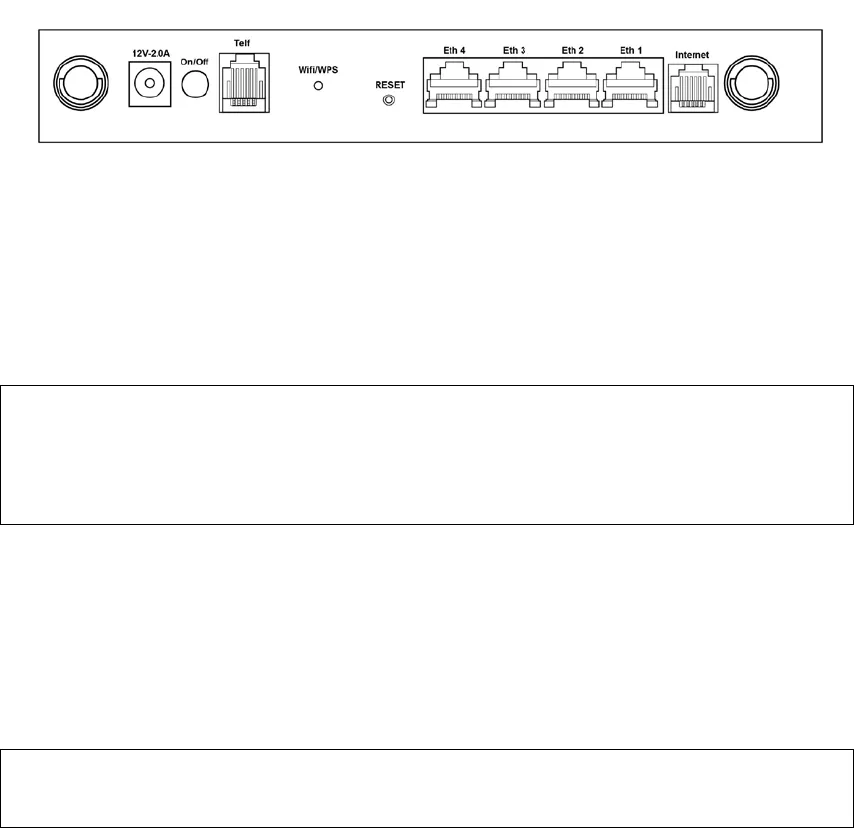
BACK PANEL
The figure below shows the back panel of the device.
Power ON
Press the power button to the OFF position (OUT). Connect the power adapter to the
power port. Attach the power adapter to a wall outlet or other AC source. Press the
power button to the ON position (IN). If the Power LED displays as expected then
the device is ready for setup (see section 2.2 LED Indicators
).
Caution 1: If the device fails to power up, or it malfunctions, first verify that the
power cords are connected securely. Then power it on again. If the
problem persists, contact technical support.
Caution 2: Before servicing or disassembling this equipment, disconnect all power
cords and telephone lines from their outlets.
Telf
For VoIP service, connect telephone(s) to these ports with RJ11 cable.
Reset Button
Restore the default parameters of the device by pressing the Reset button during 5
seconds. The device will reboot. After the device has rebooted successfully, the front
panel should display as expected (see section 2.2 LED Indicators
).
NOTE: If pressed down for more than 20 seconds, the VG-8050 will go into a
firmware update state (CFE boot mode). The firmware can then be
updated using an Internet browser pointed to the default IP address.
LAN PORTS
Use 1000-BASE-T RJ-45 cables to connect up to four network devices to a Gigabit
LAN, or 10/100BASE-T RJ-45 cables for slower networks. As these ports are
auto-sensing MDI/X, either straight-through or crossover cable can be used.
Internet
This port has the same features as the LAN ports described above with additional
Ethernet WAN functionality.


