3
English
•Remove the plug from the household outlet when storing the
shaver.
•Do not bend the power cord or wrap it around the AC adaptor.
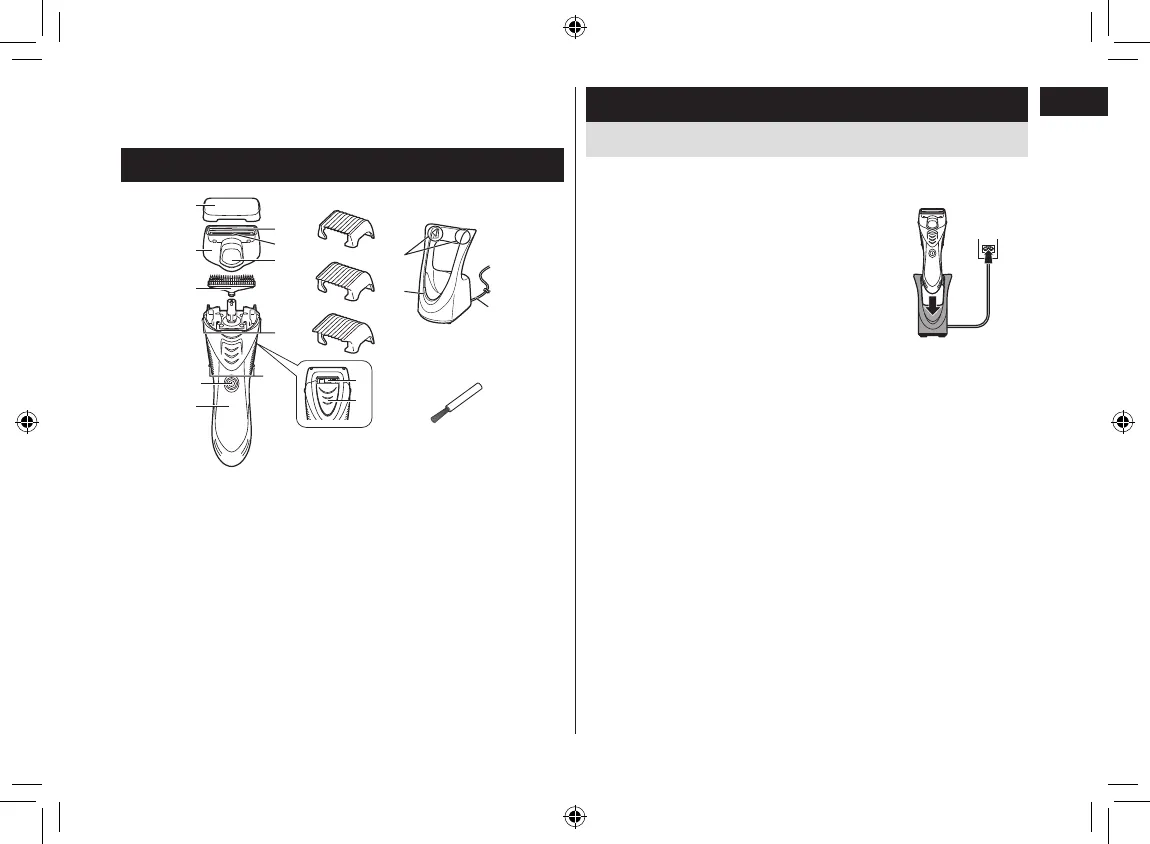
Parts identification
A Protective cap
B Foil frame
1 Outer foil
2 Pop‑up trimmer
3 Pop‑up trimmer switch
C Inner blade
D Main body
4 Foil frame release buttons
5 Side terminals
6 Power switch
7 Water outlet
8 Cleaning shutter
E 3 mm comb attachment
F 6 mm comb attachment
G 9 mm comb attachment
H AC adaptor (RE7‑69)
(RE7‑74 for the United
Kingdom)
9 Charging terminals
: Charge indicator lamp
; Power cord
I Cleaning brush
Charge
Charging the shaver
Perform the following steps to charge the shaver if it seems to lose
the speed.
1
1
Turn off the shaver and insert
it in the AC adaptor until it
clicks as illustrated.
•The shaver will not charge unless the side
terminals are in contact with the charging
terminals.
•Wipe off any water droplets on the side
terminals.
•If you charge the shaver with power switch
turned on, it will start working when you
remove from the AC adaptor.
2
1
2
2
Put the plug into a household outlet.
The charge indicator lamp glows red.
•Charging time differs depending on the rated voltage. (See
page 8.)
•When charging the shaver for the first time or when it has not
been in use for more than 6 months, the charge indicator lamp
may not glow for a few minutes, or the operating time may
shorten. Please charge it for more than 20 hours in such cases.
3
3
Disconnect the plug after charging is
completed.
•To keep charging the battery will not affect battery performance.
•Recommended ambient temperature for charging is 0 ‑ 35 °C.
The battery may not charge properly or not at all under extreme
low or high temperatures.
ER-GK40_EU.indb 3 2012/06/13 17:18:20


