4
INSTALLATION
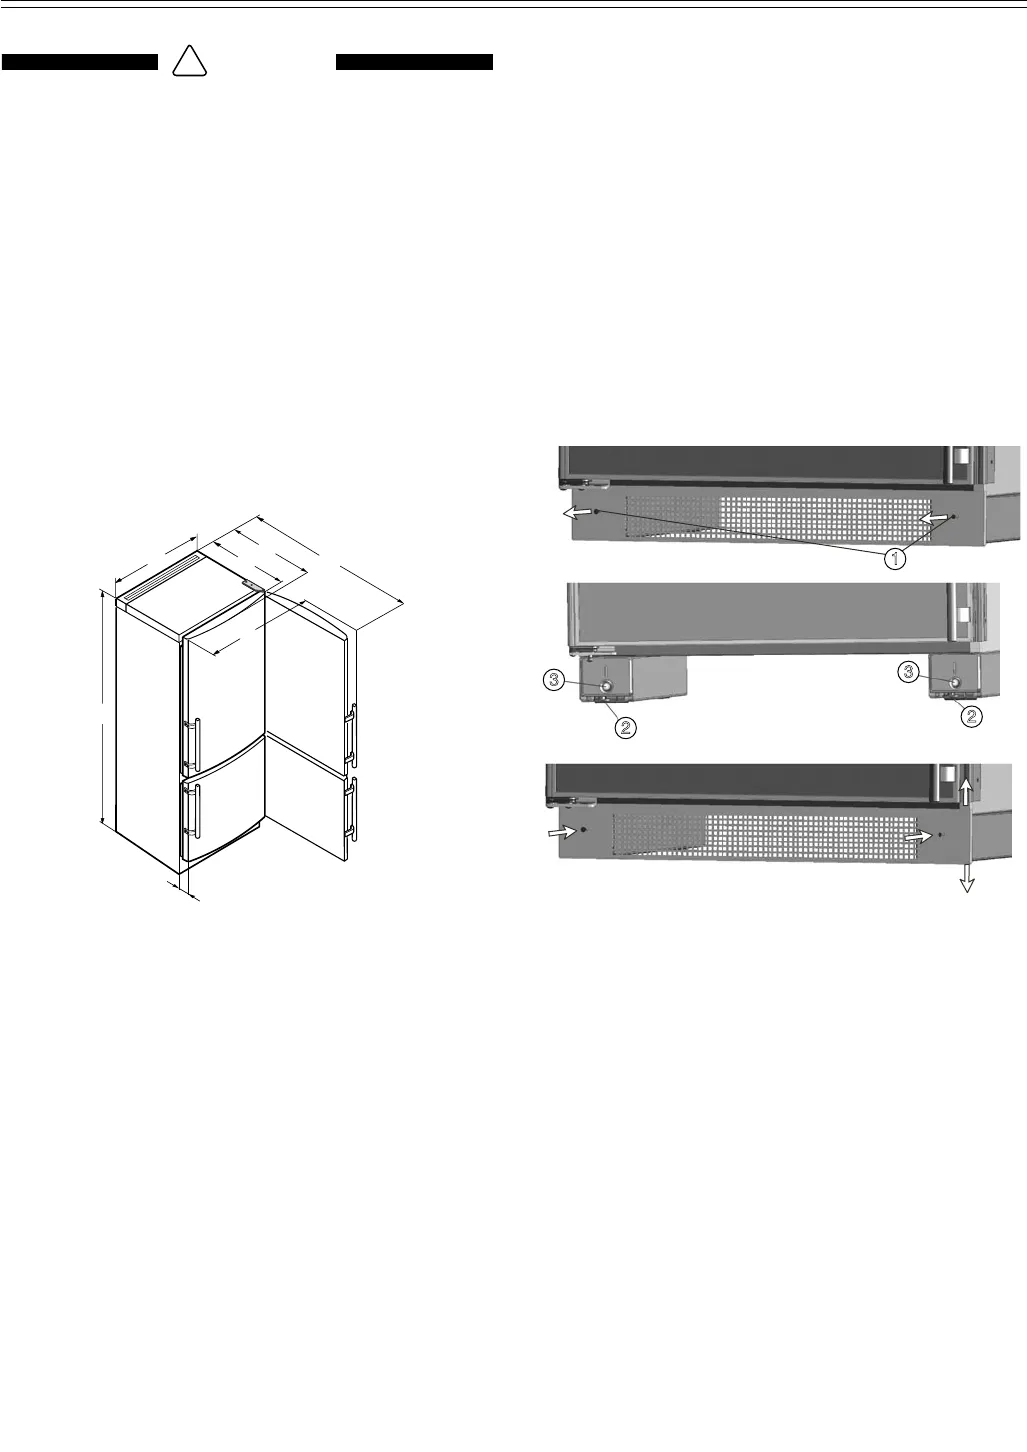
Leveling the Refrigerator - Figure 2
1. Loosen the lower air vent screws (Fig. 2, 1)
.
The height can be adjusted in front by twisting
the leveling wheels (Fig. 2, 2)
.
2. Twist the adjusting bolt (Fig. 2, 3) to set up the
back of the refrigerator.
3. Rotate leveling until firmly in place against the
floor.
4. Align refrigerator with sides of kitchen cabinets
by adjusting leveling wheels and the supports.
5. Install the air vent.
Figure 2
To protect the refrigerator from possible
damage, allow the appliance to stand 1/2 to
1 hour in place before turning the electricity
on. This allows the refrigerant and system
lubrication to reach equilibrium.
Dimensions
The external dimensions for the CS 16 appliance
can be seen in Figure 1.
IMPORTANT
If you are replacing the factory air vent with
an overlay, DO NOT restrict the air flow. The
air flow must be the same or greater than the
factory air vent of 31 square inches (200 cm
2
).
A. 2-1/4" (57.5 mm)
B. 81-11/32" (2066 mm)
C. 29-1/2" (750 mm)
D. 31-3/8" (797 mm)
E. 23-1/4" (590 mm)
F. 24-13/16" (630 mm)
G. 51-25/32" (1315 mm)
Figure 1


