8
2013-01 Supplemental sheet for IP C and IP S V 1.1 RevB – 09/2013
Fig. 3
5
Removing the red protective cap
• Unscrew the red protective cap all the way, remove
the information flag and place the red protective cap
in the recess provided on the ink cartridge (6, Fig. 8).
• Upon completion, make sure that the red retaining
bracket is in the correct position (8, Fig. 8) and close
the door on the printer.
Inserting the new ink cartridge (continued)
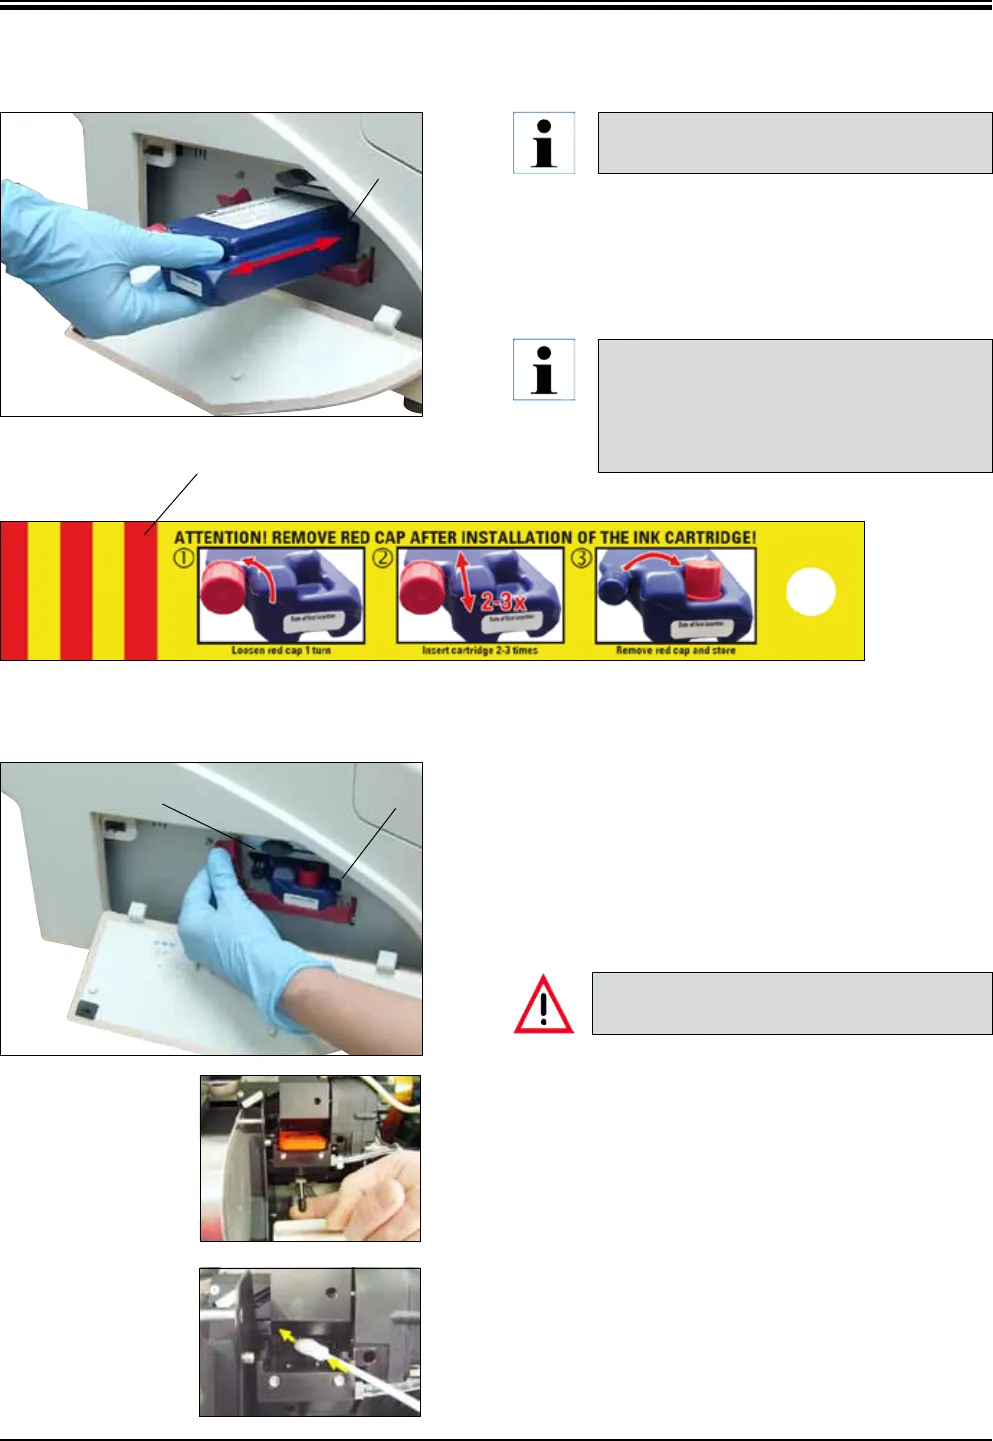
Puncturing the cartridge seal requires that
some force be applied. Withdraw the ink car-
tridge about 30 mm from the slot and push it
back in as far as it will go; repeat this step two
or three times (5, Fig. 3).
Follow the information on the flag attached to
the ink cartridge (see Fig. below).
• Open the red protective cap (4, Fig. 2) one turn coun-
terclockwise.
• Then fully insert the ink cartridge into the slot.
Informational flag
Fig. 8
68
Supplemental sheet for instructions for use for IP C and IP S V1.9 RevD - 05/2013
• For the procedure, see Instructions for Use Chap. 6.2
and Chap. 6.2.
Fig. 9
Fig. 10
Removing the location plate
• For the procedure (Fig. 9), see Instructions for Use,
Chap. 6.2.
Manually cleaning the print head
• For the procedure (Fig. 10), see Instructions for Use,
Chap. 6.2.
Inserting the location plate
Never press the CLEAN button while a new or
used ink cartridge is in the instrument!


