Back to Contents Page
Replacing a PCI Express Card
DellStudioXPS™435MTServiceManual
Removing a PCI Express Card
Installing a PCI Express Card
Replacing the Card Retention Bracket
Configuring Your Computer After Removing or Installing a PCI Express Card
Removing a PCI Express Card
1. Uninstall the PCI Express card's driver and software from the operating system. For more information, see the Setup Guide.
2. Follow the procedures in Before You Begin.
3. Remove the computer cover (see Replacing the Computer Cover).
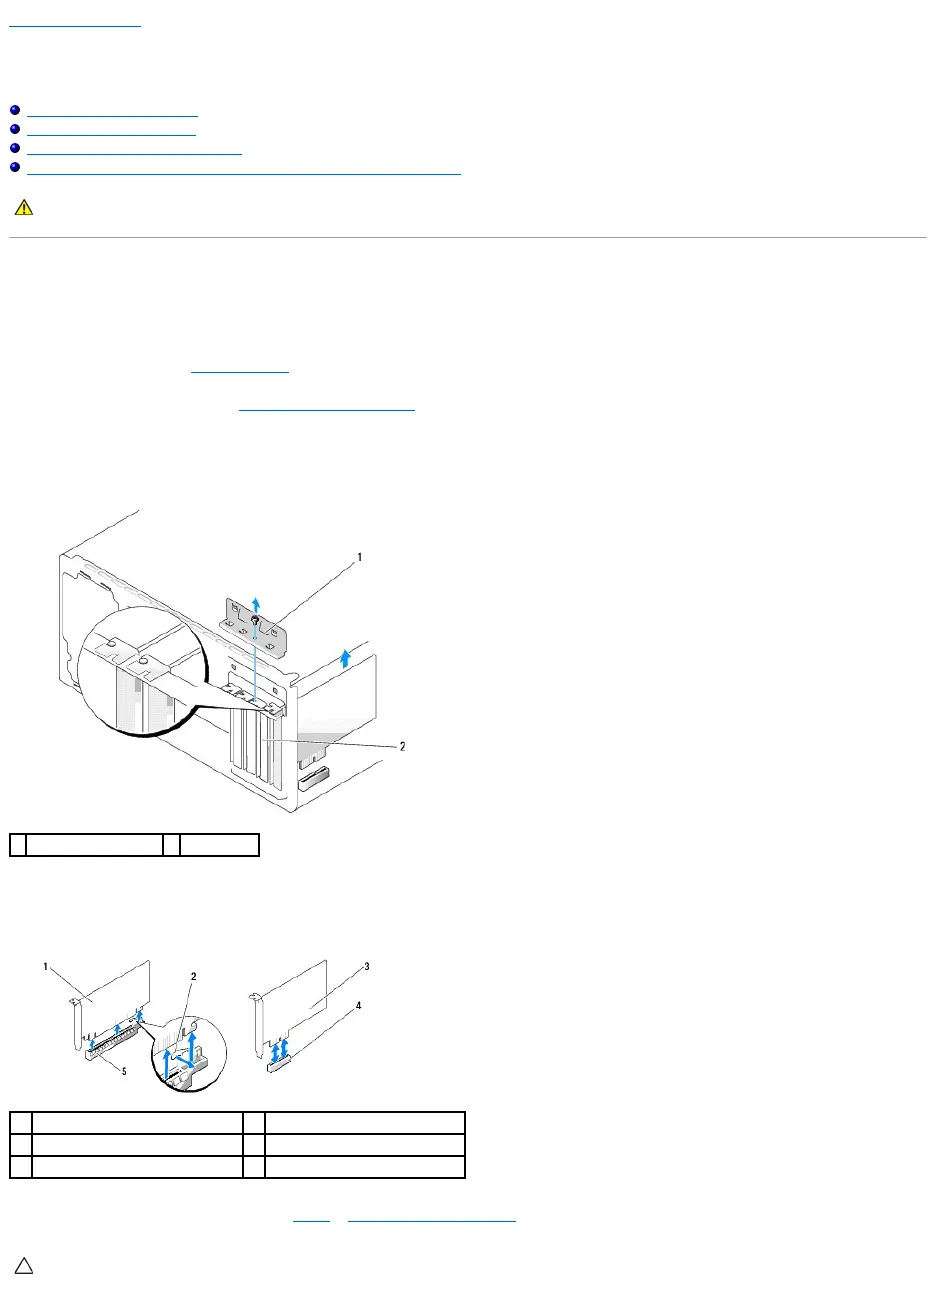
4. Remove the screw that secures the card retention bracket.
5. Lift the card retention bracket and set it aside in a secure place.
6. If applicable, disconnect any cables connected to the card.
7. Press the securing tab, grasp the card by its top corners, and then ease it out of its connector.
8. If you are replacing an existing card, go to step 6 of Installing a PCI Express Card.
WARNING: Before working inside your computer, read the safety information that shipped with your computer. For additional safety best
practices information, see the Regulatory Compliance Homepage at www.dell.com/regulatory_compliance.
CAUTION: Installing filler brackets over empty card-slot openings is necessary to maintain FCC certification of the computer. The brackets also
keep dust and dirt out of your computer.