7. Remove the memory modules (see Removing Memory Modules).
8. Remove the heat sink(s) and processor(s) (see Removing a Processor).
9. Disconnect the control-panel cable from the system board.
10. Disconnect the four fan connectors from the system board.
11. Disconnect the front USB cable connector from the system board.
12. Disconnect the SATA_0, SATA_1, and SATA_2 data-cable connectors from the system board.
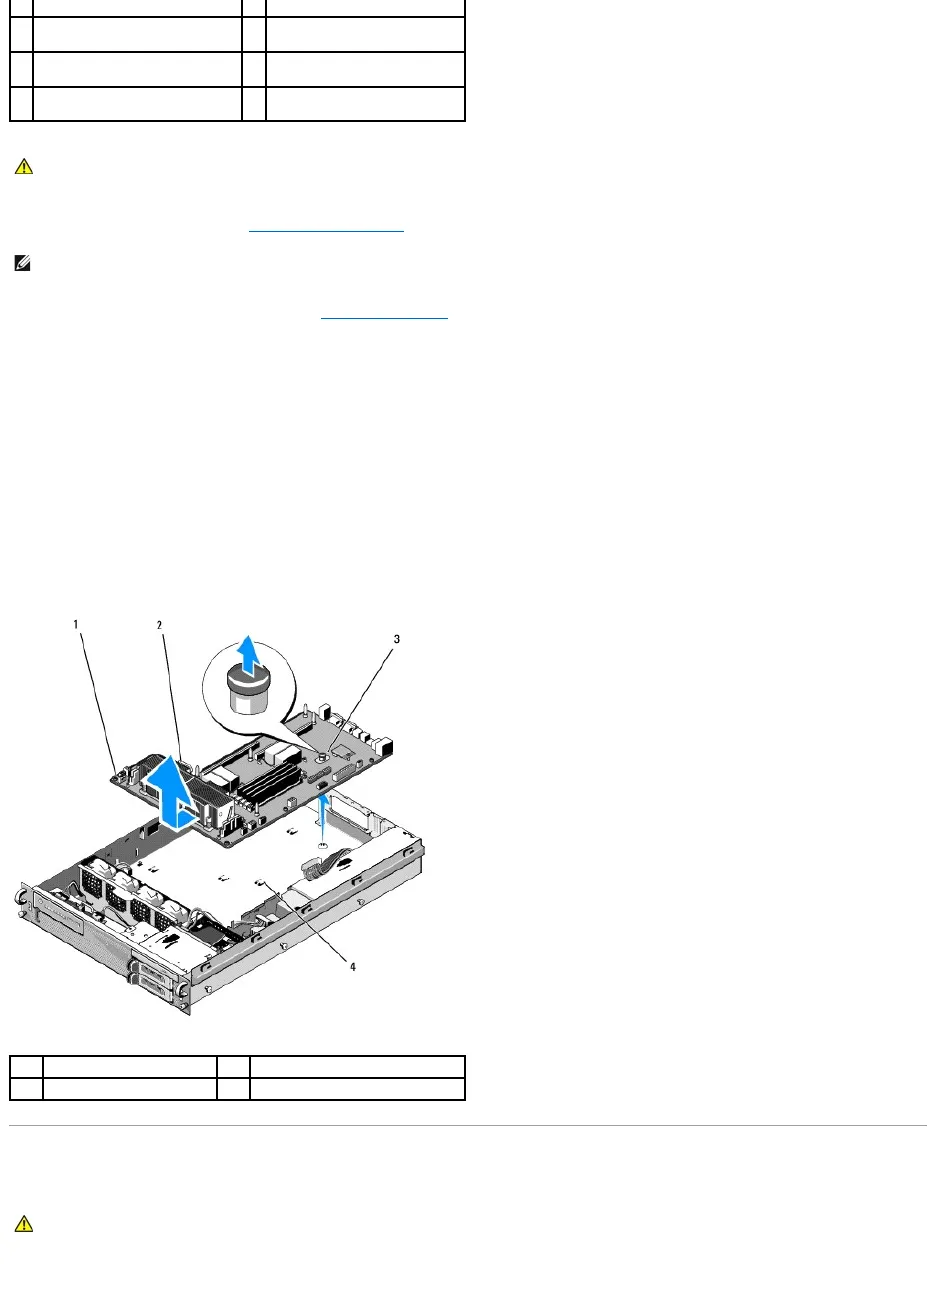
13. Remove the system board:
a. Pull up on the system-board tray release knob.
b. While pulling up on the release knob, use the metal tab/handle to slide the system-board tray toward the front of the chassis.
c. Lift the system-board tray at a 45-degree angle as you slide the system- board tray away from the power-supply bay, and remove it from the
chassis.
Installing the System Board
CAUTION: The DIMMs are hot to the touch for some time after the computer has been powered down. Allow time for the DIMMs to cool before
handling them. Handle the DIMMs by the card edges and avoid touching the DIMM components.
CAUTION: Only trained service technicians are authorized to remove the computer cover and access any of the components inside the computer.
Before working inside the computer, read the safety information that shipped with the computer. For additional safety best practices information,
see the Regulatory Compliance Homepage at www.dell.com/regulatory_compliance.