Back to Contents Page
Optical Drive
DellPrecision™R5400ServiceManual
Removing the Optical Drive
Installing the Optical Drive
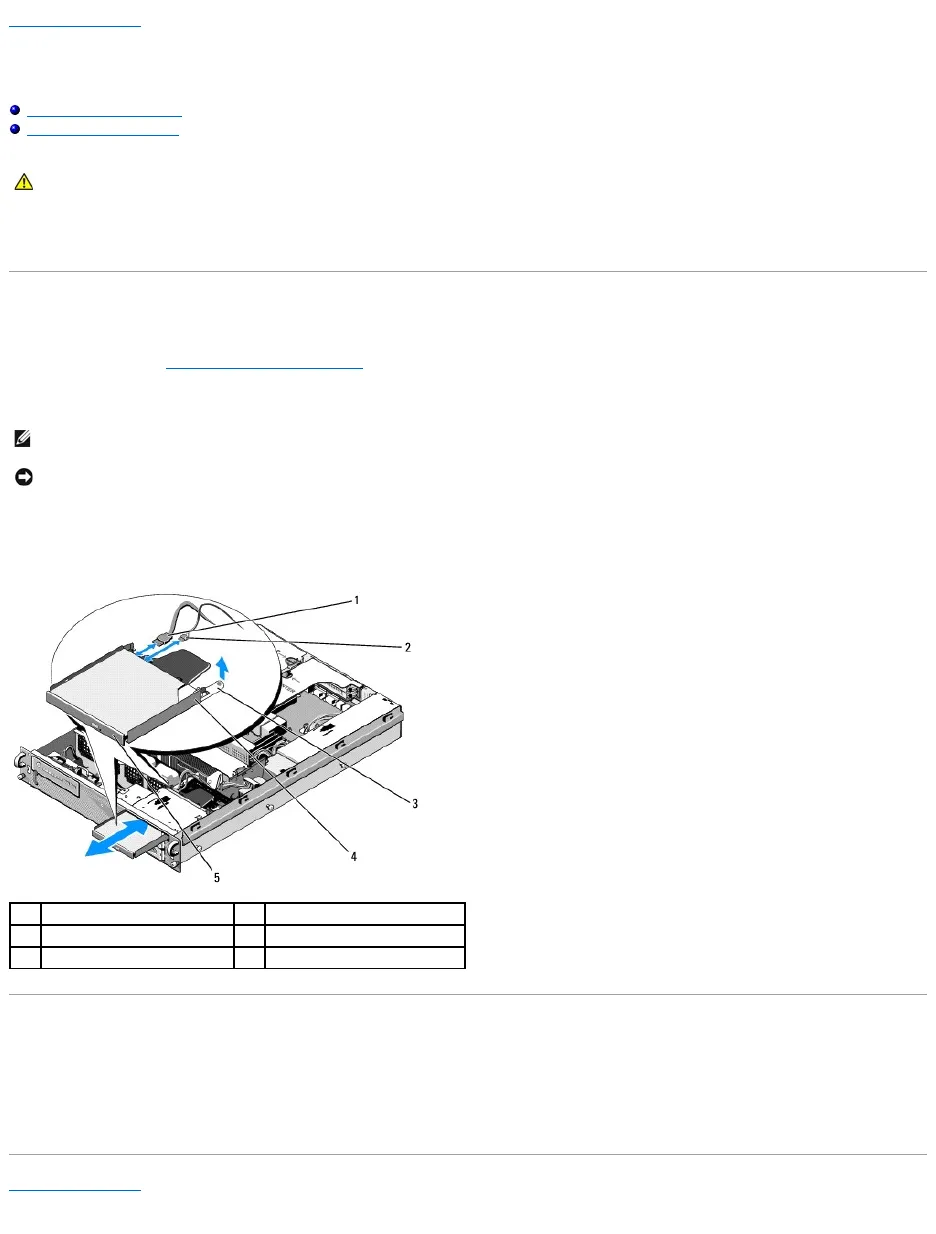
An optical drive is mounted on a tray that slides into the front panel and connects to the system board through a SATA data cable and power cable assembly.
Removing the Optical Drive
1. Perform the steps in Before Working on Your Computer.
2. Disconnect the optical-drive SATA data cable.
3. Disconnect the power cable from the back of the drive.
4. Lift the blue tray-release tab and slide the drive tray out through the front of the computer.
Installing the Optical Drive
1. Slide the drive tray into the optical drive bay, from the front of the computer, until the tray snaps into place.
2. Connect the optical-drive SATA data cable and the power cable to the connectors on the back of the drive.
Back to Contents Page
CAUTION: Only trained service technicians are authorized to remove the computer cover and access any of the components inside the computer.
Before working inside the computer, read the safety information that shipped with the computer. For additional safety best practices information,
see the Regulatory Compliance Homepage at www.dell.com/regulatory_compliance.