2. Remove the AGP card brace according to the instructions in "Removing and Replacing the AGP Card Brace."
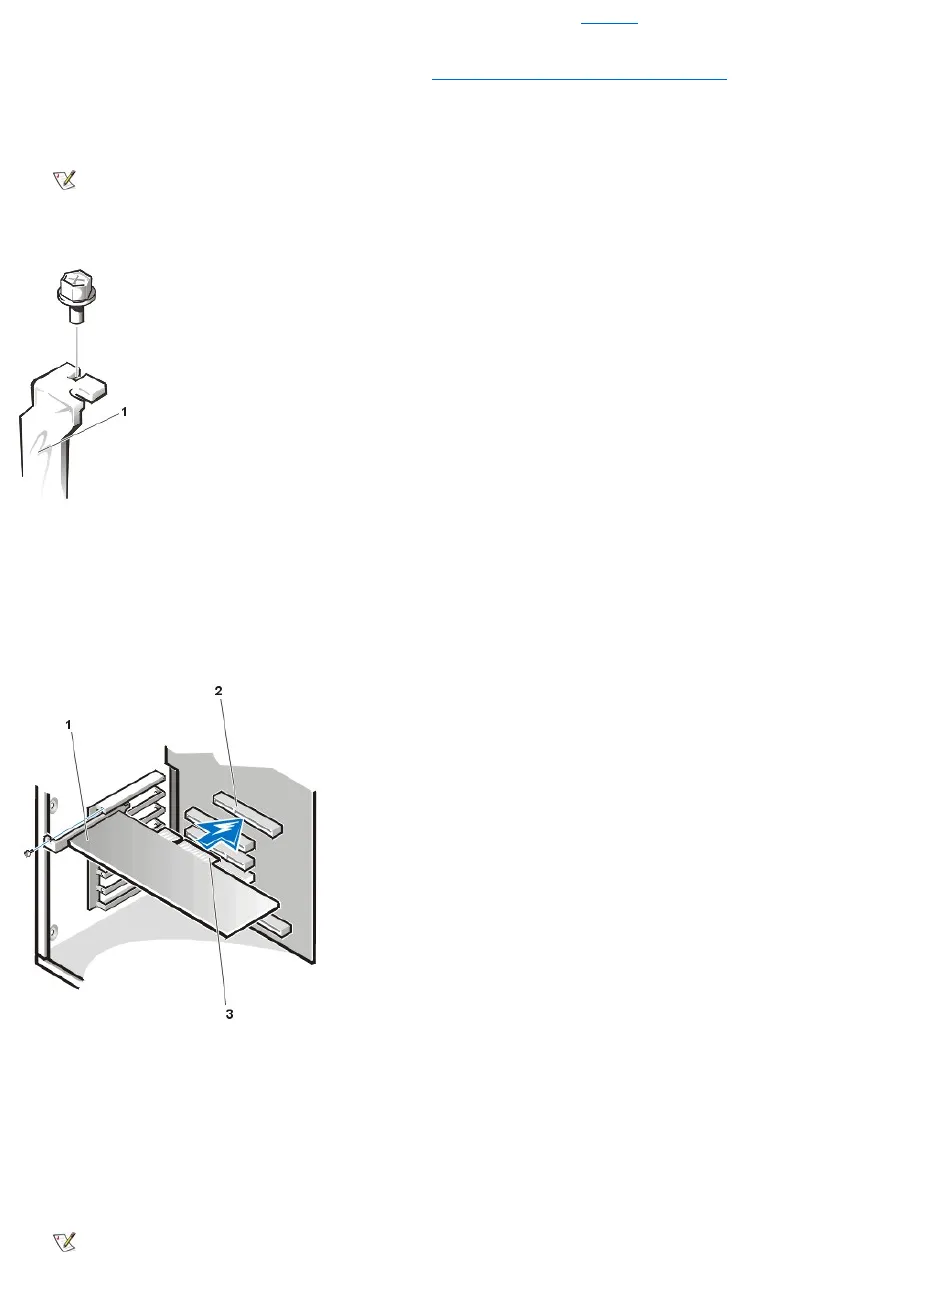
3. Unscrew and remove the metal filler bracket that covers the card-slot opening for the expansion slot you intend to use (see Figure 3).
Save the screw to use when you install the expansion card later in this procedure.
Figure 3. Removing the Filler Bracket
4. Insert the expansion card into the expansion-card connector.
If the expansion card is full-length, insert the front end of the card into the corresponding card guide on the inside front of the chassis as you
insert the card into its connector.
Insert the card-edge connector firmly into the expansion slot. Gently rock the card into the connector until it is fully seated (see Figure 4).
Figure 4. Installing an Expansion Card
5. When the card is firmly seated in the connector, secure the card's mounting bracket to the chassis with the screw that you removed in step 3.
6. Connect any cables that should be attached to the card.
See the documentation that came with the card for information about the card's cable connections.
7. Replace the AGP card brace.
8. Replace the computer cover, reconnect the network cable and phone line if present, reconnect your computer and peripherals to their
electrical outlets, and turn them on.
NOTE: If you install an AGP Pro (4X) Graphics adapter expansion card, you may need to remove up to three adjacent metal
filler brackets depending on the configuration of the expansion card.