Back to Contents Page
Drives
Dell™Dimension™2400Series
Adding a Floppy Drive
Adding or Replacing a CD or DVD Drive
Replacing a Hard Drive
Adding a Floppy Drive
1. Shut down the computer through the Start menu.
2. Ensure that your computer and attached devices are turned off. If your computer and attached devices did not automatically turn off when you shut
down your computer, turn them off now.
3. Disconnect any telephone or telecommunication lines from the computer.
4. Disconnect your computer and all attached devices from their electrical outlets, and then press the power button to ground the system board.
5. Remove the computer cover.
6. Release and remove the front panel.
7. Remove the front-panel insert.
8. Connect the floppy-drive power cable to the back of the drive.
9. Connect the data cable to the back of the drive and to the floppy drive connector on the system board.
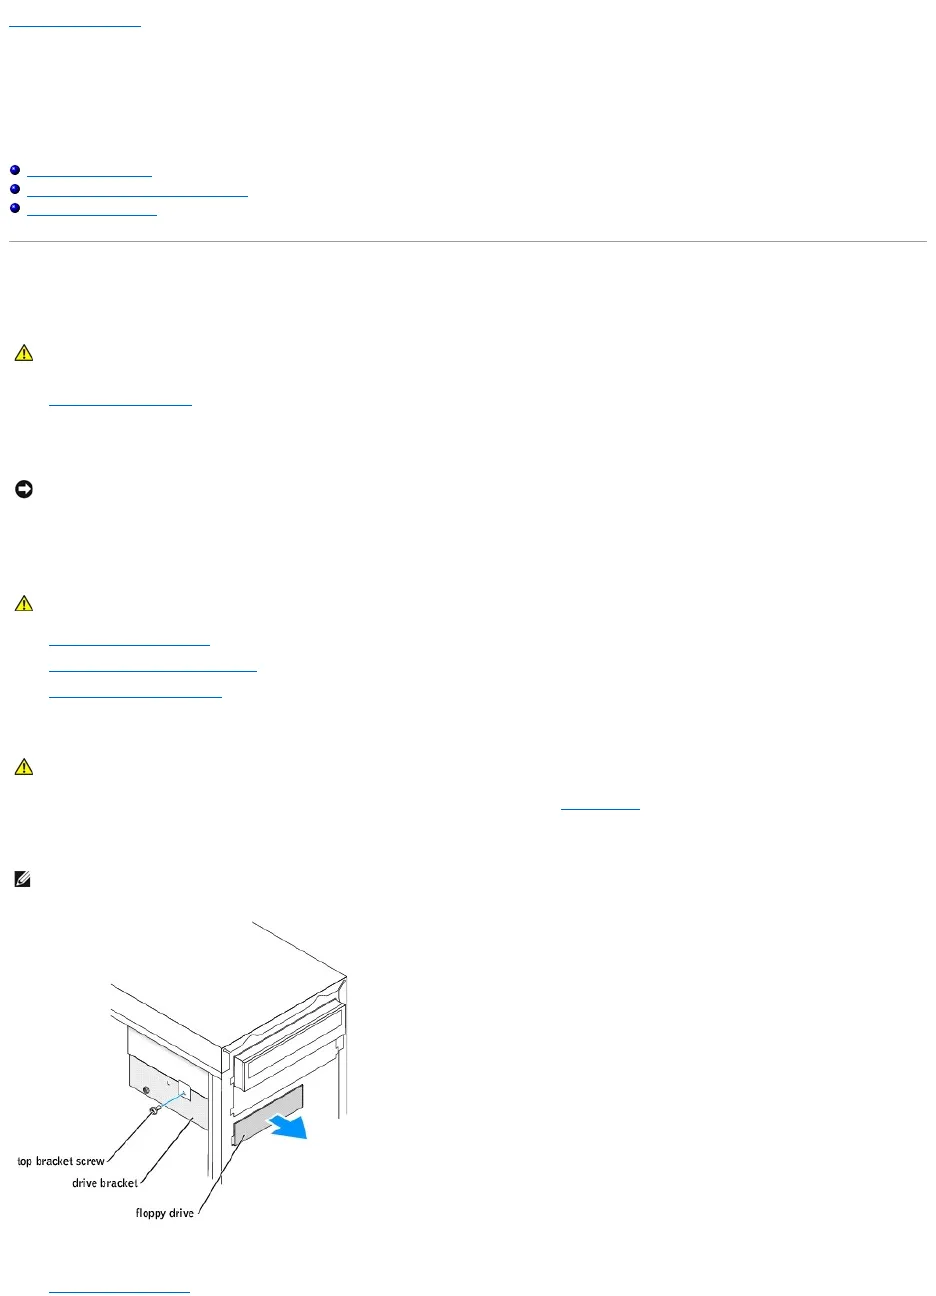
10. Position the top of the floppy drive bracket so that it is completely flush with the bottom of the lower drive bay, and then slide the floppy drive bracket
forward into place.
11. Secure the floppy drive bracket with the top bracket screw that came with your drive.
12. Reattach the front panel.
NOTE: The top of the floppy drive bracket has two slots that fit into two clips on the bottom of the upper drive bay. When the floppy drive bracket is
properly mounted, it remains in place without support.