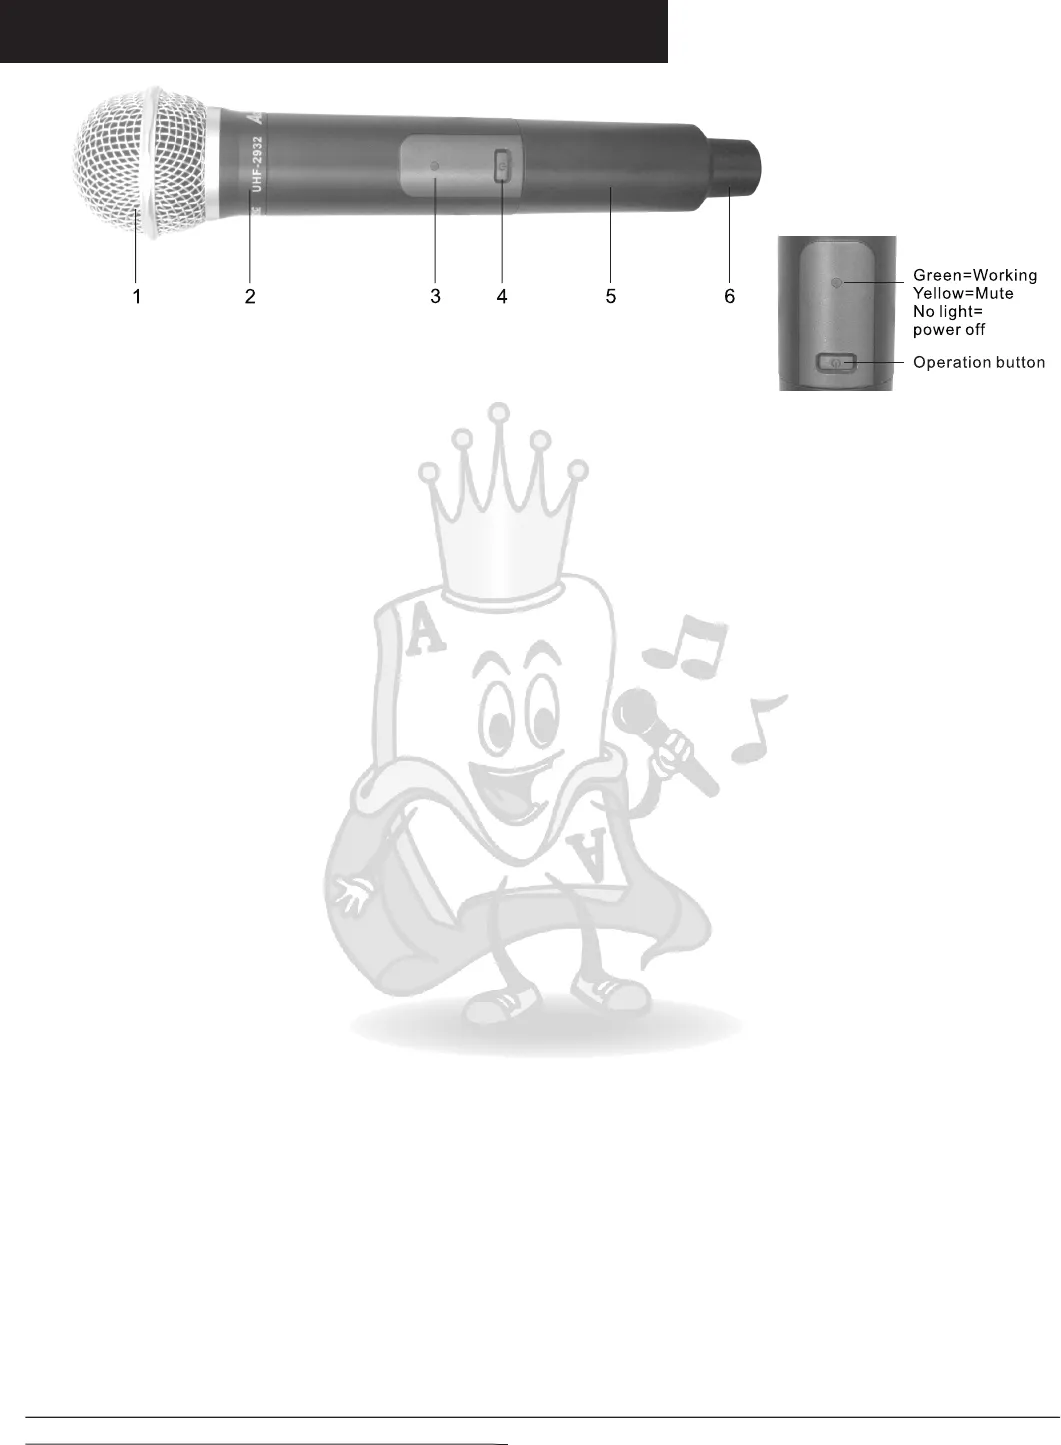
Microphone Descriptions
1)Cartridge module- This is where you would sing into.
2)Microphone body- The main frame of the microphone.
3)Operating indicator and
Hold the switch button for 1 second to turn on the power. Light will turns green means
microphone is now in working condition.
When it lights up green, then press switch button shortly, the light will turn yellow,
means microphone is in mute mode, no sound will comes out from microphone. to
go back to working mode, press the switch button shortly again, the light will turn
green.
When IR syncing, microphone needs to stay power on, but can be either
working or mute mode. After switching channel on the receiver and start IR syncing.
Then put the button part of the microphone to face the IR launcher on the receiver,
the distance need to be under 1 meter. Press the microphone switch button shortly
to confirm the IR syncing. If IR sync successes, the CH in the LCD screen will stop
flashing and you can see the RF signal bar on the LCD screen.
5)Battery cover
6)IR receiver & charging unit - This is the base of the microphone. The bottom part has
a IR receiving unit inside which receive the IR signal from receives to complete the
IR matching for microphone and receiver.
4)Switch button-
Microphone Operation & Channel switching:
1)Install batteries into microphone handheld.
2)Turn on microphone by pushing the switch towards, the indicator should turn green.
3)To mute the microphone, push the switch button shortly, the light will turns yellow.
4)To turn off the microphone, push the switch button for about 1~ 2 seconds then release
it, the indicator light will turns off.
5)If you are not going to use the microphone for a long period of time, turn off the
microphone and pull out the batteries to avoid deterioration and damage toward the
components.
6)When IR syncing, microphone needs to stay power on, but can be either working
or mute mode. After switching channel and start IR syncing on the receiver . Put the
button part of the microphone to face the IR launcher on the receiver, the distance
need to be under 1 meter. Press the microphone switch button shortly to confirm the
IR syncing. if IR syncing got confirmed, the channel information on the LCD of
receiver will stop flashing and you can see the RF signal bar on the LCD screen.
* For quick microphone channel matching process, please see the note on the top of
receiver, or see page 7 for more detail.
6
12
08X
R


