5
SETTING-UP YOUR NEW
SNOWTHROWER
TOOLS REQUIRED
12 mm wrench, 10 mm wrench, and a Phillips screwdriver
UNPACKING
1. Remove all the cardboard. Inspect the loose parts. Missing parts
can be obtained from the Honda dealer who sold you the
snowthrower.
2. Loosen and remove the curved-head bolt, flange nut, and starter
bracket from the lower handlebar. Do not discard the hardware.
ASSEMBLY
1. Install the handlebar
with the hardware
shown. Tighten the
flange nuts securely.
2. Pull the clutch cable
enough to insert the
“Z” fitting on the cable
through the auger
clutch lever as shown
here. Check the lever
free play as shown on
page 11.
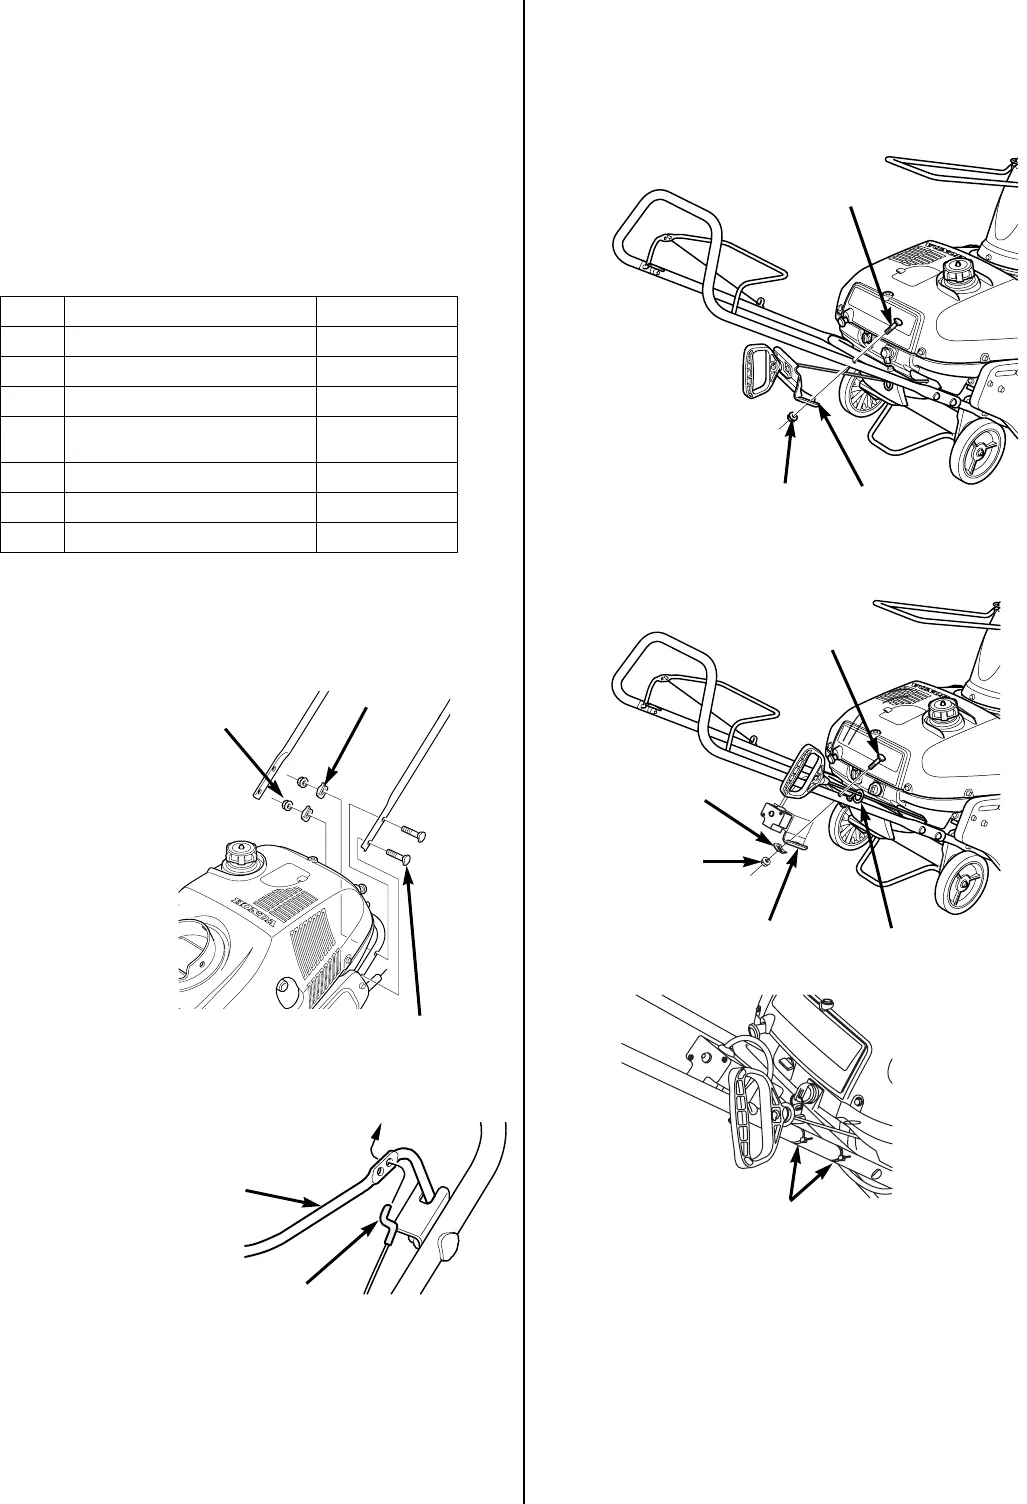
3. Install the starter bracket using the hardware removed from step 2
on the previous page. For the HS520AS, snap the starter rope into
the rope guide on the handlebar and secure the electric start wire
using the two cable ties as shown. Trim the cable ties to a length of
3/8 inch (10 mm).
Qty. Description Part number
4 Curved head bolt 8 x 40 mm 90109-VA4-000
4 Flange nut, 8 mm 94050-08000
4 Curved washer, 9 mm 90501-898-000
3 Phillips head shoulder screw 6 x
12 mm
90112-V10-000
3 Flange nut, 6 mm, Nylock 90303-V10-000
2 Cable tie (AS model only) 32901-VB5-A00
2 Key 35110-766-003
8 x 40 mm
CURVED HEAD
BOLT (4)
8 mm FLANGE
NUT (4)
9 mm CURVED
WASHER (4)
“Z” FITTING
AUGER
CLUTCH
LEVER
HS520A
FLANGE NUT
CURVED
HEAD BOLT
STARTER BRACKET
HS520AS
ELECTRIC
STARTER BRACKET
FLANGE
NUT
CURVED
HEAD BOLT
ROPE GUIDE
CABLE TIE (2)
9 mm
CURVED
WASHER


