ATTACHING THE ROUTER
TO THE TABLE
Attach the router to the router
table after you have assem
bled the table.
1. Place the router table
upright, vi/ith the front edge
closest to you.
2. Be sure that the table is
stable and that it rests on
all four legs.
3. Remove the sub-base
from the fixed-based
router supplied.
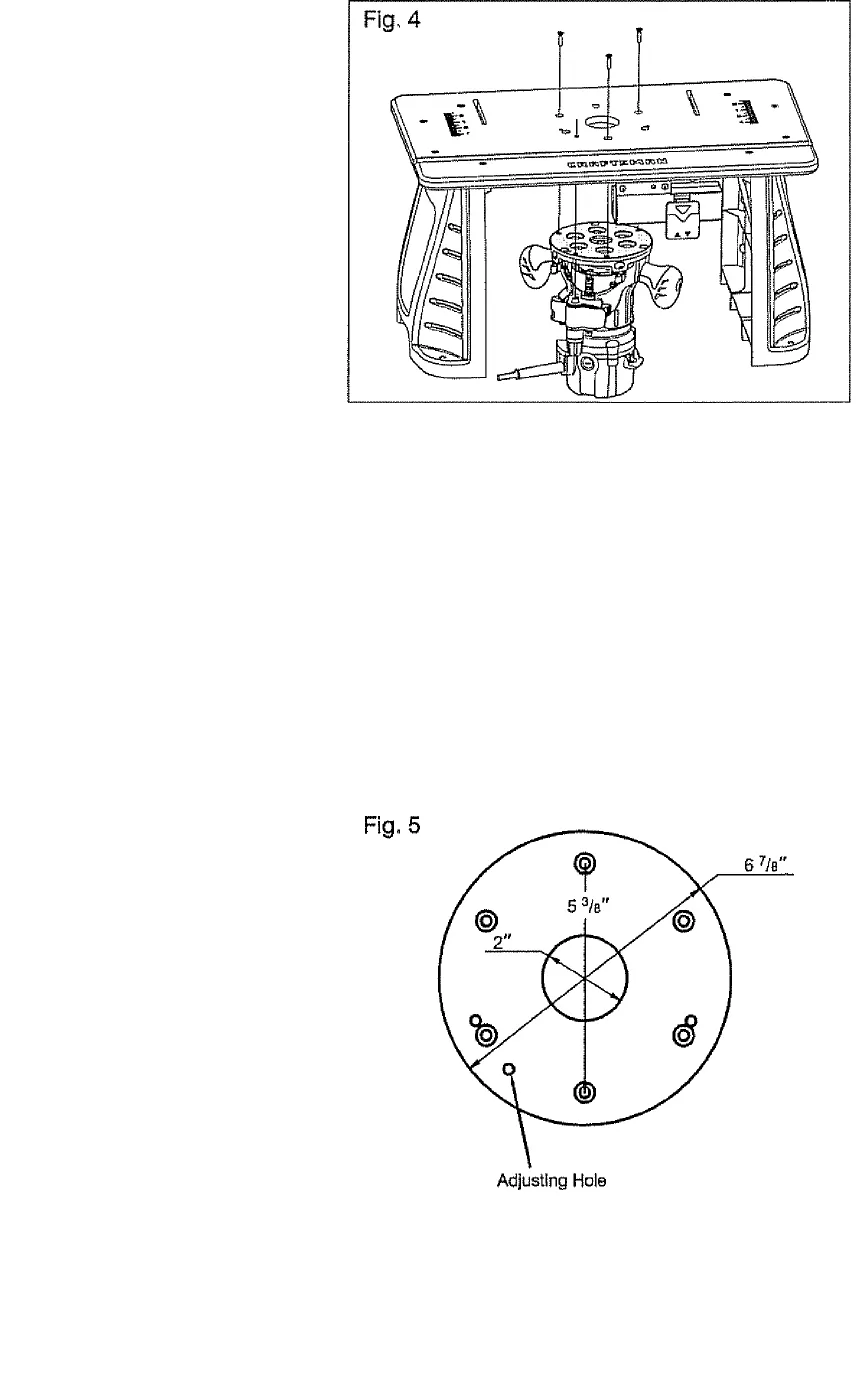
4. Hold the router upside down, and align the three holes in the center of the
table with the holes in the router, as shown in Fig. 4. Position the router so
that the screw holes used for attachment are not directly above either of the
router handles.
5. Insert a flat-head screw through each of the three router-table holes into the
router holes.
6. Hold the router with one hand, and securely tighten each flat-head screw (9)
with the other hand.
If you Install a different router (one not supplied to the table), ensure that the di
ameter of the router sub-base does not exceed 6-7/8 inches. Six mounting holes
for the router are distributed in
the center of the table; the dis
tance between two opposite
holes is 5-3/8". Select three
appropriate holes to mount the
router to the table. (Fig. 5)
The adjusting hole in the
table, shown in Fig. 5, is for
cutting height adjustment of
the router supplied (Model
No. 17541) or the following
Craftsman routers: 17542 and
17543.
28180 MariuaLRevlsed_07-0228
Page 15


