5
4
6
2
RUBBER
SCREW
COVER
7
SCREW
CONE GEAR
5B
1
5A
【】Figure 7
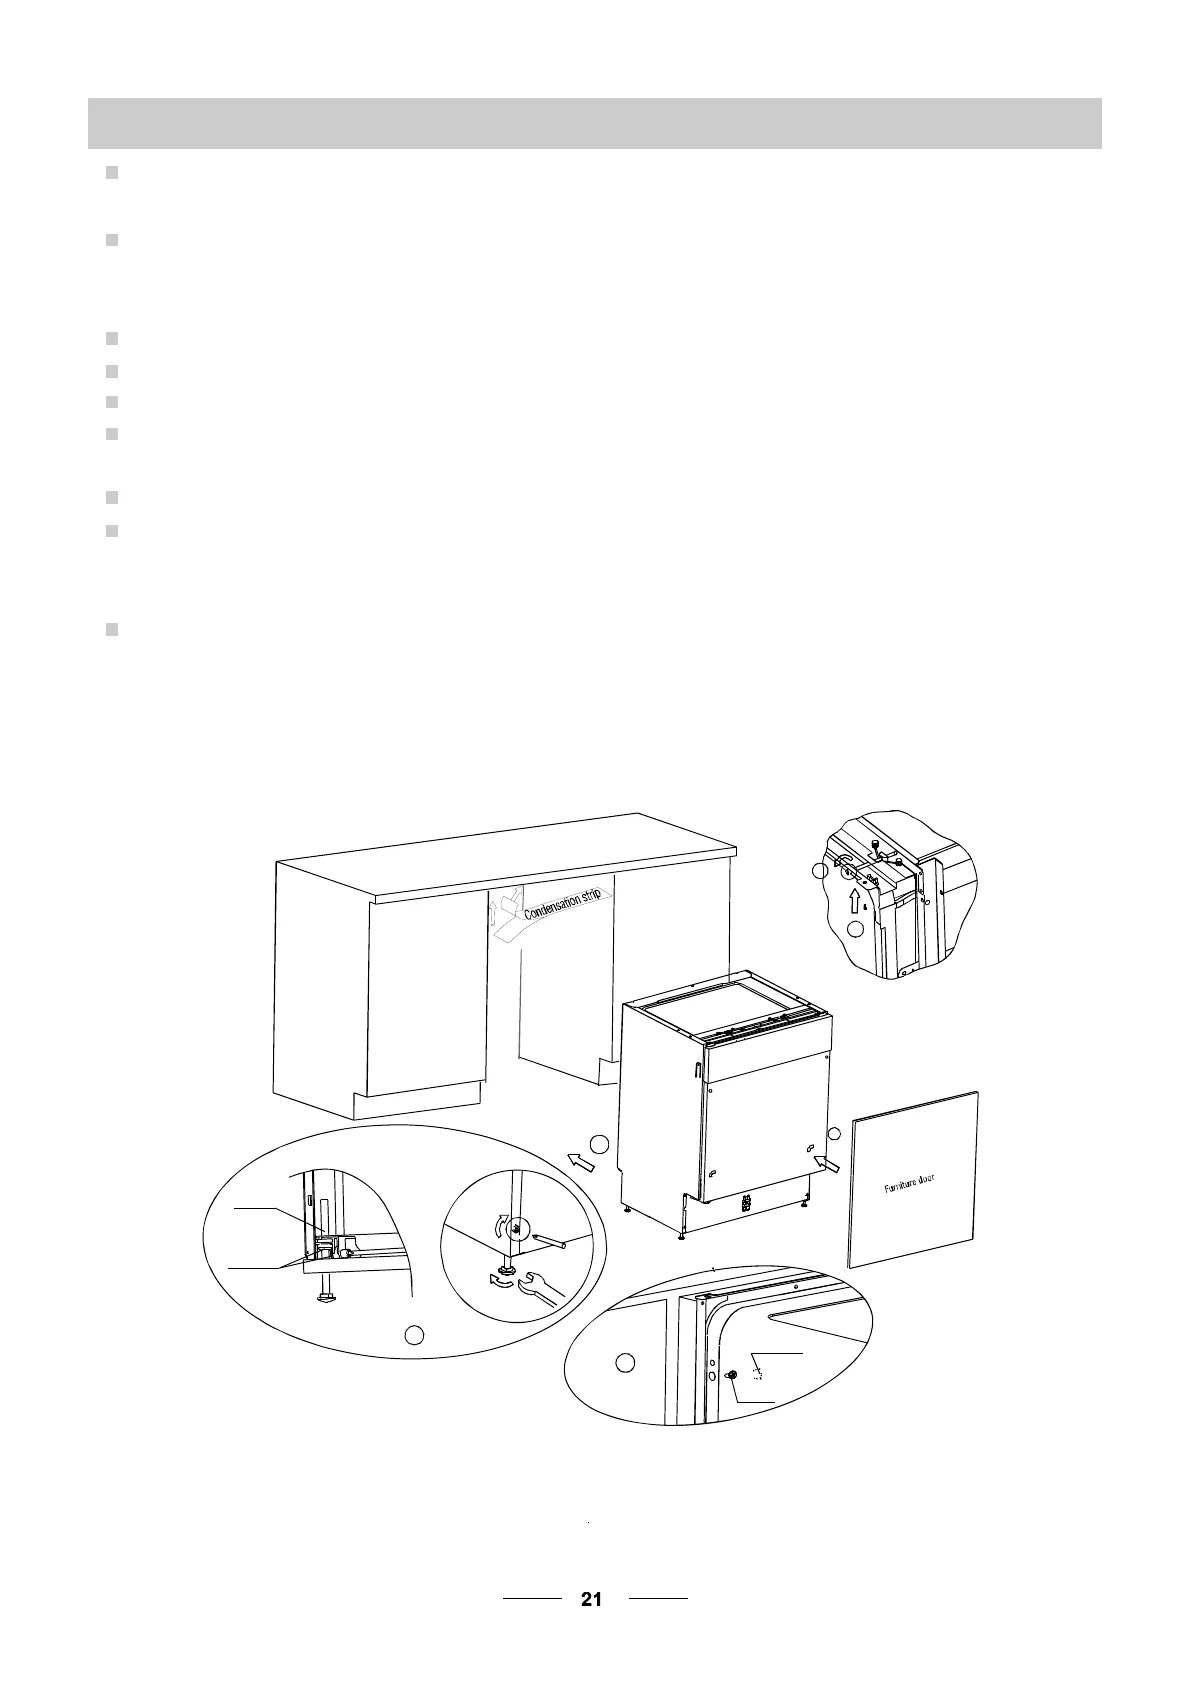
Dishwasher installation steps
●
1
2
.
3.
4.
5.
6
7
8
Install the furniture door to the outer d oor of the dishwasher using the brackets provided. Refer
to the template for positioning of the brackets.
Adjust the tension of the door springs by using an Allen key tu rning in a clockwise motion to
tighten the left and right door springs. Failure to do this could cause d amage to your dishwash er
(Illustration 2)
Connect th e inlet hose to the cold water supply
Connect the drain hose. Refer to diagram (Figure 6)
Connect the power cord
Affix the condensation strip under t he work sur fa ce of cabinet. P lease ensure the co ndensation
strip is flush w ith edge of work surface.
Place the dishwasher into position.
Level the dishwasher. The rear feet can be adjusted from the front of the dishwasher by turning
the screws on the left and right hand side of the cabinet (Illustration 5A). To adjus t the front feet,
use a wrench and turn the front feet u ntil the dishwasher is level (Illustration 5B).
9 The dishwasher must be secured in p lace. There are two ways to do this:
A. Normal work surface-secure to the work surface by using two woodscrews ensuring the
dishwasher weight is not being hit by the surface (Illu stration 6).
B. M arble or granite work top-secure the bracket to the side panel of th e dishwasher and secure
the dishwasher to the furniture housing. Put the rubber cap over the screw (Illustration 7).


