28
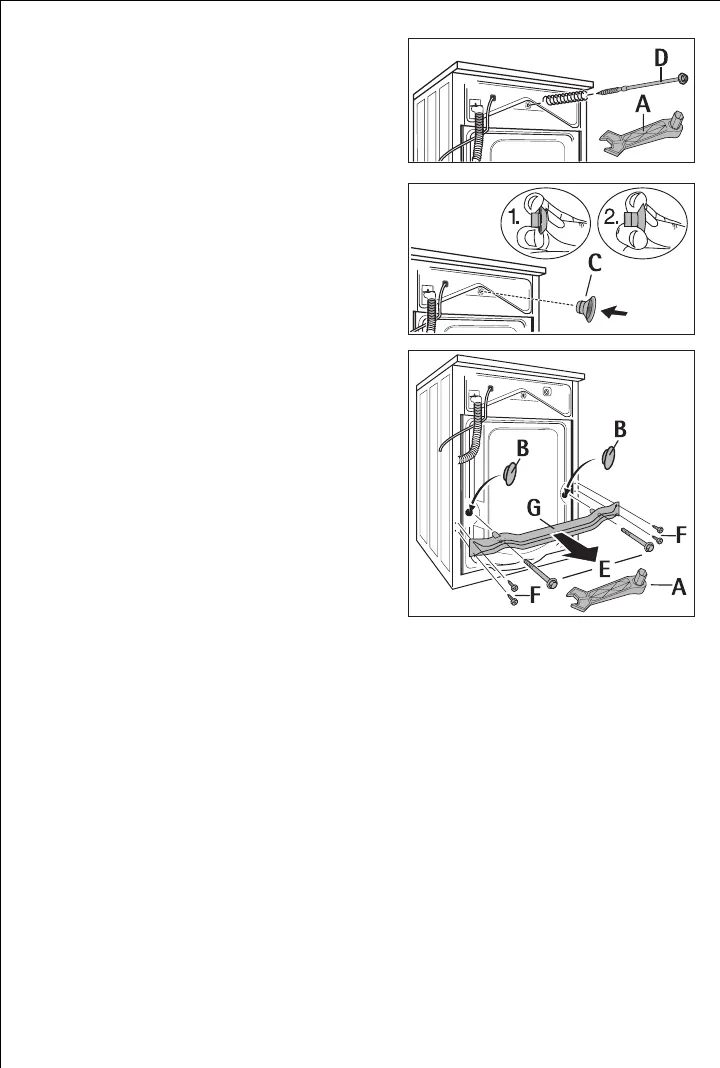
3 Special spanner A and sealing caps B
(2 off) and C (1 off) are supplied
with the appliance.
3. Remove screw D with its compres-
sion spring using special spanner A.
4. Turn sealing cap C upside down as
shown in the illustration.
5. Seal hole using sealing cap C.
6. Unscrew and remove two screws E
using special spanner A.
7. Unscrew and remove four screws F
using special spanner A.
8. Remove transit bar G.
9. Screw in the four screws F again.
10. Seal the two big holes using sealing
caps B.
Important! Press all sealing caps B
(2 off) and C (1 off ) in firmly, so
that they snap into place. (Splash
protection).


