19
HOW TO UNPACK THE APPLIANCE
1.
Cut and remove the shrink-wrap.
2.
Remove the top protection and the protection corners.
3.
Remove the bottom protection by tilting and turning
the appliance on one rear bottom corner.
4.
Open the lid while pressing it slightly down and at the
same time operate the handle. Remove the
polystyrene cushion.
5.
Peel off the light blue protective film from the panel
(depending on model).
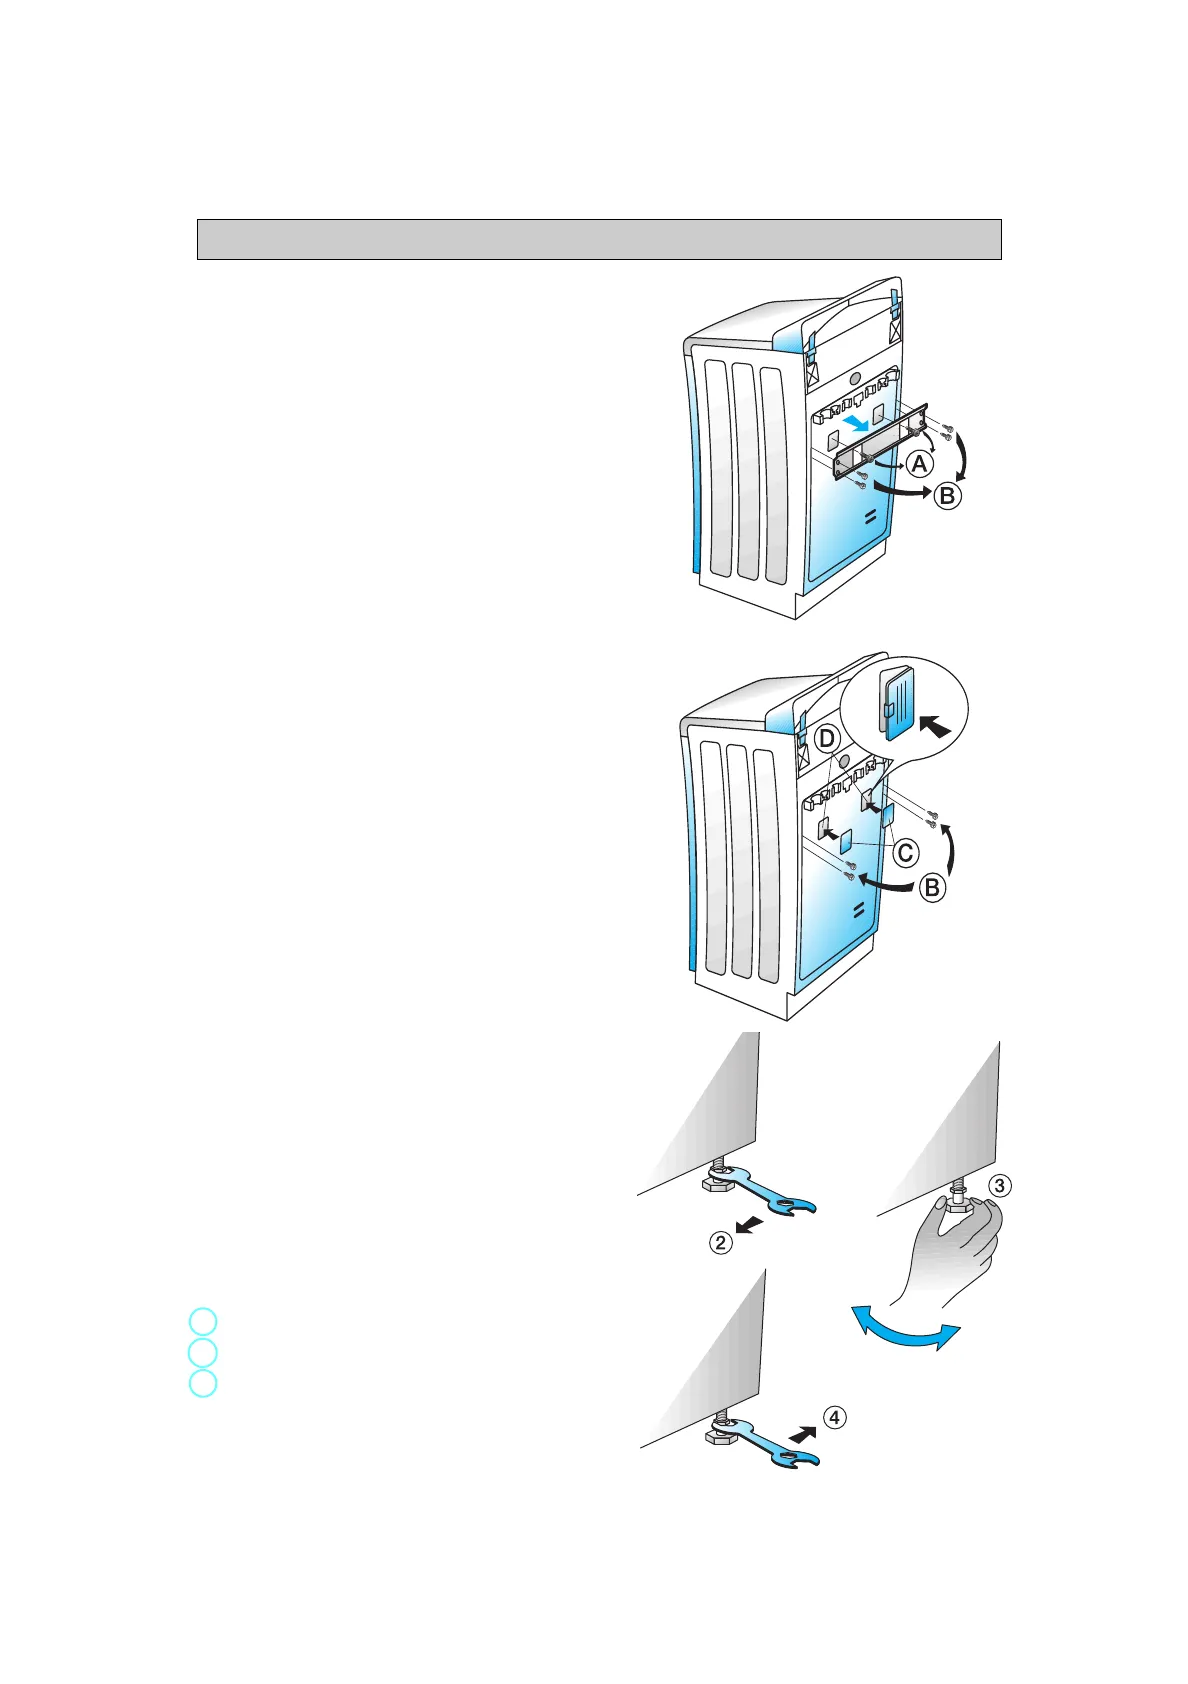
HOW TO REMOVE THE TRANSPORT
SCREWS AND THE TRANSPORT BRACKET
The appliance is fitted with the transport screws and
the transport bracket to prevent internal damage while
being moved.
Before using the appliance, the transport bracket
at the back MUST be removed.
1.
Unscrew the two screws
A
and the four screws
B
with a flat screwdriver or a N° 8 hex nut screwdriver.
2.
Remove the transport bracket.
3.
Replace the four outer screws
B
into the machine
again and tighten.
4.
Tear off the two stop plugs
C
from the hose holder
and clip them into the openings of the machine
D
.
Note:
In case of future moves, always transport the
washing machine upright.
INSTALLATION
•
Install the appliance on a solid and level floor surface
close to electrical, water and drain connections.
•
Make sure that all feet are stable and resting on
the floor and then check that the appliance is
perfectly level (use a spirit level).
•
If the floor is uneven, adjust the levelling feet as
required (do not insert pieces of wood, cardboard
etc. under the feet).
•
The appliance can be installed in a 40 cm width
and 63 cm depth space.
Note:
It is important to avoid blocking the openings on the
underside of the appliance when installing on a carpet floor.
ADJUSTMENT OF THE APPLIANCE
1.
To move the appliance into its operating position:
Pull the handle situated on the bottom of the front
(optional on certain models) a little bit by hand
and pull it in the final driving position by foot.
Afterwards push the handle back into the original,
stable position.
The front feet can be adjusted in order to level the
appliance.
2.
Loosen the locknut using a wrench.
3.
Adjust the height of the foot, turning it by hand.
4.
Tighten the locknut by turning it anti-clockwise
towards the appliance casing.
IMPORTANT:
Do not run the appliance while it is
standing on the trolleys.
INSTALLATION INSTRUCTIONS


