3
EN
See Use and Care Guide for more details on functions / see last page for
information on how to obtain the Use and Care Guide
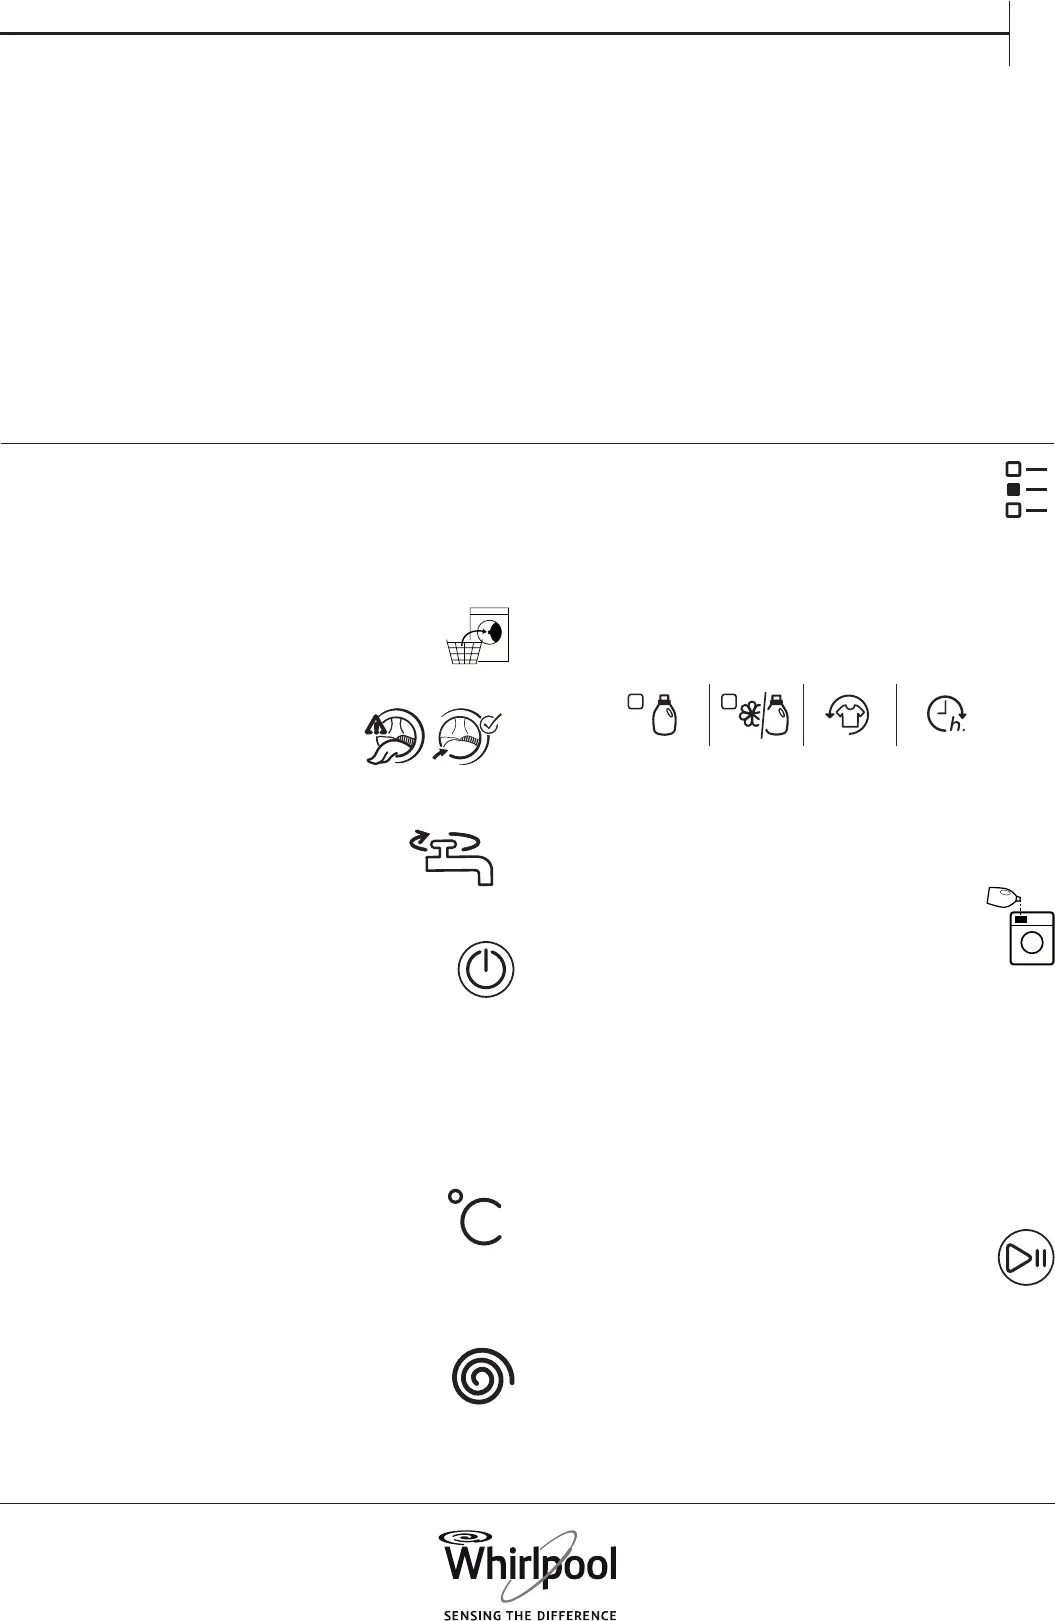
1. LOAD LAUNDRY
• Prepare your laundry according to the recommendations in
section “HINTS AND TIPS”.
• Make sure that fasteners are closed and ribbons tied together.
• Open the door and load the laundry.
Observe the maximum load sizes given in the
programme chart
2. CLOSE DOOR
• Make sure that no laundry gets stuck
between door glass and rubber seal.
• Close the door so that you can hear it click
shut.
3. OPEN THE WATER TAP
• Make sure that the washing machine is connected
to the mains.
• Open the water tap
4. SWITCH ON WASHING MACHINE
• Press the On/O button. An animation appears, and there
is a sound. The programme which was used last lights up.
Afterwards the washing machine is ready to be operated.
5. SET THE DESIRED PROGRAMME
• Select programme:
Press the programme symbol on the control panel. Programme
name, default duration, temperature and spin speed as well as
maximum laundry load appear on the display.
• Change temperature, if needed
Press the temperature button; the display indicates that the
temperature can be set.
• Press the temperature button repeatedly
OR
• press the UP or DOWN key until the needed temperature appears
on the display.
• Change spin speed, if needed
Press the Spin button; the display indicates that the spin
speed can be set.
• Press the Spin button repeatedly
OR
• press the UP or DOWN key
until the needed spin speed, or Rinse hold, appears on the display.
DAILY USE
• Select options, if needed
Press the options button. The options which are selectable
for the programme appear on the display.
Press the UP or DOWN key to navigate through the list of options.
Press the OK key to select an option; the option symbol lights up on
the control panel.
To deselect a selected option, press the OK key again.
Some options / functions can be selected by directly pressing the
button:
1 2
If such an option is not selectable for the programme, it switches o
automatically when the button is pressed.
Refer to section OPTIONS, FUNCTIONS AND INDICATORS for more
information.
6. ADD DETERGENT
• If you want to add the detergent manually, carefully pull
out the detergent dispenser and add detergent (and
additives) now, as indicated in section DETERGENT
DISPENSER.
Do not pull hard when opening the dispenser.
Observe the dosing recommendations on the detergent pack. If
you have selected PREWASH or FINISH IN, observe the instructions
in section PROGRAMMES AND OPTIONS, and FUNCTIONS.
Afterwards carefully close the detergent dispenser.
• If you want the washing machine to dose the detergent
automatically, simply make sure the Auto Dosing function is
activated (refer to section OPTIONS, FUNCTIONS AND INDICATORS
/ Auto dosing). The detergent is added by the auto
dosing system after programme start.
7. START PROGRAMME
• Press and hold “Start/Pause” until the button lights up
solidly; the programme starts.
• If you have selected Auto dosing, the display indicates
dispensing of the detergent after programme start. Observe the
instructions in section OPTIONS, FUNCTIONS AND INDICATORS /
Auto dosing function.
8. CHANGE A RUNNING PROGRAMME, IF NEEDED
You can still change the settings while a programme is running. The
changes will be applied, provided the respective programme phase
has not nished yet.
Before using this function, follow the instructions in the USE AND
CARE GUIDE/AUTO DOSING – FIRST USE to:
1. Set the correct water hardness level
2. Set tank 2 content. By default, Tank 1 is set for a detergent (your
main detergent), and Tank 2 is set for fabric softener. If you do not use
fabric softener, set Tank 2 for another detergent.
3. Check/adjust the preset dosing quantities.
By default, the system comes with the following dosing values:
• 80 ml detergent for Tank 1
• 30 ml softener for Tank 2
You need to adjust these preset dosing values to the dosing values
reported on the detergent and softener package that you intend to
use.
After the Auto Dosing function is set for use, ll the tanks with the
appropriate content and install the labels on the tanks accordingly, as
explained in the USE AND CARE GUIDE / AUTO DOSING – FIRST USE.


