MODEL: WD-52525 / WD-52725 / WD-52825 / WD-62525 / WD-62725 / WD-62825
Page 27
Electrical Adjustments
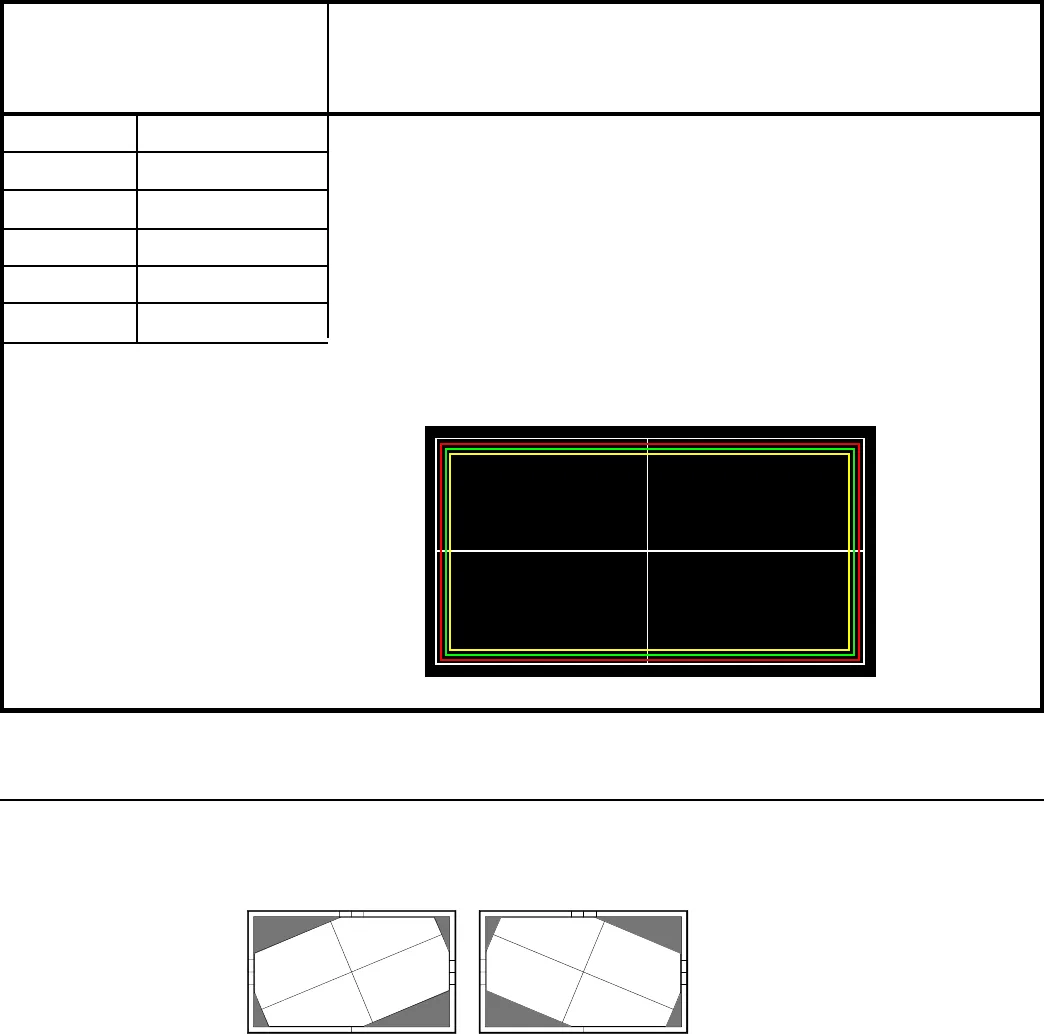
[PICTURE POSITION]
1. Horizontal/Vertical Position
To center picture on the screen.
Picture is off center.
NOTE: The TV should be placed on a flat level surface.
Improper installation can affect raster geometry.
----
----
------
-------
None
ANT-DTV
1. Select the ANT-DTV Input, no signal.
2. Press “TV MENU-2-4-5-7” in sequence
3. Press “REWIND” to activate the Test Pattern shown above.
4. Press “AUDIO” to select “FMT” function.
5. Use the “VIDEO” button to select “1 HPOS”.
6. Use the “ADJUST” buttons to center the picture Horizontally.
7. Press “ENTER” to save the adjustment.
8. Use the “VIDEO” button to select “2 VPOS”.
9. Use the “ADJUST” buttons to center the picture Vertically.
10. Press “ENTER” to save the adjustment.
CAUTION: DO NOT set VPOS data to “0” or “255” and press ENTER.
Video will be muted and On Screen Menus will no longer be visible.
11. Press “HOME” or “TV MENU” twice to terminate the Adjustment Mode.
Purpose:
Measuring
Instrument
Test Point
Measuring
Range
Input Signal
Ext. Trigger
Input
Symptom:
Mechanical Adjustments
Picture Rotation Adjustment
NOTE: The TV should be placed on a flat level surface.
Improper installation can affect raster geometry.
1. Refer to the Disassembly Preocedures on Pages 7, 8, and 9 to remove the Speaker Grille, Front Cover, Back Cover and
Inner Cover.
2. From the front of the TV, lift the sponge to access and slightly loosen the brass Rotation Locking Screws on the Adjuster
Assembly, Figure 4A. (Use a 10mm wrench.)
3. From the rear of the TV, access the black Rotation Adjustment screw (4mm allen wrench) and adjust so the test pattern
center lines are parallel to the sides, top and bottom of the screen frame, Figure 4B. (Use a mirror to view the picture
from the rear of the set.)
4. Tighten the two Locking Screws. Use Locktite to secure the Adjustment Screw. (If necessary, use the electrical
adjustments to center the picture)


