Attaching Drive Cables in the Chassis
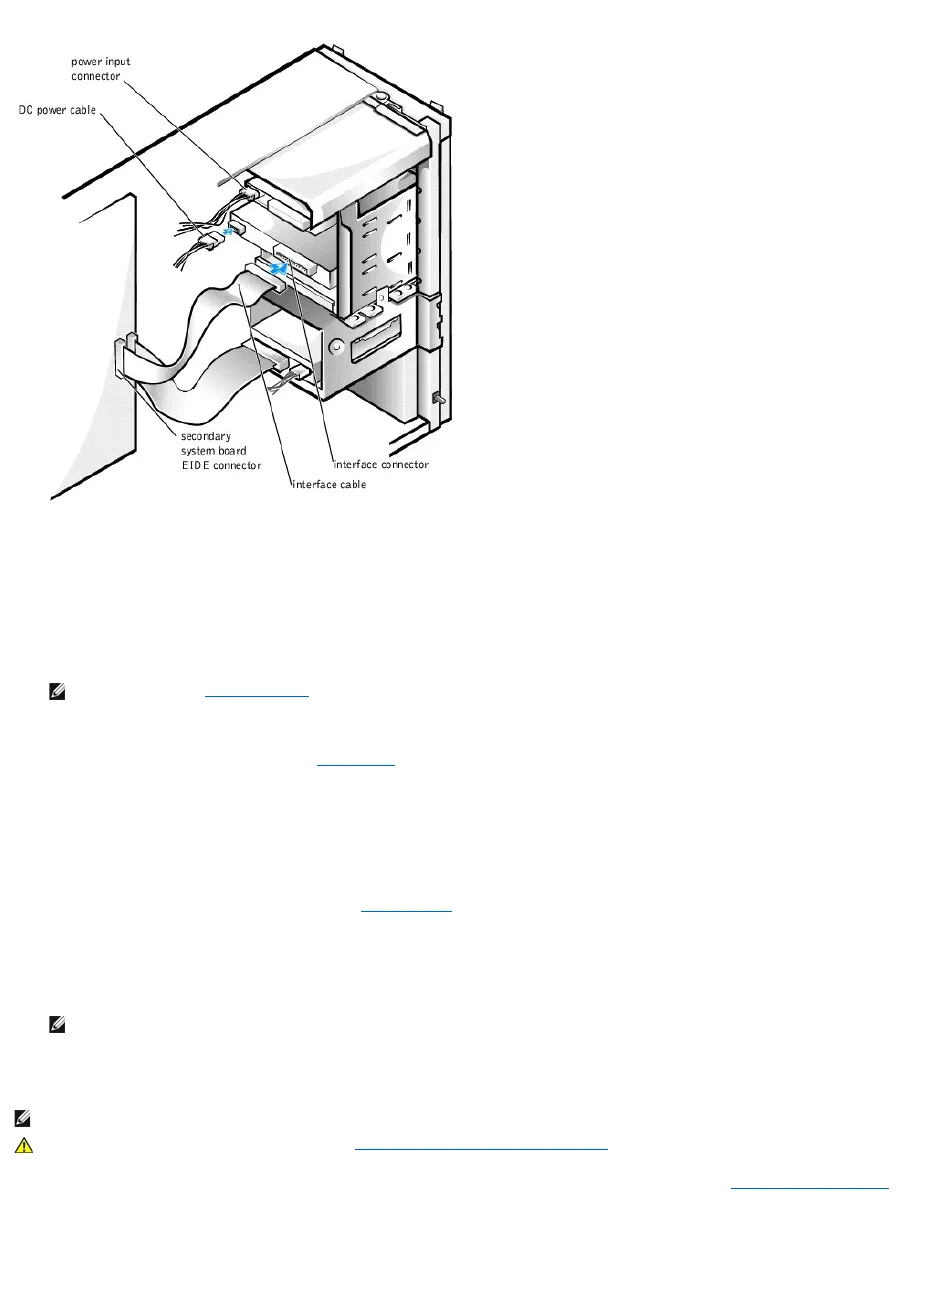
10. Ensure that all cables are firmly connected. Fold cables out of the way to provide airflow for the fan and cooling vents.
11. If the chassis drive bay was previously empty, remove the corresponding insert from the front panel.
Hold the front panel with the outside facing you. Press the ends of the insert with your thumbs until the insert snaps free of the front panel.
12. Replace the front panel.
13. Replace the computer cover, reconnect the computer and peripherals to their electrical outlets, and turn them on.
ALERT! Cover was previously removed.
14. If the drive you installed is a hard drive, enter system setup, and update the drive settings.
After you update the system settings, exit system setup and reboot the computer.
15. If the device you installed is a hard drive, partition and logically format the drive before proceeding to the next step.
See the operating system's documentation for instructions.
16. Test the drive to verify that it is operating properly.
l If the drive you installed is a hard drive, run the Dell Diagnostics to test the drive.
l For other types of drives, see the drive's documentation for information on testing the drive.
17. If the drive you installed is the primary hard drive, install the operating system on the drive.
See the operating system's documentation for instructions.
Installing a Hard Drive in the Chassis
1. Turn off the computer and peripherals, disconnect them from their electrical outlets, wait at least 5 seconds, and then remove the computer cover.
2. Rotate the power supply away from the system board.
3. Remove the front panel.
4. Remove the drive bracket from the chassis.
Pull the drive door forward and down until the hard-drive bracket is ejected halfway out of the chassis (see the following figure). Then grasp the bracket