GENERAL OPERATING INSTRUCTIONS
3/31/2008 Rev. 4.3 3-6
delete the last file saved, or + key (for the letter “Y”) to delete all files saved. The shift
and keys will have to be pressed again to confirm erasure of all files. Deleting a file removes it
permanently! Be sure to transfer important data before deleting it from the CI-340. Refer to the DATA
TRANSFER section for related information.
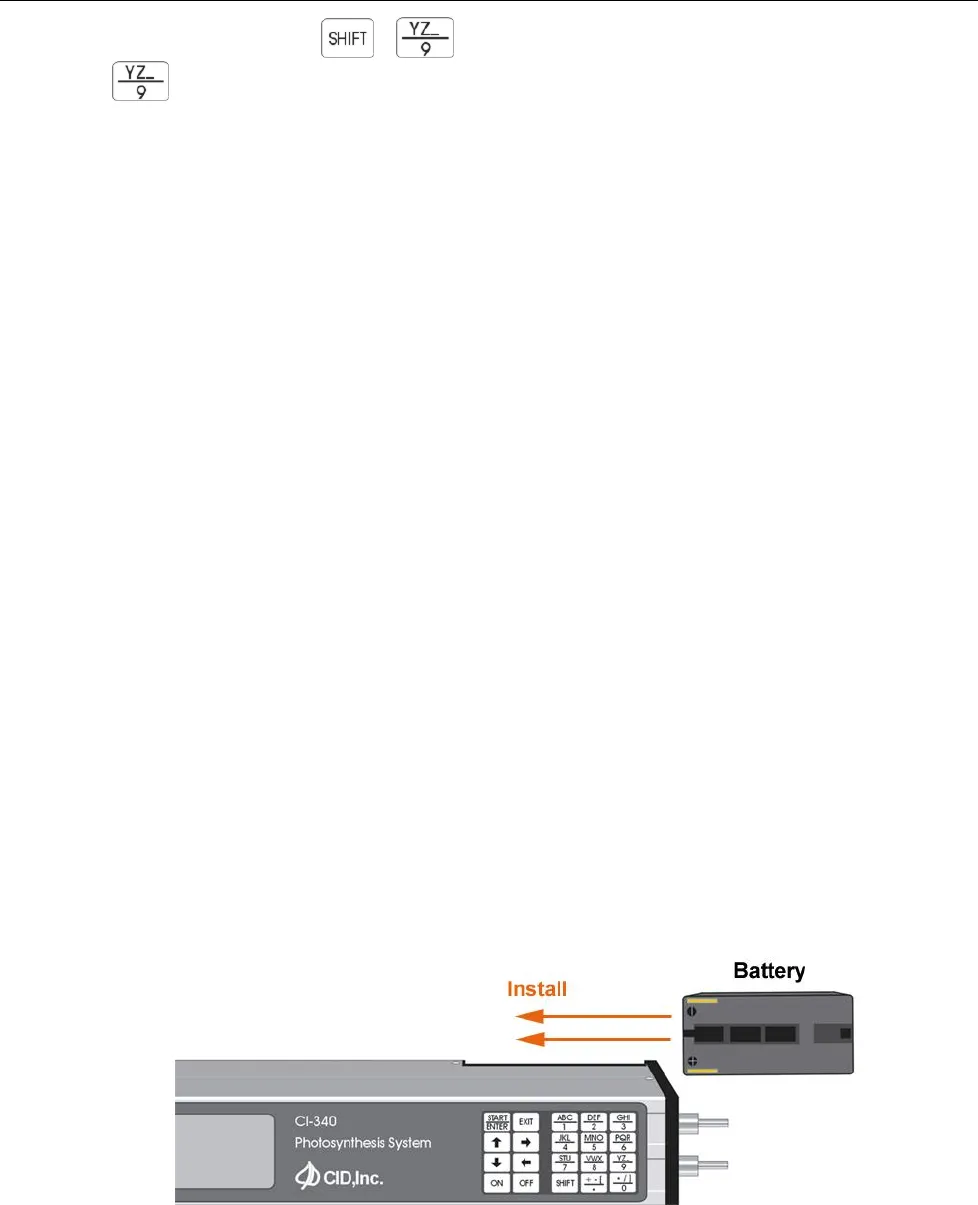
INSTALLATION OF THE BATTERY
The CI-340 is dependent upon a properly charged power source for efficient and reliable
measurements and calculations. The included battery/battery eliminator is designed to provide the
necessary power. The system is designed to operate from 7.2V rechargeable Li-Ion batteries. Check
with the nearest representative or manufacturer if the included system does not include one or more of
the above items.
If the rechargeable battery should ever fail to charge properly, please recycle it. Many waste
processing systems do not allow Li-Ion batteries to be simply thrown in the trash.
Proper installation of the battery is as follows:
• Align the contacts of the battery with the contacts of the CI-340 (Figure 3-2).
• Line up the battery so that it is about 7 mm “off” its final position within the battery mounts in the
direction shown in Figure 3-2.
• Press the battery toward the contacts and slide in the direction shown (Figure 3-2) until firmly in
place. By pressing the battery toward the contacts, the CI-340 will make necessary connections
with the battery and the battery will be in the correct position.
• To remove the battery, slide it in the opposite direction that is shown in Figure 3-2.
Refer to the RECHARGING chapter for further information on how to take care of the battery and for
how to power the CI-340 in the lab without using the Li-ion battery.
Note: The CI-340 should only be used in low RF ambient areas. Do not use near radio/TV
transmitting antennas or near electrical arc welders.
Figure 3-2. Battery installation: Press the battery toward the contacts.


