HANDHELD MICROPHONE
--2--
1.Unscrew the battery cover at the end of the microphone. Install the provided 9 volt battery and then close the cover. Make
sure to connect with the correct polarity.
2.Move power switch to ON position. Power LED indicator will flash once and then go off. This indicates correct operation. If
power LED indicator lights red, this indicates the battery is low. Please replace with new battery.
3.Move power switch to center to mute the microphone.
4.If the microphone is not going to be used for a long period of time, please take out the battery to prevent damage by battery
leakage.
BATTERY CONDITION
INDICATOR
POWER SWITCH POWER COVER
UNSCREW BATTERY
COVER TO INSERT
BATTERY
INSTALLATION
--5--
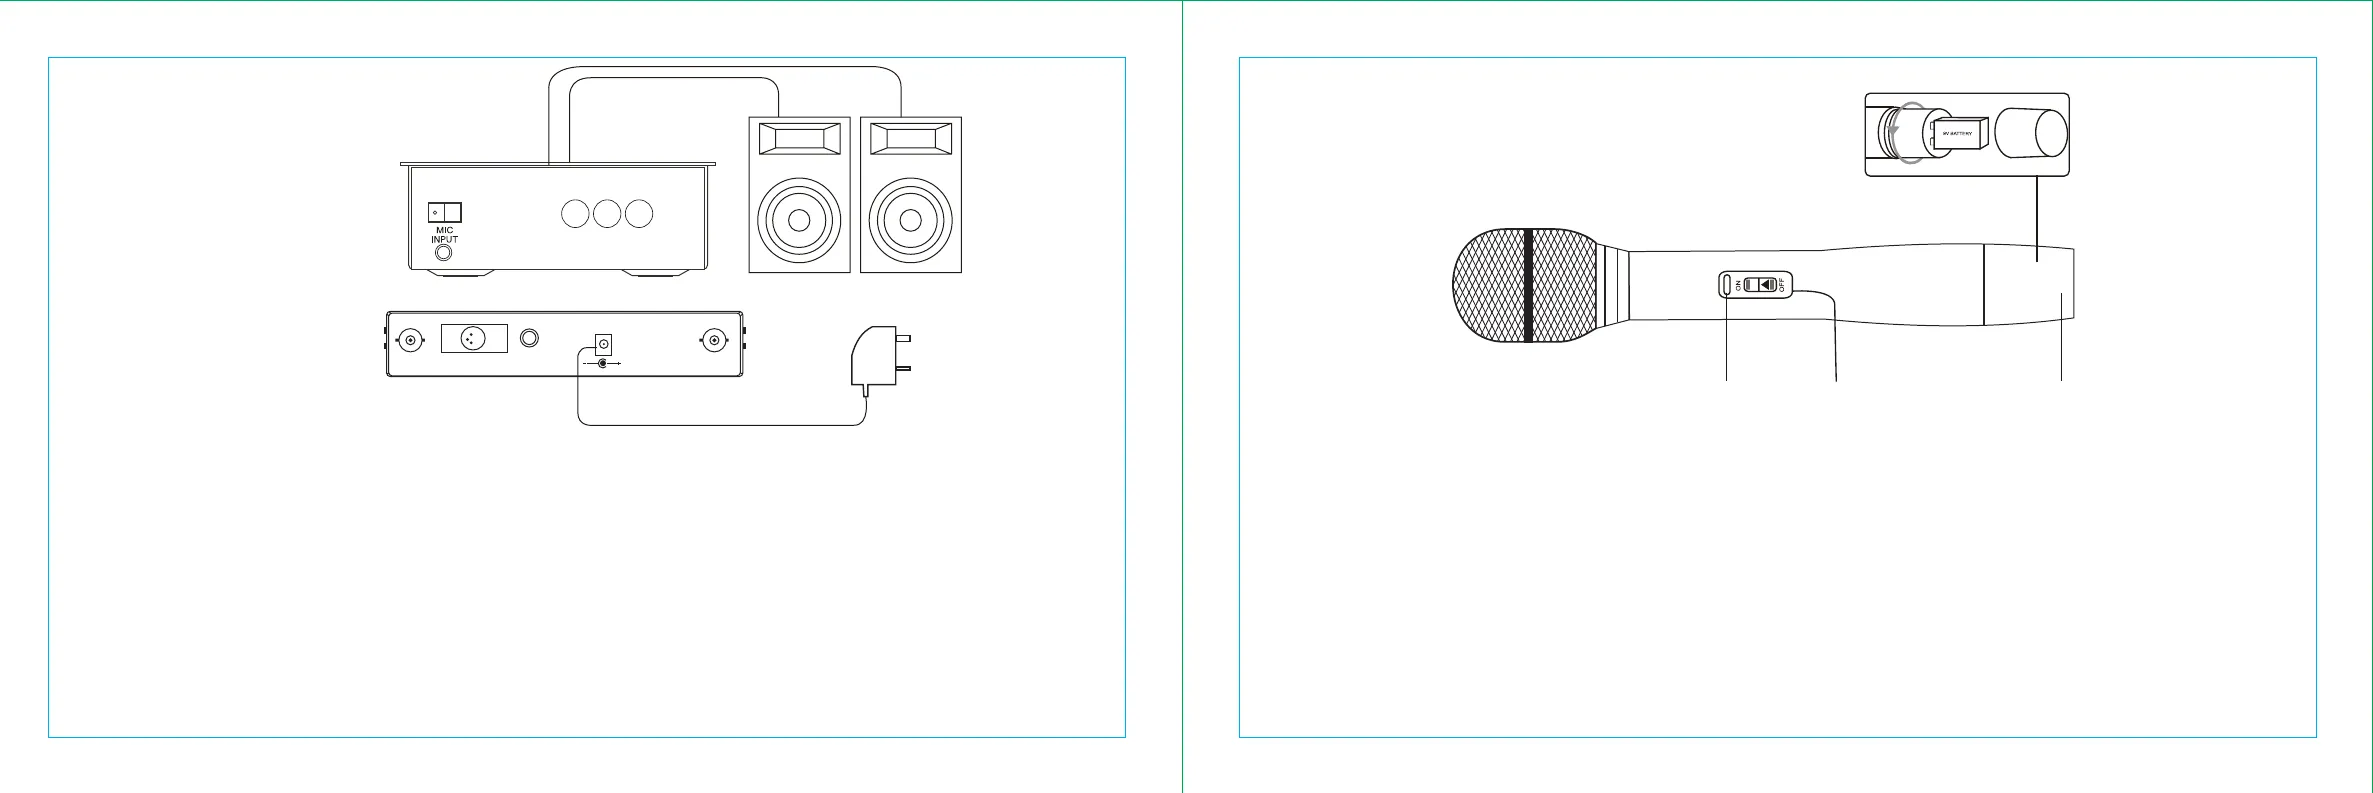
To connect the wireless microphone to your amplifier system:
Refer to above installation diagram.
Using the supplied 6.35mm to 6.35mm lead, connect from the AF OUT jack of the receiver to the MIC INPUT socket on your
amplifier.
Plug one end of the mains power adapter into a suitable mains socket.
Plug the other end of the adapter into receiver DC 12V input socket.
ANT.B BALANC ED AF.OUT
MIX
ANT.A
DC 12V
RADIO MIC
RECEIVER UNIT
AMPLIFIER
SPEAKERS
MAINS POWER
ADAPTER


