Fax Driver 2-6
Installing the fax driver
2
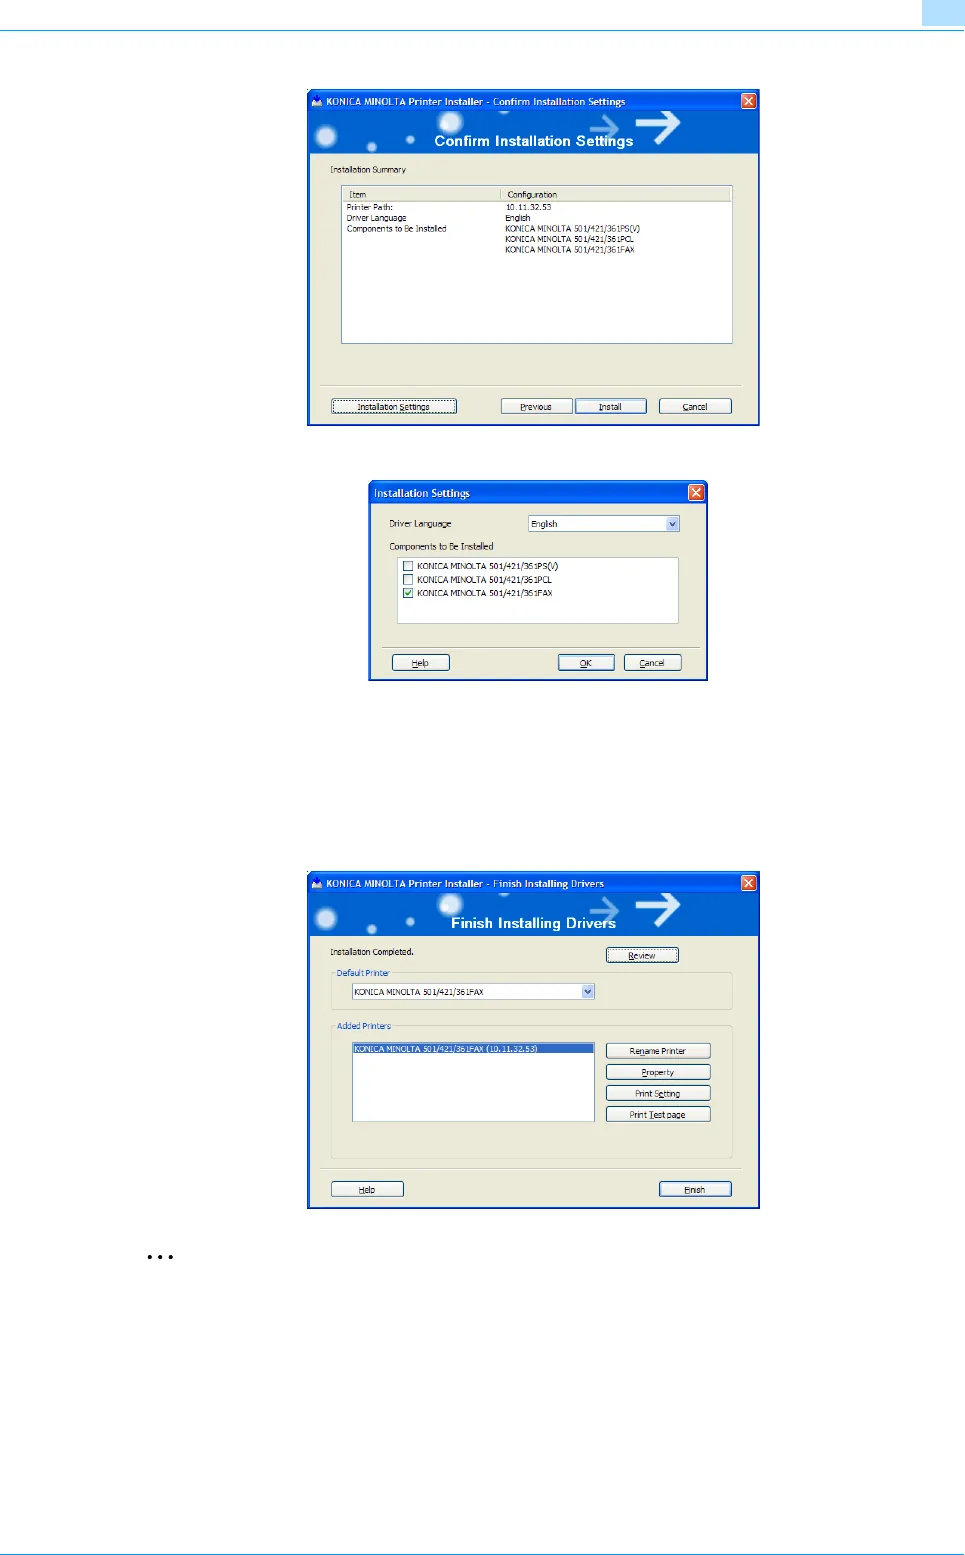
6 Click the [Installation Settings] button.
7 Select the fax driver as the component to be installed, and then click the [OK] button.
8 In the Confirm Installation Settings dialog box, click the [Install] button.
– If Windows logo test and digital signature warning messages appear, click the [Continue] or [Yes]
button.
9 In the Finish Installing Drivers dialog box, click the [Finish] button.
This completes the fax driver installation.
2
Note
In the Finish Installing Drivers dialog box, installation items can be confirmed and settings can be
changed.
[Review]: Check the installation settings.
[Rename Printer]: Change the printer name.
[Share Setting]: Specify shared settings of the printer.
[Property]: Specify the property settings of the fax driver. For details,refer to "Specifying the Configure
tab settings" on page 3-18.
[Print Setting]: Specify the functions of the fax driver. For details, refer to "Settings" on page 3-8.
[Print Test Page]: Perform test print.


