2. Select Languages in the General tab.
3. Specify the display language in order of preference in the Language in order of preference list.
For example:
Italian (Italy) [it]
Spanish (Traditional Sort) [es]
German (Germany) [de]
French (France) [fr]
English [en] or English (United States) [en-us]
Setting the Printer's IP Address to Non-proxy
1. Select Internet Options from Tools on the menu bar.
2. Select Proxy server under LAN Settings in the Connections tab.
3. Do either of the following.
Clear the Direct connection to the Internet check box.
Click Advanced, and then specify the printer's IP address in the Do not use proxy server for addresses
beginning with field under Exceptions.
When you have finished setting the language and proxy, type http://nnn.nnn.nnn.nnn/ (the printer's IP address) in the
URL entry field of the browser to activate the Dell Printer Configuration Web Tool.
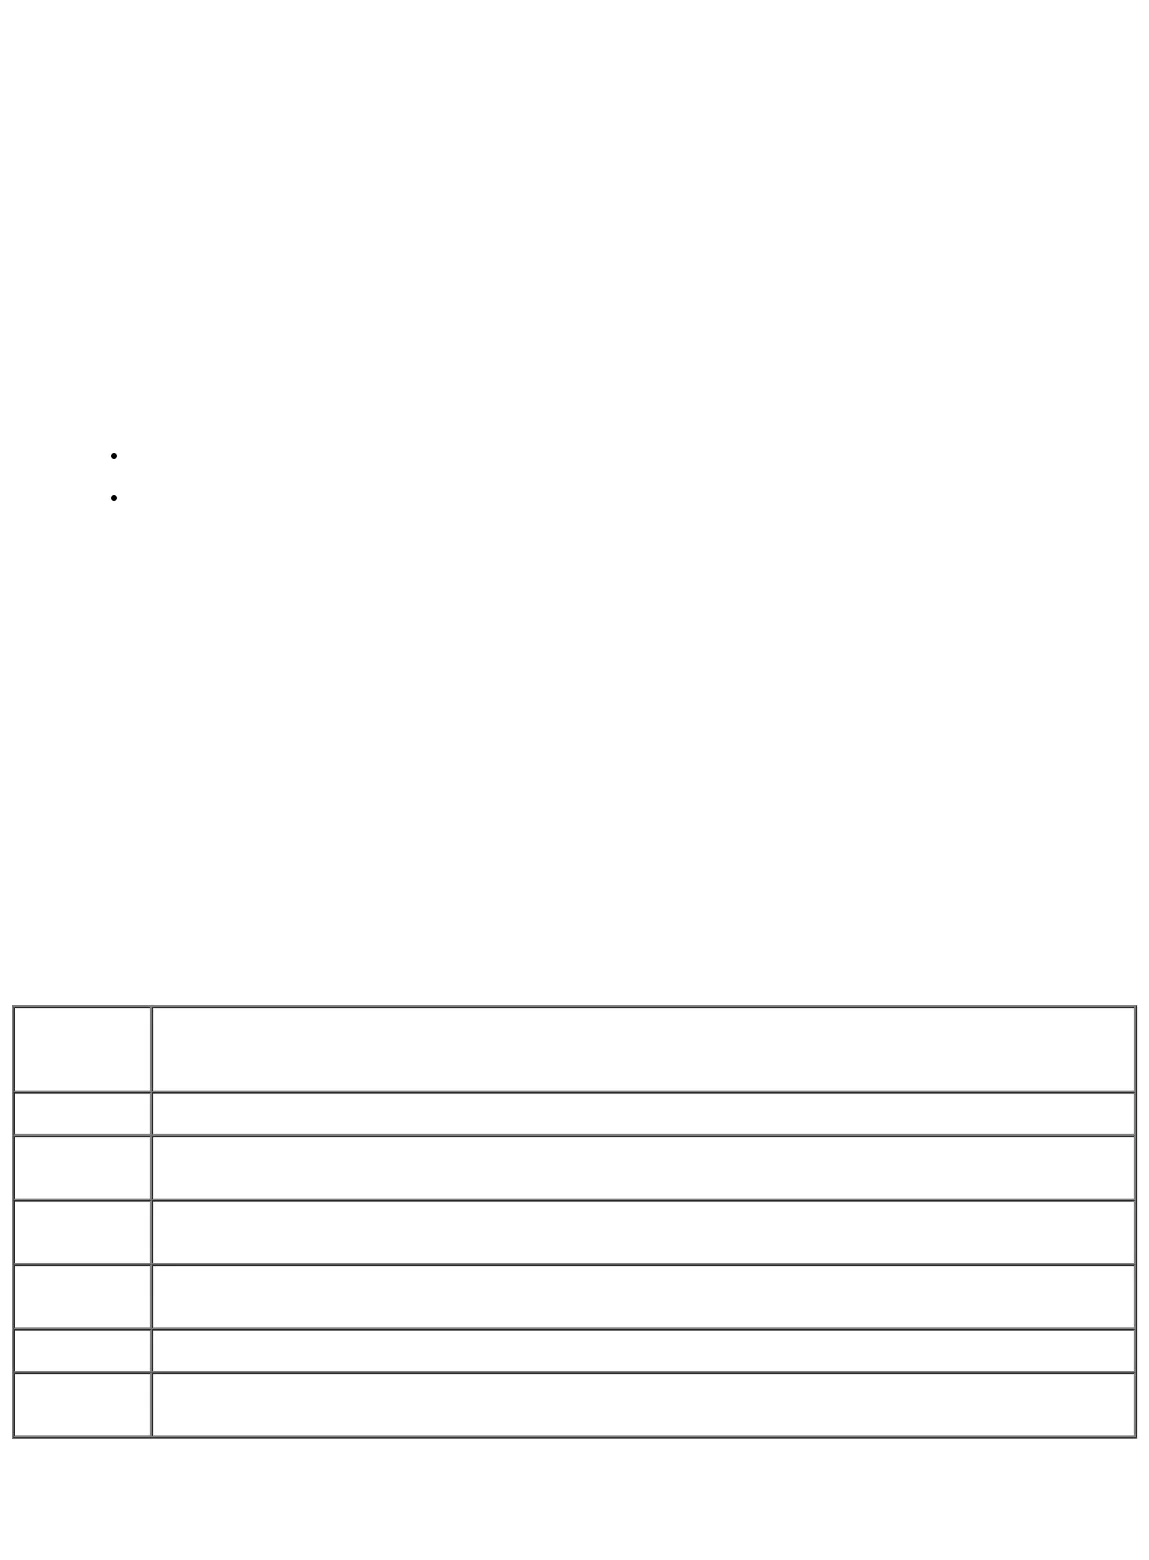
Page Display Format
The layout of the page is divided into three sections.
Top Frame
Located at the top of all pages is the Top Frame. When Dell Printer Configuration Web Tool is activated, the current
status and specifications of the printer are displayed in the Top Frame on every page.
The following items are displayed in the Top Frame.
Dell Laser
Printer
5100cn
Displays the printer product name.
IP Address: Displays the printer's IP address.
Location: Displays the printer's location. The location can be changed in Basic Information on the Print Server
Settings page.
Contact
Person:
Displays the printer's administrator's name. The name can be changed in the Basic Information on the
Print Server Settings page.
Printer
Console
Displays the status of the printer operator panel display and indicators. This is automatically refreshed at
the set interval. The interval can be changed in the Basic Information on Print Server Settings page.
Help Links to the Dell web page. See the User's Guide on that page.
Printer
Bitmap
Shows the printer bitmap. The Printer Status menu appears in the Right Frame by clicking this image.
Left Frame


