Installation Guide
Press MENU butto
n to display the MAIN OSD MENU; Press ◄ / ►button to select the
MENU you want; Press ENTER button to enter the sub menu; Press ▼ / ▲ button to select the
option and then press ◄ / ► to adjust the value in the sub menu; You can press MENU button to
go back to the upper menu or EXIT button to close the OSD.
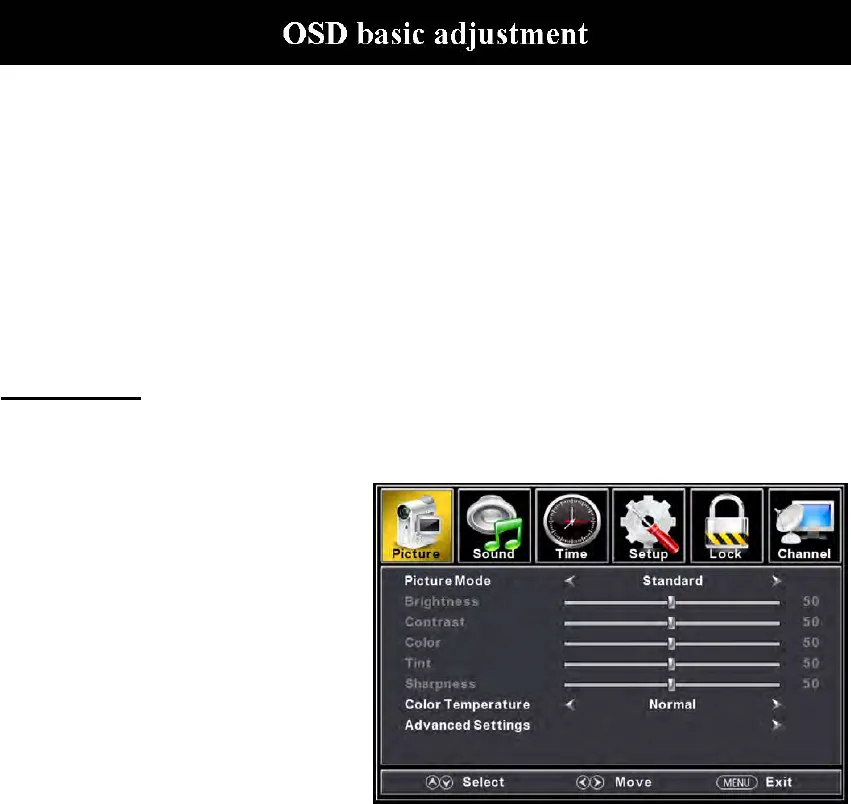
PICTURE
You c
an select the type of picture, which best corresponds to your viewing. Press the “MENU”
button to enter the OSD menu .Then
press “/” button to select the
“PICTURE” menu.
1. Press “” button to select “Picture
Mode”, press “
/
” but
ton to select.
2. Press “/” button to select
“Brightness” and press the “/”
button to enter brightness adjustment
menu to adjust brightness.
3. Press “/” button to select
“Contrast” and press the “/” button
to enter contrast adjustment menu to
adjust contrast.
4. Press “/” button to select “Color” and press the “/” button to enter color adjustment
menu to adjust color.
5. Press “/” button to select “Tint” and press the “/” button to enter hue adjustment menu
to adjust tint.
Note:
The 'Tint' item is used in NTSC mode only
.
6. Press “/” butto
n to select “Sharpness” and press the “/” button to enter sharpness
adjustment menu to adjust sharpness.
7. Press “/” button to select “Color Temperature” and press the “/” button to select.
8. Press “/” button to select “Advanced Setting” and press the “ENTER/” button to enter
sub-menu.
18


