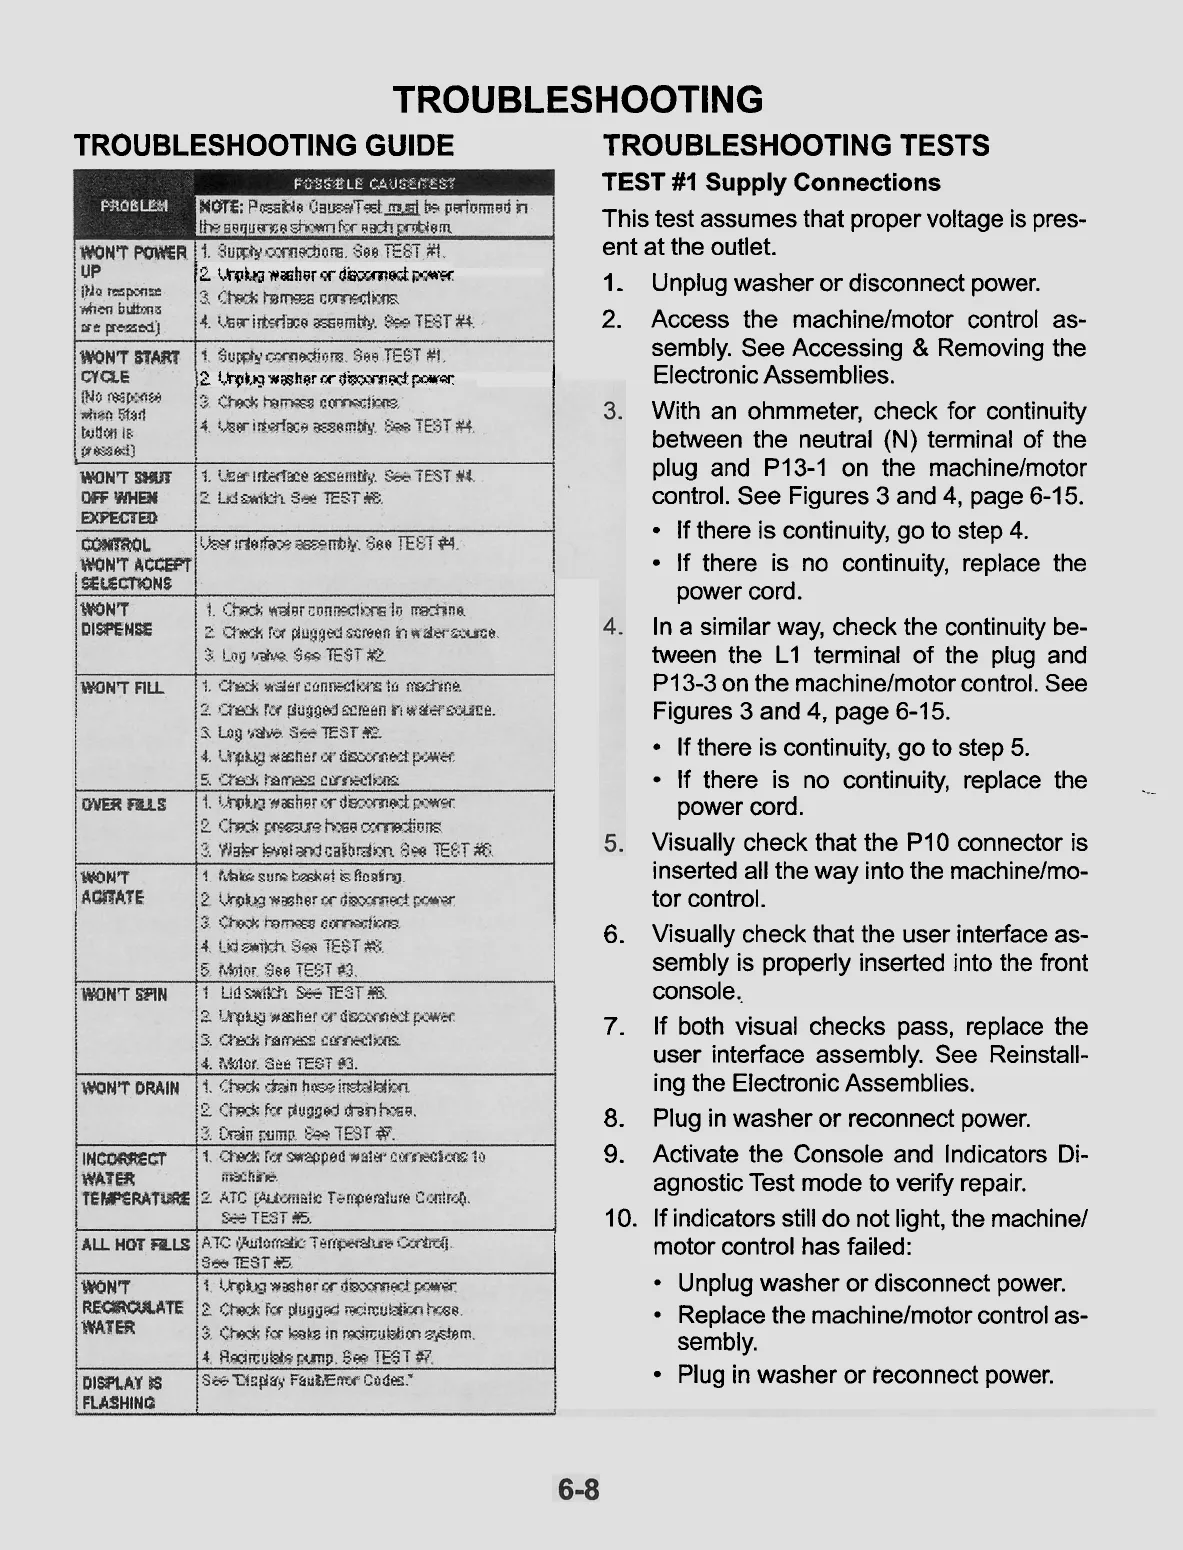
TROUBLESHOOTING
TROUBLESHOOTING GUIDE TROUBLESHOOTING TESTS
TEST
#I
Supply
Connections
This test assumes that proper voltage is pres-
ent at the outlet.
'2
t~.a
wailher
w diyrnezt FMY
1.
Unplug washer or disconnect power.
2.
Access the machinelmotor control as-
sembly. See Accessing
&
Removing the
2
f.fWtLkr7wash~rrrdhmd
ww
Electronic Assemblies.
With an ohmmeter, check for continuity
between the neutral
(N)
terminal of the
plug and
P13-1 on the machinelmotor
control. See Figures 3 and 4, page 6-1
5.
If there is continuity, go to step 4.
If there is no continuity, replace the
power cord.
In a similar way, check the continuity be-
tween the
L1 terminal of the plug and
PI 3-3 on the machinelmotor control. See
Figures 3 and
4,
page 6-15.
If there is continuity, go to step
5.
If there is no continuity, replace the
-.-
power cord.
Visually check that the
PI0
connector is
inserted all the way into the
machinelmo-
tor control.
6.
Visually check that the user interface as-
sembly is properly inserted into the front
console..
7.
If both visual checks pass, replace the
user interface assembly. See Reinstall-
ing the Electronic Assemblies.
8.
Plug in washer or reconnect power.
9.
Activate the Console and Indicators Di-
agnostic Test mode to verify repair.
10.
If indicators still do not light, the machine1
motor control has failed:
Unplug washer or disconnect power.
Replace the machinelmotor control as-
sembly.
Plug in washer or reconnect power.


