4
AUS
Where to install the tumble dryer
Install the dryer far from gas
ranges, stoves, radiators or
hobs, as flames may damage it.
If the dryer is installed below a
worktop, ensure there are 10
mm between the upper panel of
the dryer and any objects above
it, and 15 mm between the sides
of the machine and the walls or
furniture units adjacent to it. This
ensures adequate air circulation.
Ventilation
The room must be adequately ventilated while the dryer is
running. Make sure that the dryer is installed in a room free of
humidity and with adequate air circulation. The flow of air
around the dryer is essential to allow water to condense
during drying; the dryer will not function properly if it is placed
in an enclosed space or inside a cabinet.
Some condensation may form if the dryer is used in a small
or cold room.
We do not recommend installing the dryer in a cupboard
because dangereous levels of heat can buildup! The dryer
must not be installed behind a loackable door, a sliding door
or a door with the hinge on the opposite side to that of the
tumble dryer in such a way that the full opening of the tumble
dryer door is restricted.
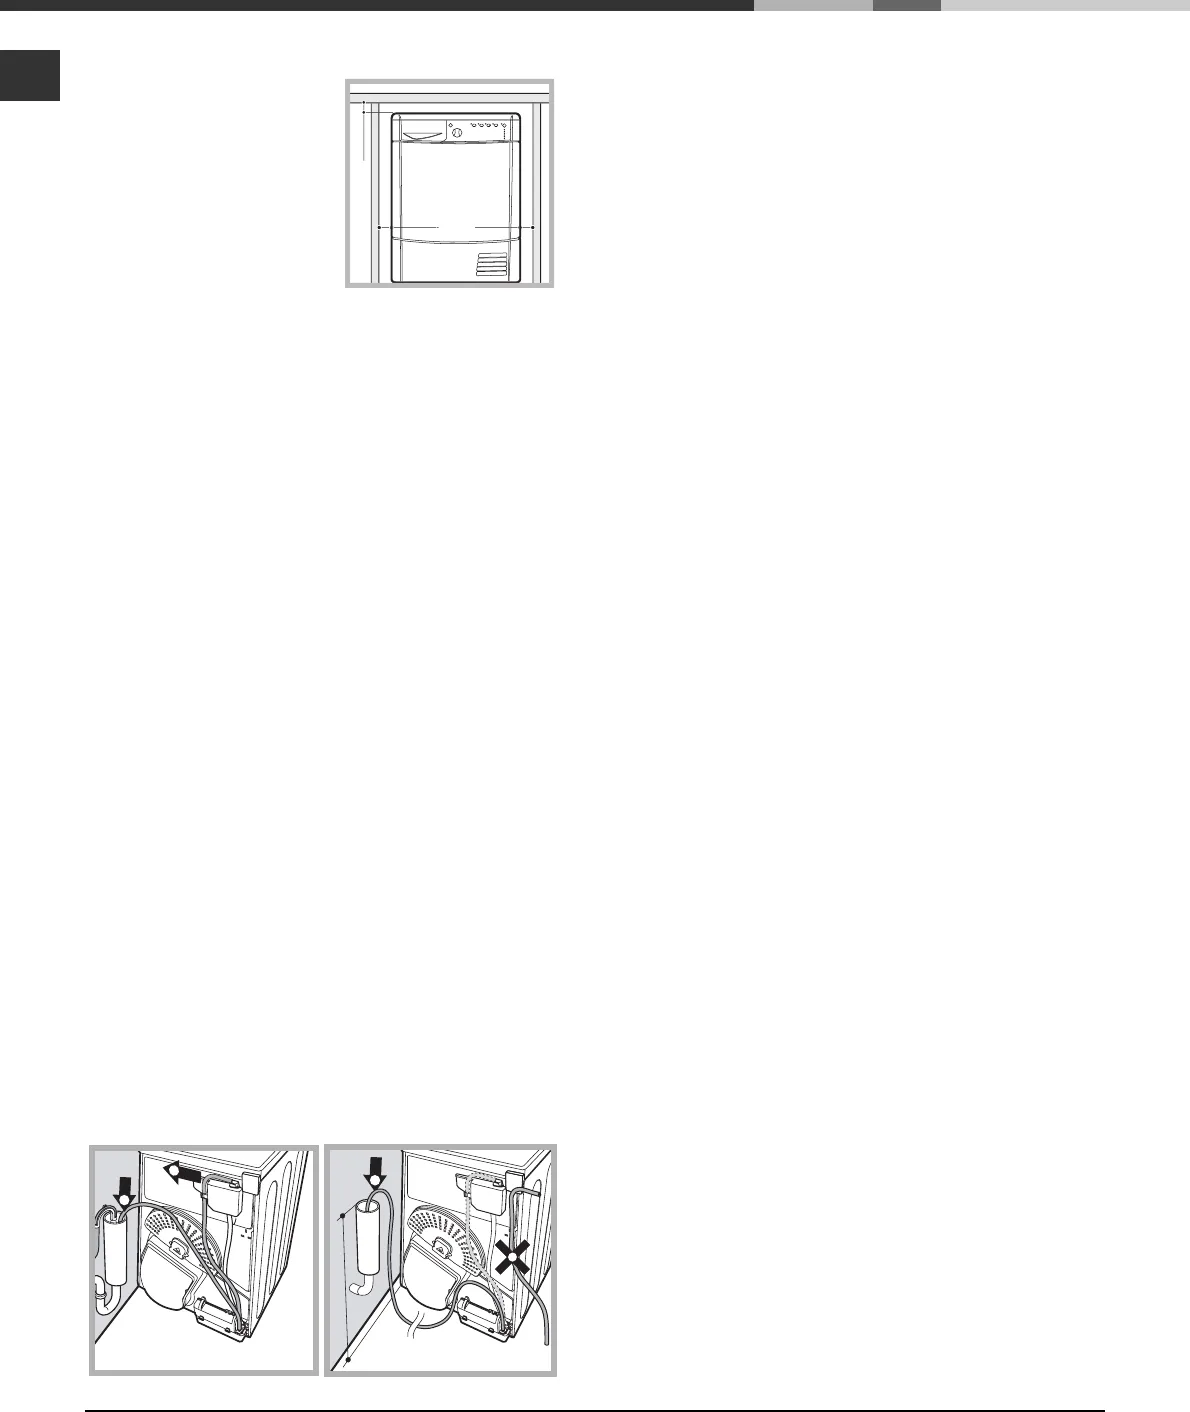
Water drainage
If your dryer is installed next to a drain the water can be
plumbed into this drain. This does away with the need to
empty the water container. If the dryer is stacked onto or
installed next to a washing machine it can share the same
drain. The dryer is supplied with a length of hose and this must be
used to drain the condensed water under certain condition. If you
are using a washing machine with a spin speed below 1100 rpm
and drying loads of 7 kg or more and for energy label test to
AUS/NZS 2442 you must plumb out the water or the container
may fill before the clothes are dried. Follow the instruction below.
The height of the drain must be less than 3' (1 m)
from the bottom of the dryer.
Remove existing hose from position shown in picture A.
And fit a supplied length of hose to location shown in picture B.
Make sure that the hose is not squashed or kinked
when the dryer is in its final location.
To length of the hose can be reduced if necessary to
avoid this.
1
m
Electrical connections
Before plugging the appliance into the socket, check the
following:
Make sure your hands are dry.
The socket must have an earth connection.
The socket must be able to withstand the machines
maximum power output as indicated on the data plate (see
Description of the tumble dryer).
The power supply voltage must fall within the values
indicated on the data plate (see Description of the tumble
dryer).
The socket must be compatible with the machines plug. If
not, either the socket or the plug must be replaced.
Avoid using any extension cord or multiple socket outlet.
The tumble dryer must not be installed in outdoor spaces,
even if sheltered. It may be very dangerous to expose this
appliance to rain and thunderstorms.
Once dryer installation is complete, the electric cord and
plug must be at hand.
The electric cord must not be bent or crushed.
If the plug to be replaced is of the moulded-on type, it
must be disposed of in a safe way. DO NOT leave it where it
can be plugged into a socket and cause electric shocks.{}
The electric cord must be regularly checked and replaced
with a cord specifically designed for this dryer; it must then
be installed by an authorised technician only (see
Assistance). New or longer electric cords are supplied by
authorised dealers at a supplementary cost.
The manufacturer declines all responsibility for failure
to observe these instructions.
When in doubt about the above indications, contact a
qualified electrician.
CAUTION: If this appliance is supplied from an
extension cord or portable electrical outlet device, the
extension cord set or electrical portable outlet device
must be positioned so that it is not subject to splashing
or contact with moisture.
If the supply cord is damaged, it must be replaced by
the manufacturer, its service agent or similarly qualified
persons in order to avoid a hazard.
Preliminary information
Once the tumble dryer is installed, clean the inside of the
drum before operating it and remove any dirt accumulated
during transportation.
1
2
2
1
Less than 1m
Picture A
Picture B
Installation


