SECTION 2
SETTING UP THE SYSTEM
XPS-ProMail System Operations 4-24-14.doc 15
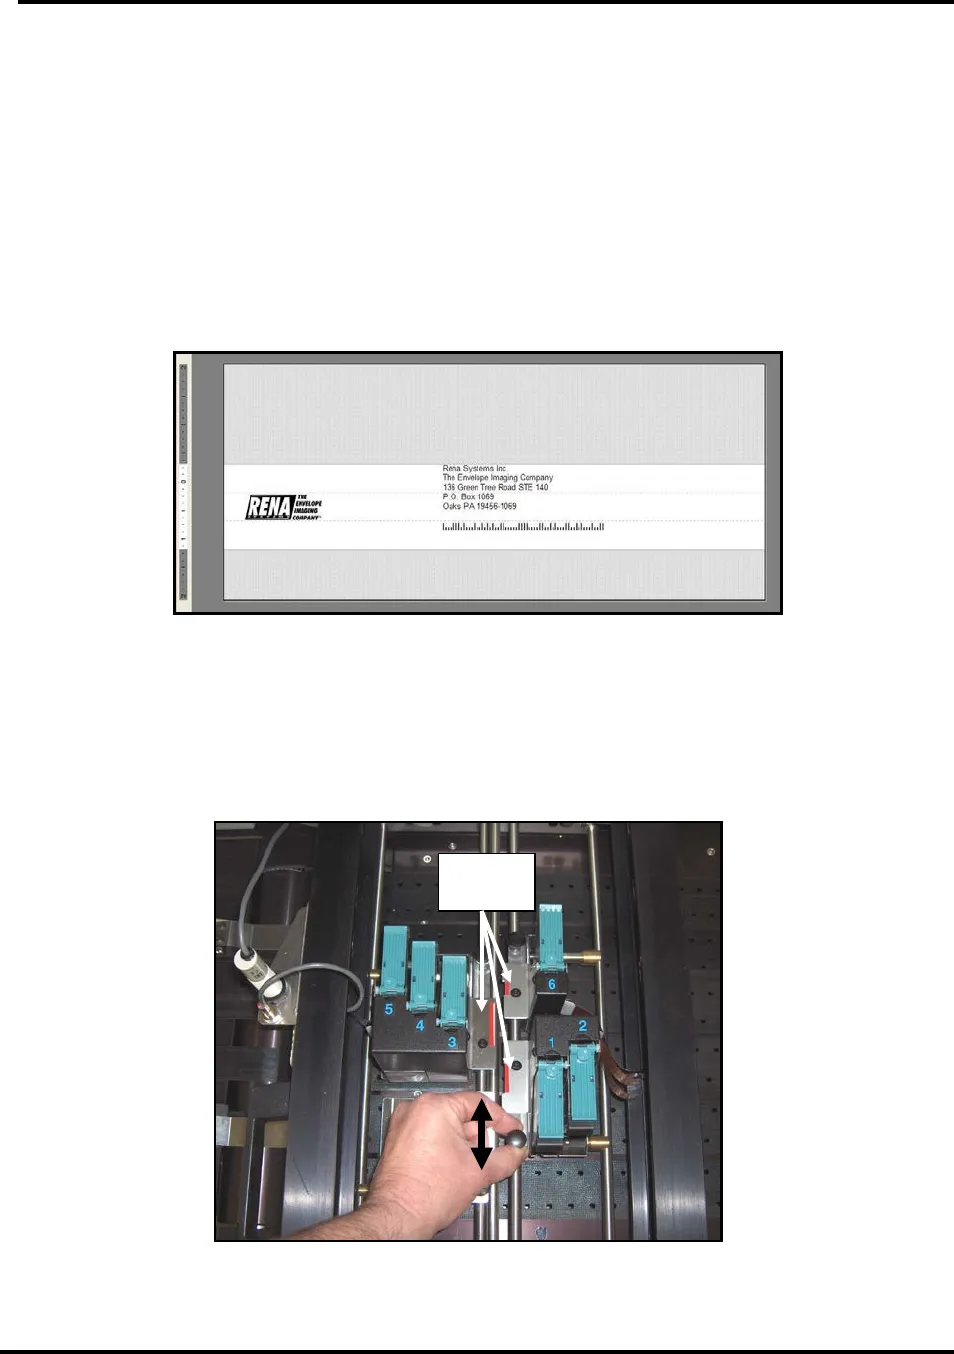
under the printheads, slowly lower the carriage until you just begin to feel a very small amount
of drag between the bottom of the print units and the media.
Tip: If the carriage is adjusted too low, the media may jam or skew as it passes under the print
units. If the carriage is adjusted too high, the image quality will be poor (fuzzy). Ink cartridge
condition can also greatly affect the print quality. A clogged nozzle will produce small white lines
through the image. A partially clogged nozzle will cause ink drops to fire at an angle; producing
fuzzy images. See the “Maintenance” section for ink cartridge cleaning information.
Adjusting the Horizontal Print Position
The horizontal print position is adjusted via your software program. This is normally done by
changing the left margin or the location of the text box, in the layout.
Adjusting the Vertical Print Position
The vertical print position is adjusted by moving the print units. Loosen the thumb screw that
secures the print unit to the shaft. Then slide the print unit to the desired position and secure the
thumb screw. The red label, located at the inside of each print unit, identifies the approximate
print area for each of the print units. See “Head Layouts” on next page.
XPS-ProMail 3.0


