SECTION 2
SETTING UP THE SYSTEM
10
XPS-ProMail System Operations 4-24-14.doc
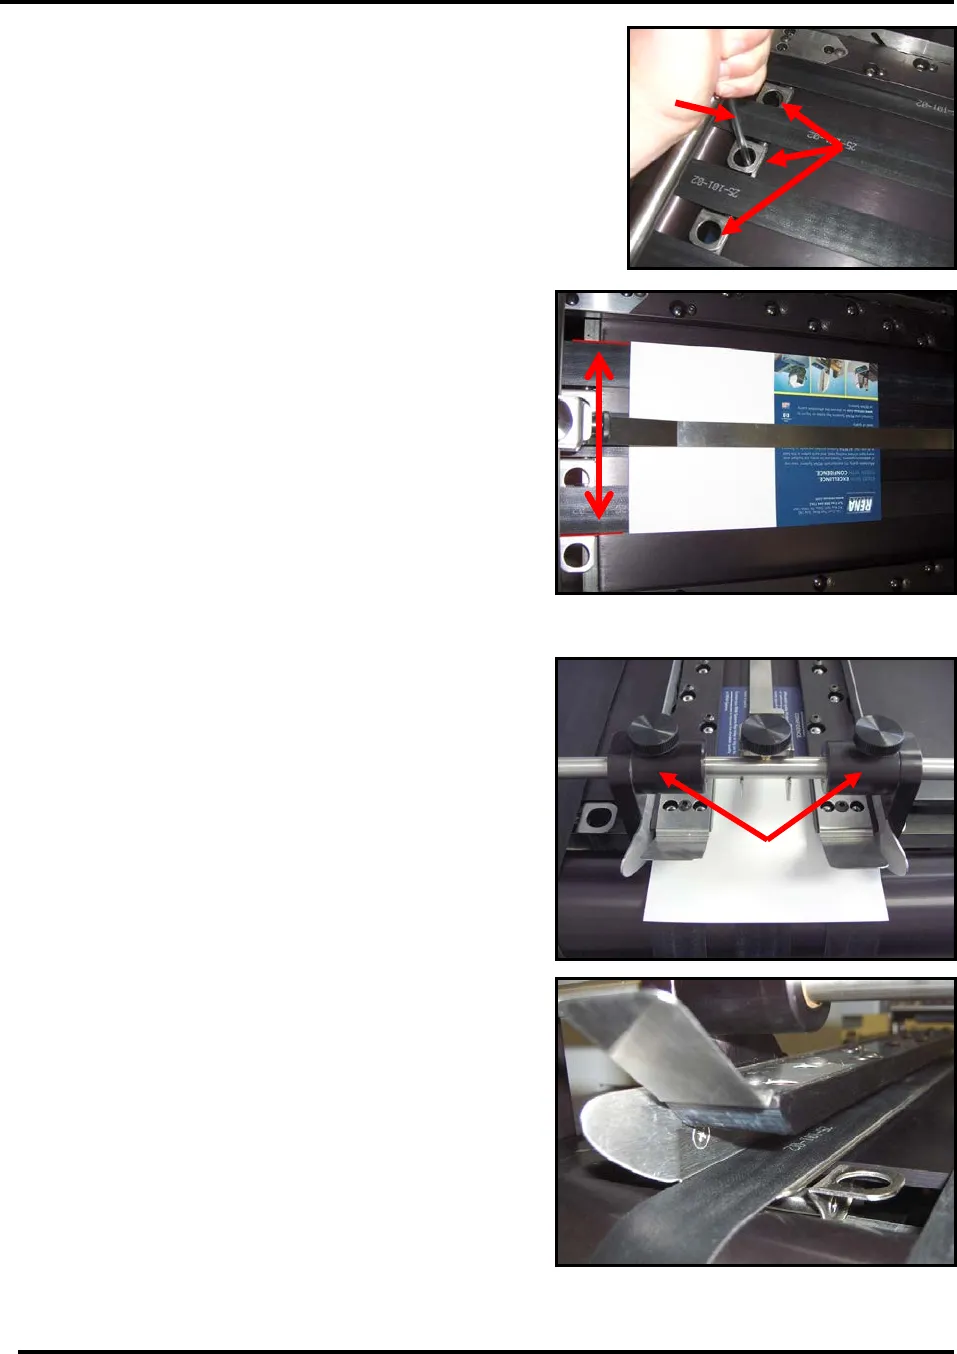
2. Adjust the transport belts so that they are evenly
distributed under the media. Depending on the width
of the media, you may need to use 2, 3 or 4 belts.
The rings [B], in the transport belt guides, are used to
move the belt positions. Turn on the Master Power
button. Set the Transport Base to Manual mode and
set the speed control dial to about 1/4 speed. Insert a
rod of wood or metal [C] into the hole [B] in the belt
guide. Move the belt to the desired location. Repeat
for other belts.
The outer belts should be positioned so they
are close to the outer edges of the media, as
shown. Do not position the belts beyond the
outer edges of the media.
3. STOP the base transport, using the Emergency
Stop button, after making this adjustment.
4. Slide the side guides [D] to within 1/16-inch of
the media, then tighten the side guide securing
knobs [A].
Tip: If you adjust the side guides too tight
against the outer edges of the media; the
media will hesitate as it feeds. If this occurs,
move one of the side guides out a little, to allow
the media to feed without being held back by
the side guides.
IMPORTANT: The bottom plates of the side
guides must slide under the outer belts, as
shown.
When properly positioned; the belt will be
located between the silver metal plate, at the
bottom of the side guide, and the ball guide
assembly.


