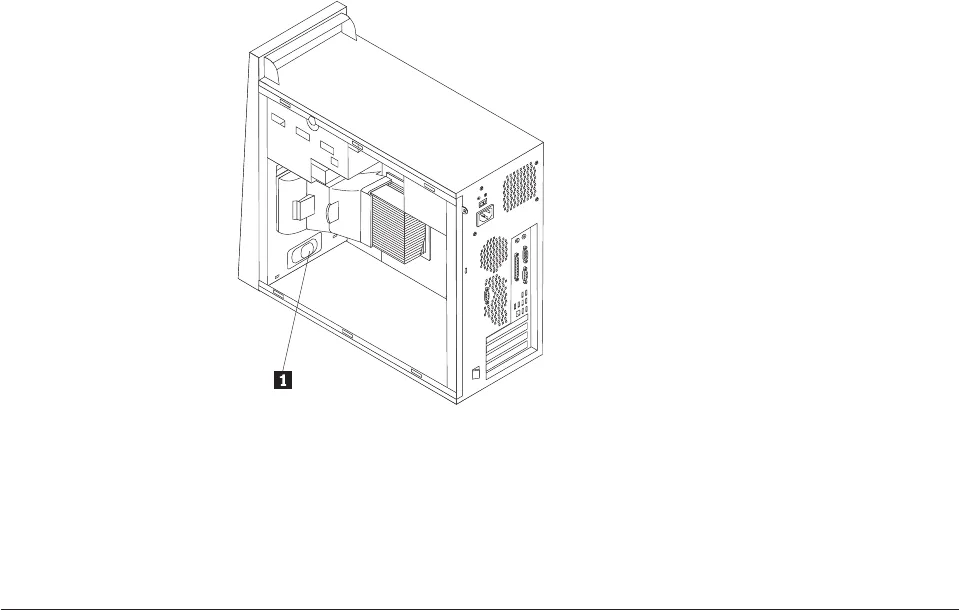
5. Slide the speaker 1 upward until it is free from the metal tabs that secure it
at the bottom. Then pivot the bottom of the speaker outward and remove it
from the chassis.
6. Position the bottom of the new speaker into the metal tabs and pivot the top of
the speaker inward until it snaps into position.
7. Reconnect the speaker cable to the system board. See “Identifying parts on the
system board” on page 4.
8. Reinstall the air baffle.
9. Go to “Completing the installation.”
Completing the installation
After replacing a failed part, you need to install any other removed parts, install
the computer cover, and reconnect any cables, including telephone lines and power
cords. Also, depending on the part that was replaced, you might need to confirm
the updated information in the Setup Utility program. See ″Using the Setup
Utility″ in your User guide or Hardware Maintenance Manual.
To complete the installation:
1. Ensure that all components have been reassembled correctly and that no tools
or loose screws are left inside your computer. See “Locating components” on
page 1 for the location of the various components.
2. Place the hard disk drive bracket back into position and reconnect any cables
that were disconnected from the optional hard disk drive. See “Removing the
hard disk drive mounting bracket” on page 7.
3. Reposition any cables that might impede the replacement of the computer
cover.
4. Position the computer cover on the chassis so that the rail guides on the bottom
of the computer cover engage the rails. Then, push the computer cover closed
until it latches.
34 Hardware Replacement Guide


