Installation
• Make sure that the appliance is not dam-
aged because of transport. Do not con-
nect a damaged appliance. If necessary,
contact the supplier.
• Remove all packaging before first use.
• A qualified and competent person must do
the electrical installation.
• A qualified and competent person must do
the plumbing installation.
• Do not change the specifications or modify
this product. Risk of injury and damage to
the appliance.
• Do not use the appliance:
– if the mains cable or water hoses are
damaged,
– if the control panel, worktop or plinth
area are damaged so that you can get
access to the inner side of the appli-
ance.
Contact your local Customer Care Centre.
• Do not drill into the sides of the appliance
otherwise damage to hydraulic and elec-
trical components may occur.
Warning! Carefully obey the
instructions for electrical and water
connections.
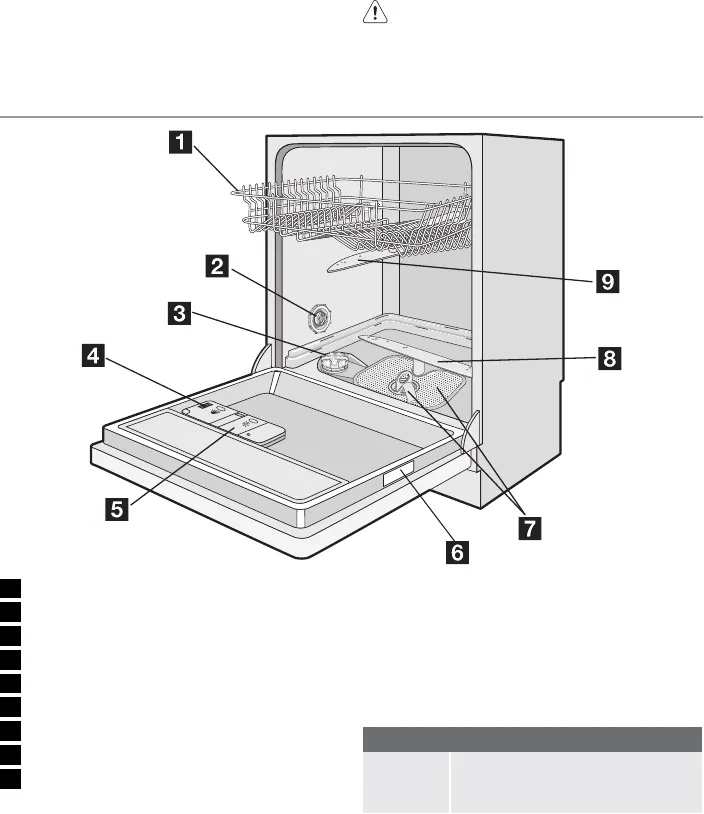
Product description
1 Upper basket
2 Water hardness dial
3 Salt container
4 Detergent dispenser
5 Rinse aid dispenser
6 Rating plate
7 Filters
8 Lower spray arm
9 Upper spray arm
Light beam
After the start of the washing program, a light
beam shows on the floor below the appliance
door.
If the appliance is installed higher with a flush
kitchen furniture door, the light beam will not
be visible.
Light beam
The red
light is on.
Indication of the start of a washing
program. The red light stays on
during the washing program.
electrolux 3


