To remove the chassis intrusion switch and install a replacement, perform the following steps:
1. Disconnectthechassisintrusionswitchcablefromthecontrolpanel(seeFigure 21).
Note the routing of the chassis intrusion cable as you remove the cable from the chassis. The cable is routed through an enlarged hole in the
chassis and through a hole in the disk-drivecagedoor.Thechassisintrusionswitchismountedontheleftfrontofthechassis(see
Figure22).
2. Slide the chassis intrusion switch out of its slot on the chassis and carefully remove the switch and its attached cable from the chassis.
3. Install the replacement chassis intrusion switch and cable.
4. Replace the computer cover. Then reconnect your computer and peripherals to their power sources, and turn them on.
5. To reset the chassis intrusion detector, enter System Setup, select System Security, and reset Chassis Intrusion to Enabled or
Enabled-Silent (see your User's Guide for instructions).
System Power Supply
System Power Supply Rotation
To access some components on the system board, you may have to rotate the system power supply out of the way. To rotate the power supply,
perform the following steps.
1. Remove the computer cover.
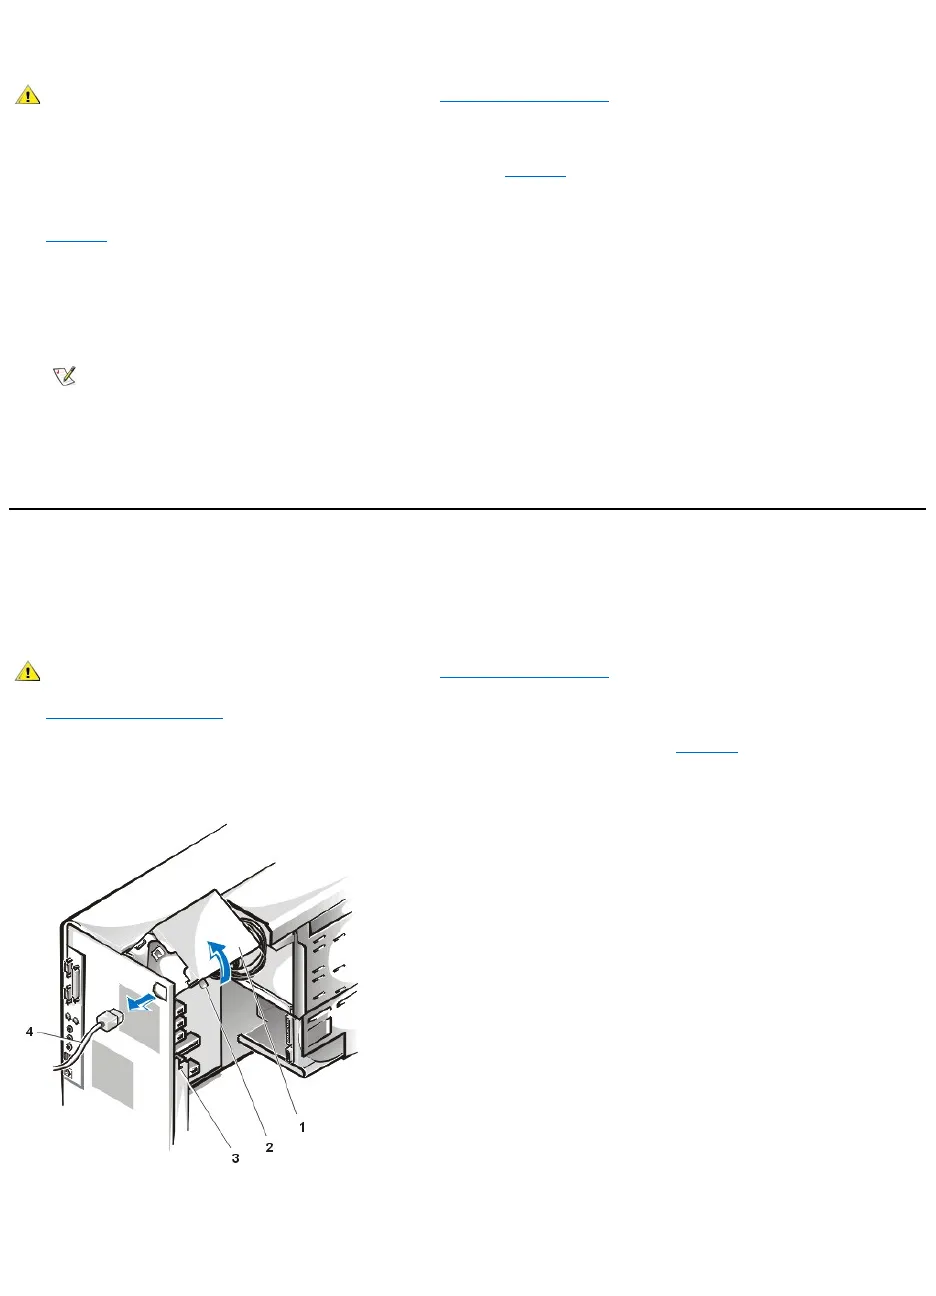
2. Disconnect the AC power cable from the AC power receptacle on the back of the power supply (see Figure 23).
Figure 23. System Power Supply Rotation
3. Free the power supply by pressing the securing tab labeled "RELEASE - >," and rotating it upward until it locks in its extended position.
System Power Supply Removal
To remove the system power supply, perform the following steps: