2
Preparations
Prepare the printer for use by installing it and connecting the power cord.
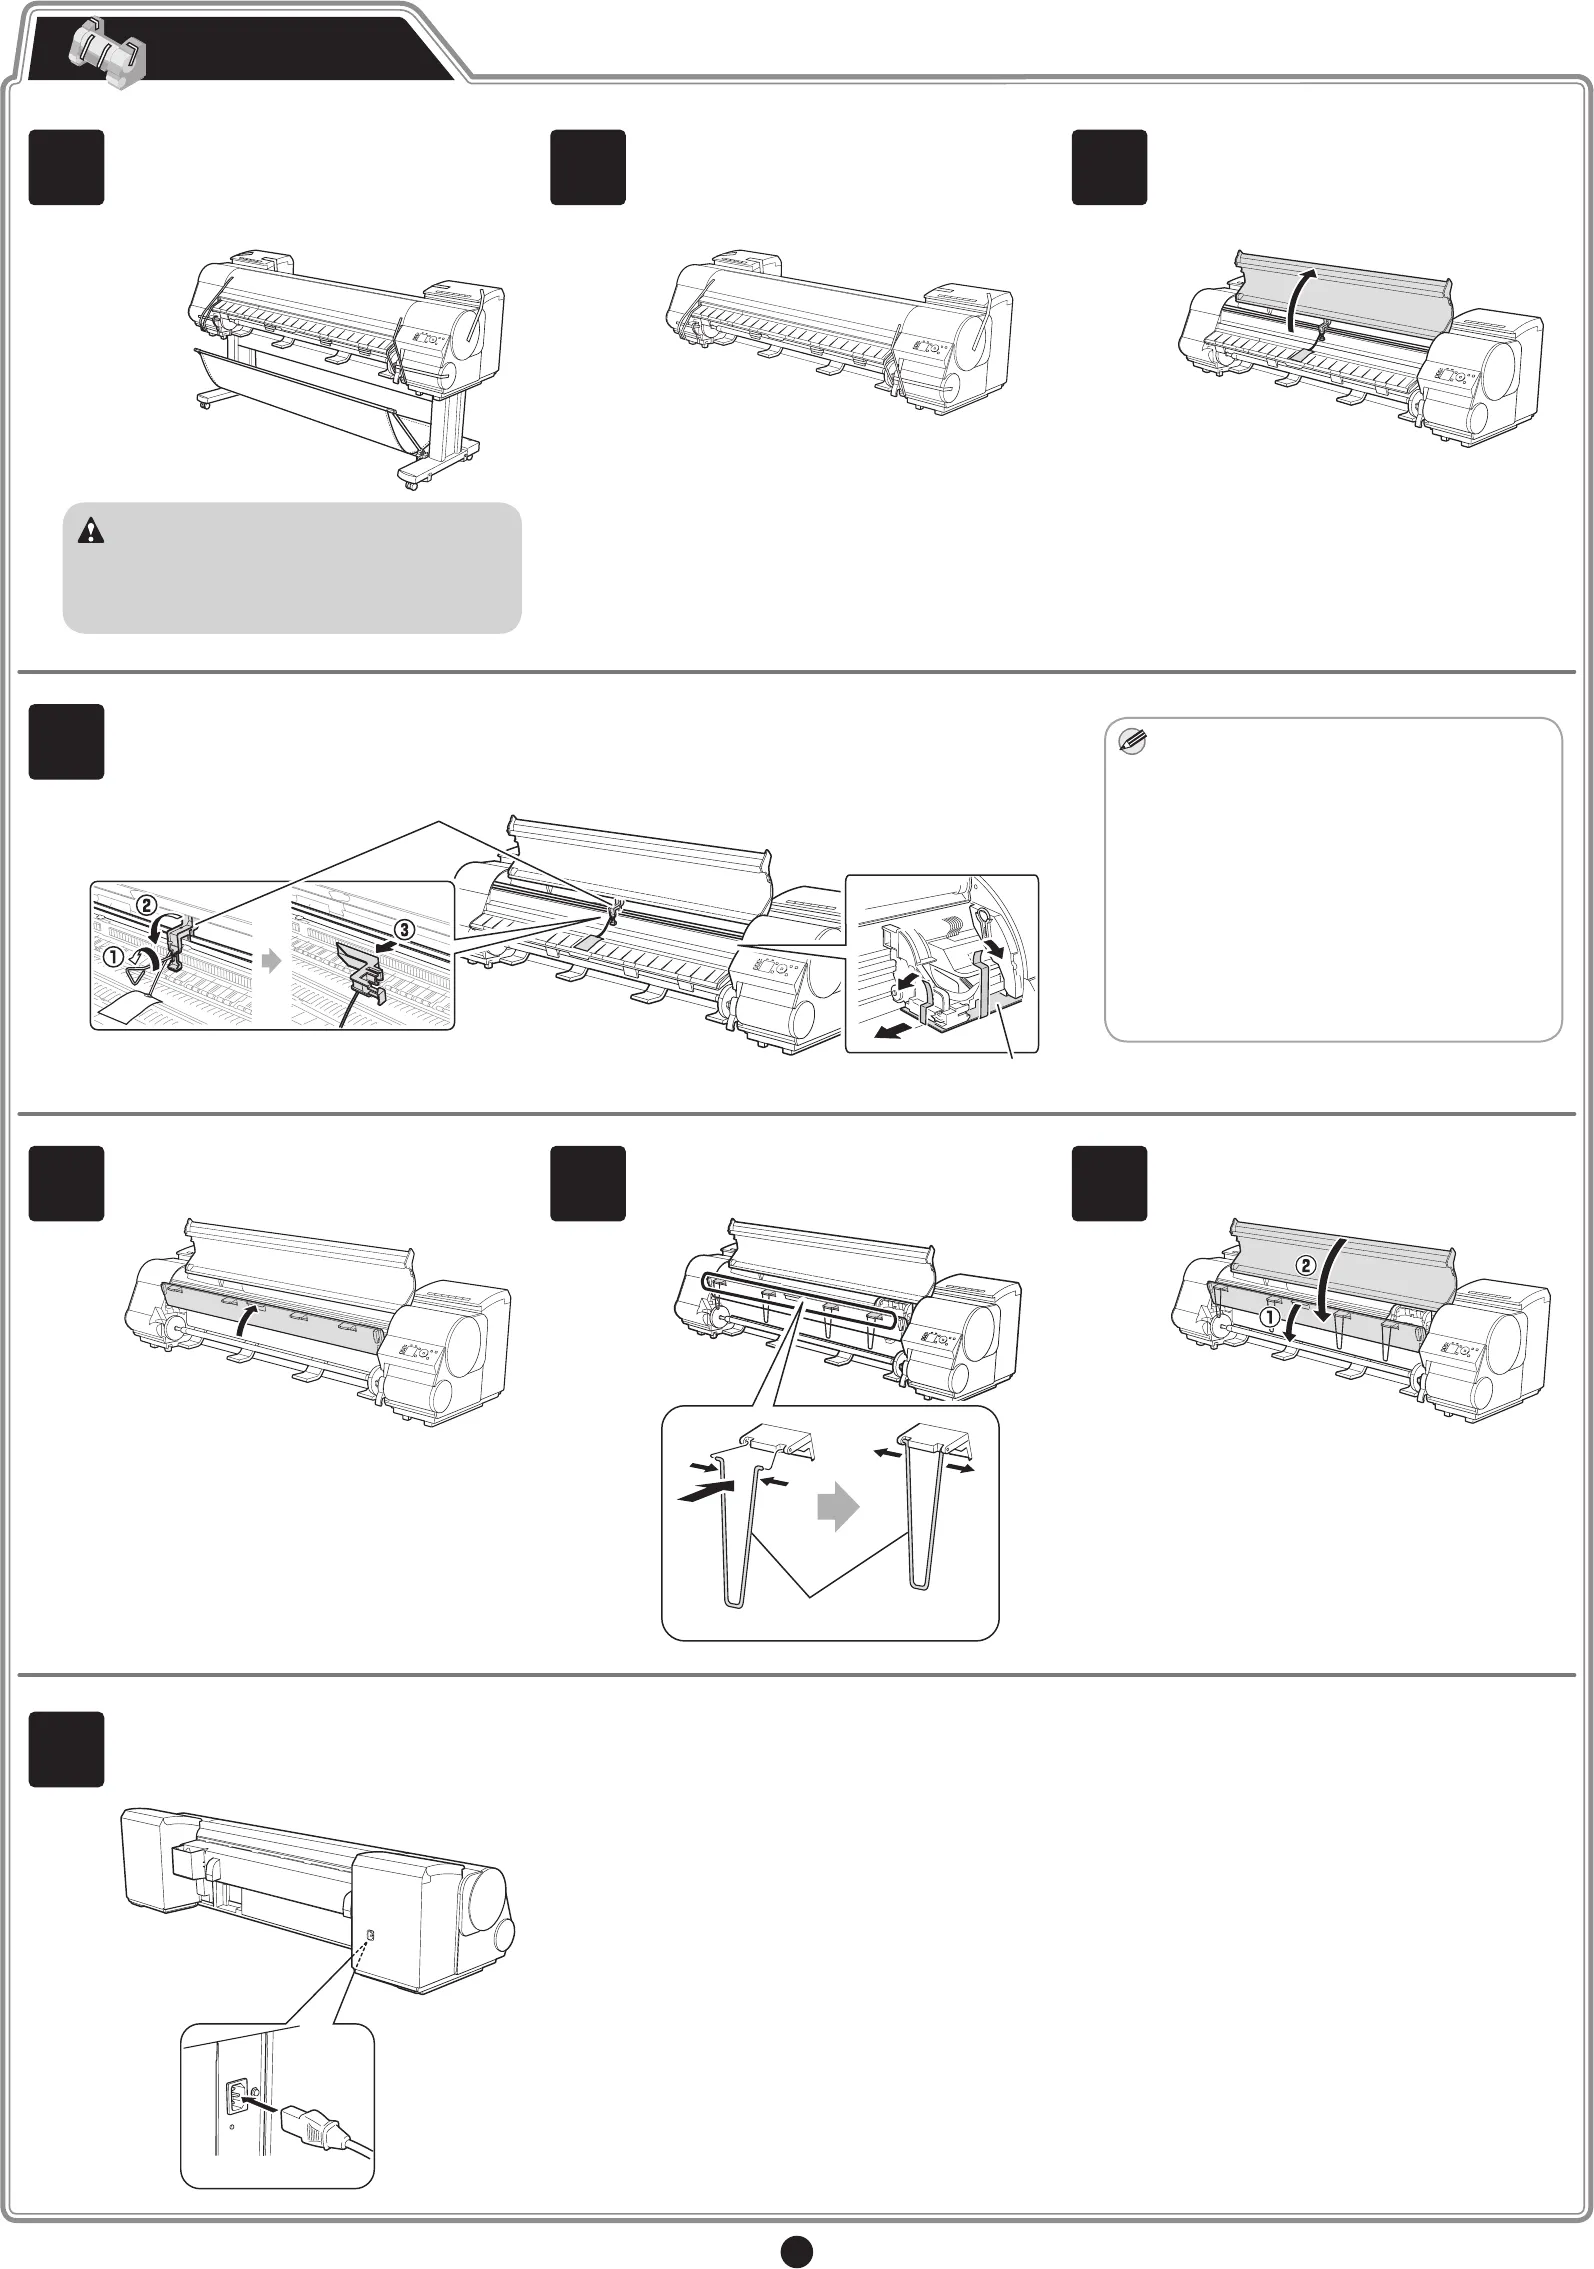
1
Install the printer.
Assemble the stand and install the printer
referring to the Printer Stand Setup Guide
included with the stand.
Caution
• It weighs approximately 100 kg by itself.
Moving the printer requires at least
six people to lift it from both sides. Be
careful to avoid back strain and other
injuries.
2
Remove the tape and other packing
materials attached to the printer.
3
Open the top cover.
4
Use the Allen wrench to loosen the screw of the belt stopper (a) and then remove the screw
from the belt stopper. Rotate the belt stopper to the left to remove it. Pull the carriage spacer (b)
in the direction indicated by the arrow to remove it.
a
b
MEM
• The Belt Stopper, screw, carriage
spacer, and Allen Wrench are needed
when moving the printer to another
location later. Keep the Belt Stopper,
screw, carriage spacer, and Allen
Wrench which have been removed.
Neglecting to attach the Belt Stopper
and carriage spacer may cause damage
to the printer when moving the printer to
another location.
• After opening the Top Cover, Cleaning
Brush is stored on the right. Take out
the brush when cleaning inside the Top
Cover.
5
Lift the ejection guide.
6
Attach the four ejection supports (a) to the
back of the ejection guide.
a
7
Close the ejection guide and the top
cover.
8
Plug the power cord into the power supply
connector on the back of the printer and
plug the other end into an electric outlet.


