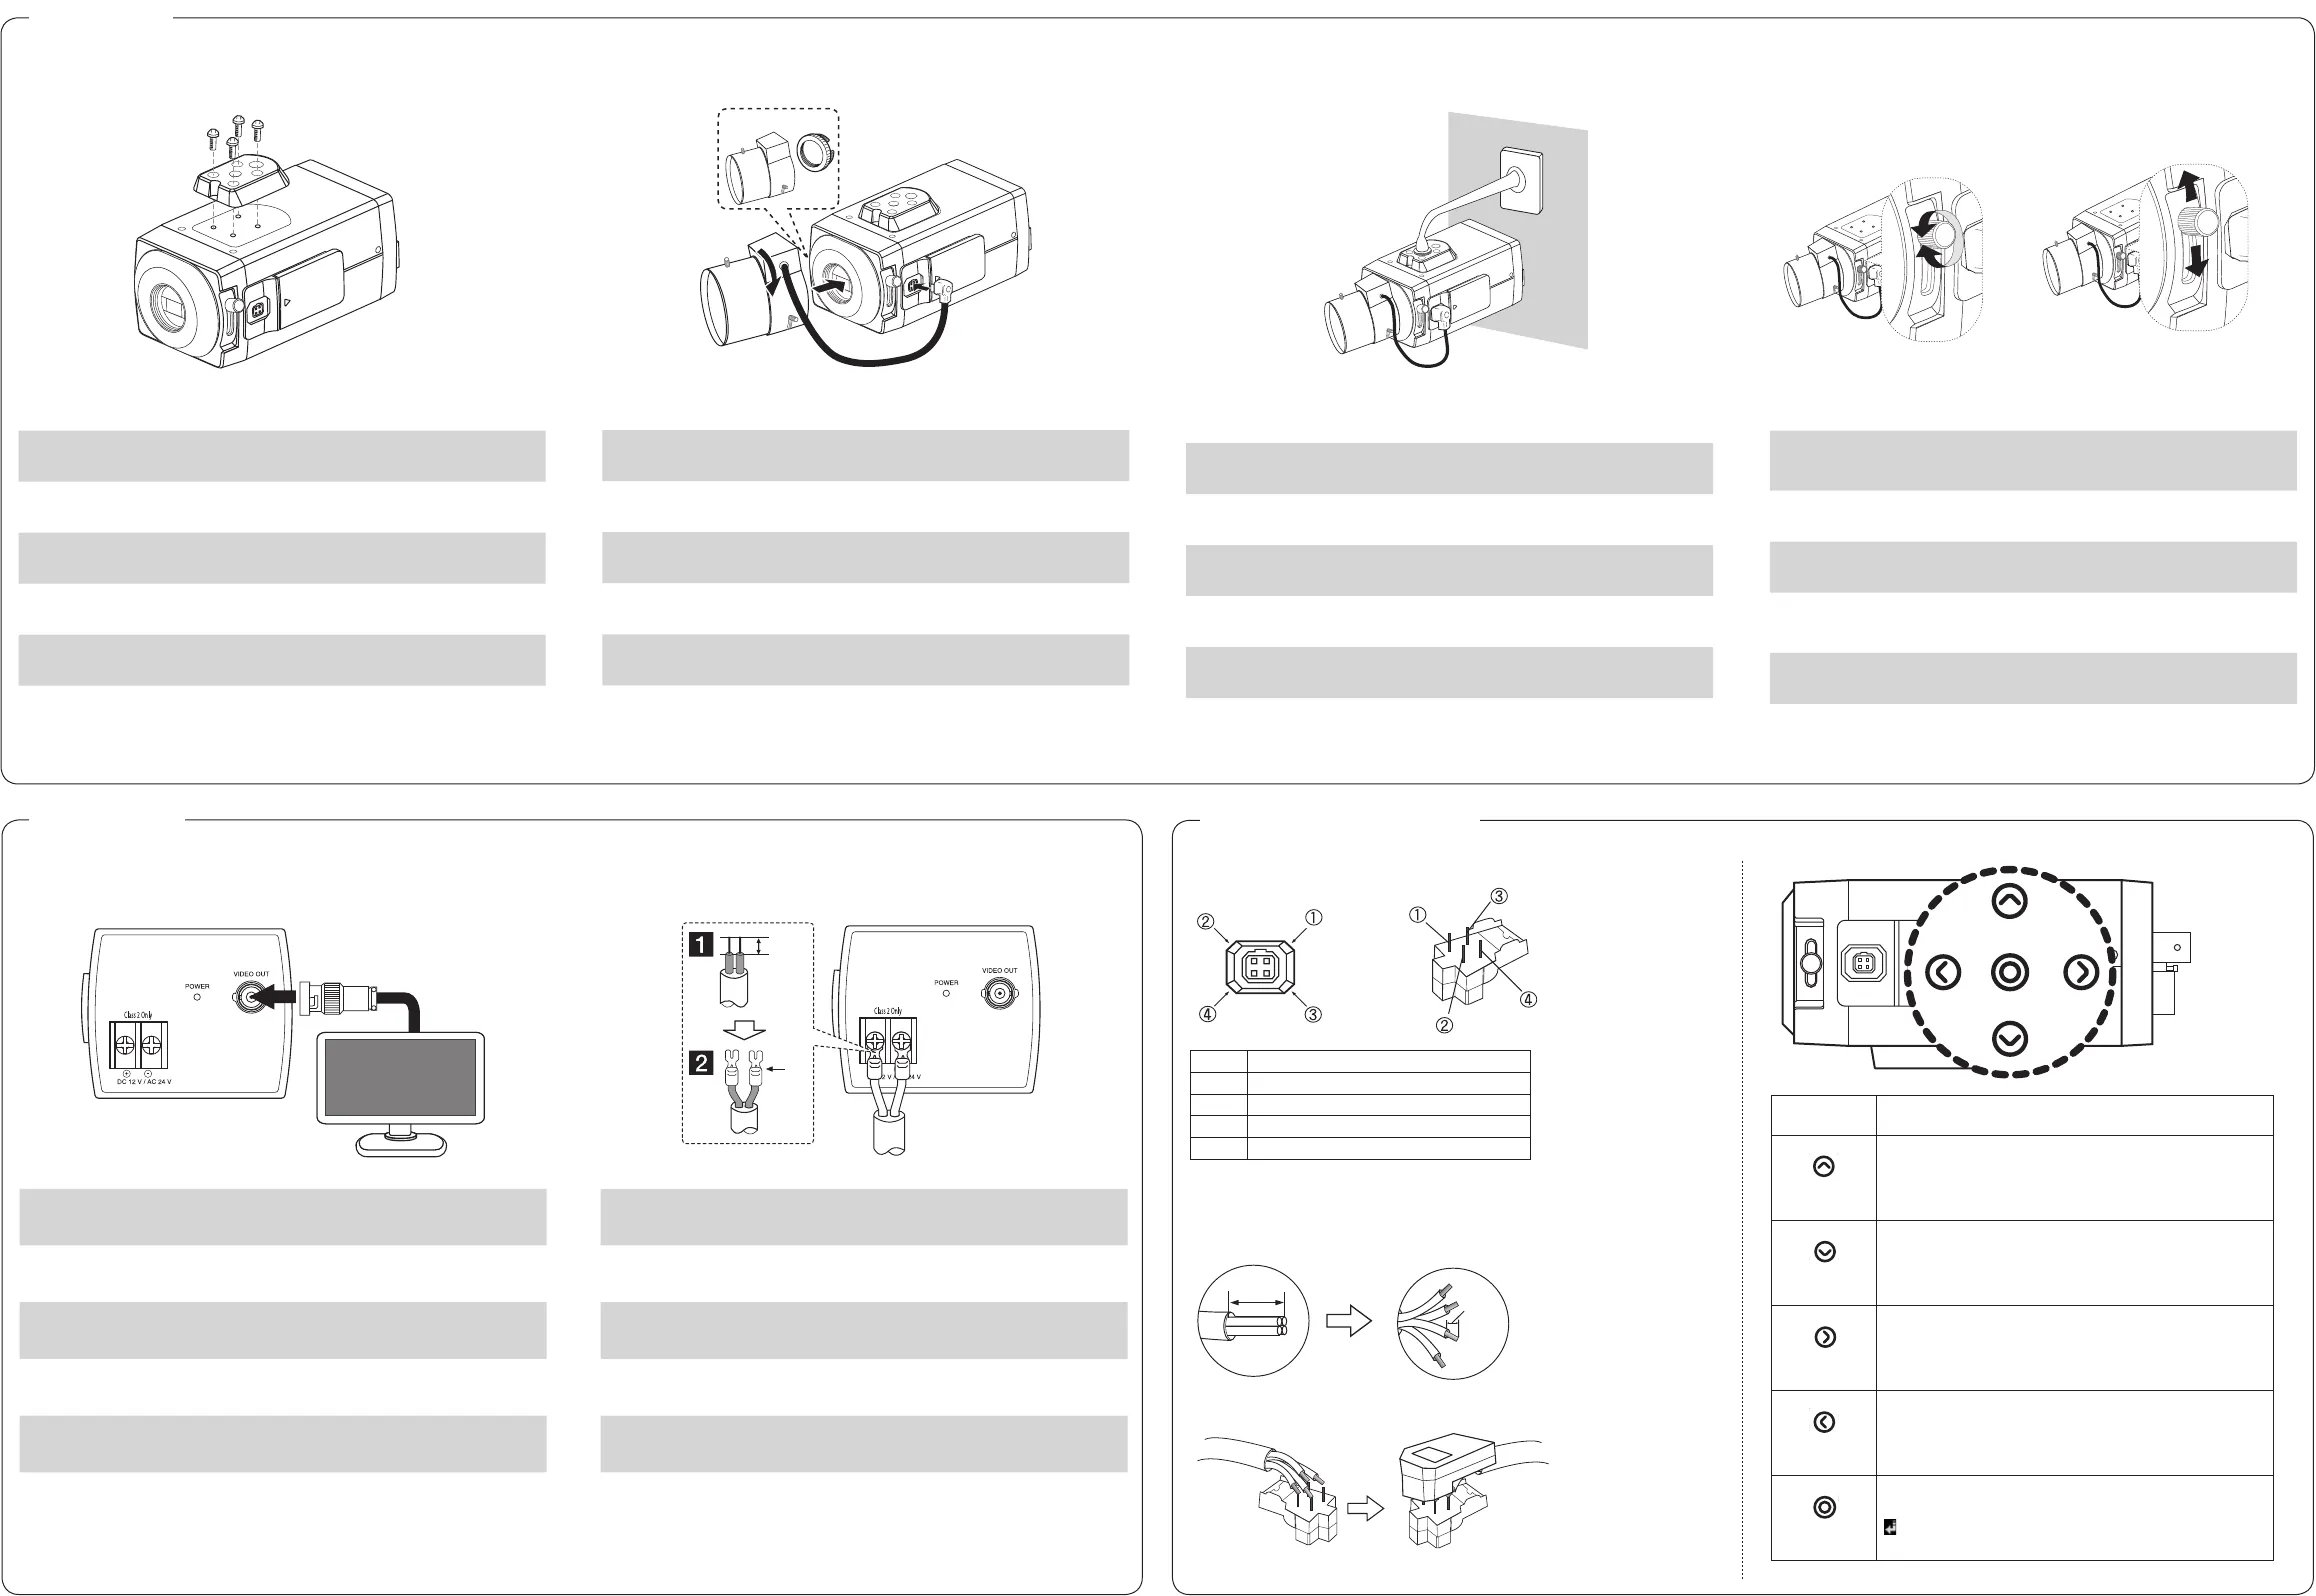
1. Install the camera and mounting bracket securely.
<ITALIANO> Montare la videocamera alla staffa in maniera sicura.
<ESPAÑOL> Monte la cámara y el soporte.
<PORTUGUÊS> Instale a câmera e o suporte de montagem firmemente.
<PYCCKNЙ> Надежно установить камеру и монтажный кронштейн.
<TÜRKÇE> Kamera ve kamera bağlantı parçasını sağlam bir şekilde monte edin.
2. Install the C or CS mount type lens.
C mount type
CS mount type
Note:
Turn off the camera essentially before the lens connection or replacement.
<ITALIANO> Installare un obiettivo di tipo C o CS.
<ESPAÑOL> Instale un objetivo C o CS.
<PORTUGUÊS> Instale as lentes de montagem do tipo C ou CS.
<PYCCKNЙ> Установить оправы объектива типа C или CS.
<TÜRKÇE> C ve CS tipi lens takın.
3. Install the camera and mounting arm.
<ITALIANO> Montare la videocamera al braccio.
<ESPAÑOL> Monte la cámara y el brazo de soporte.
<PORTUGUÊS> Instale a câmera e o braço de montagem.
<PYCCKNЙ> Установить камеру и монтажный кронштейн.
<TÜRKÇE> Kamera ve kamera bağlantı parçası kolunu monte edin.
4. Loosen the flange-back fixing lever. Up and down the flange-back adjusting
lever to obtain a focused point.
<To loosen the lever.> <To adjust the focus.>
<ITALIANO>
Allentare la leva per il fissaggio della flangia posteriore. Sollevare e
abbassare la leva di regolazione della flangia posteriore per ottenere
un punto di messa a fuoco.
<ESPAÑOL>
Afloje la palanca de fijación. Suba o baje la palanca de ajuste para
obtener un punto de enfoque
<PORTUGUÊS>
Afrouxe o nivelador de fixação da flange traseira. Suspenda e abaixe o
nivelador de fixação da flange traseira para obter o ponto do foco.
<PYCCKNЙ>
Ослабить крепежные винты заднего фланца. Использовать
регулирующее кольцо заднего фланца для достижения точки
фокуса.
<TÜRKÇE>
Flanş arka kolu tutan vidaları gevşetin. Flanş arka ayar halkasını
kullanarak odak noktasını belirleyin.
1. Connect the display device.
<ITALIANO> Collegare il dispositivo del display.
<ESPAÑOL> Conecte el dispositivo de visualización.
<PORTUGUÊS> Ligue o visor.
<PYCCKNЙ> Подключите устройство отображения.
<TÜRKÇE> Görüntüleme aygıtını bağlayın.
2.
Connect the power source.
2mm
<ITALIANO> Collegare l’alimentazione elettrica.
<ESPAÑOL> Conecte la fuente de energía.
<PORTUGUÊS> Conecte a fonte de alimentação.
<PYCCKNЙ> Подключите источник питания.
<TÜRKÇE> Güç kaynağını bağlayın.
Connections
Installation
Lens iris output connector
Pin layout for the lens iris output connector.
No. DC type lenses
1 Damping -
2 Damping +
3 Drive +
4 Drive -
Rewire the lens iris plug
1. Cut off the plug of the lens cable, cut off
approximately 8 mm of the insulation, and then strip approximately 2 mm of
the ends of the cable sheaths.
2. Solder the ends of the cable wires to the ends of the pins, and then attach
the cover of the lens iris plug.
OSD Menu Control Buttons
BUTTON Description
UP
Used to move upper direction on the menu screen. Use this
button to select an item or adjust the parameters.
DOWN
Used to move lower direction on the menu screen. Use this
button to select an item or adjust the parameters.
RIGHT
Moves the cursor to the right. Used to increment the value
selected in the menu. The parameter changes each time this
button is pressed.
LEFT
Moves the cursor to the left. Used to decrement the value
selected in the menu. The parameter changes each time this
button is pressed.
SET
Executes selections and displays a submenu for an item with the
mark.
Additional Information


