4
English
TroubleshootingSetting/AdjustmentPrior to use Installation
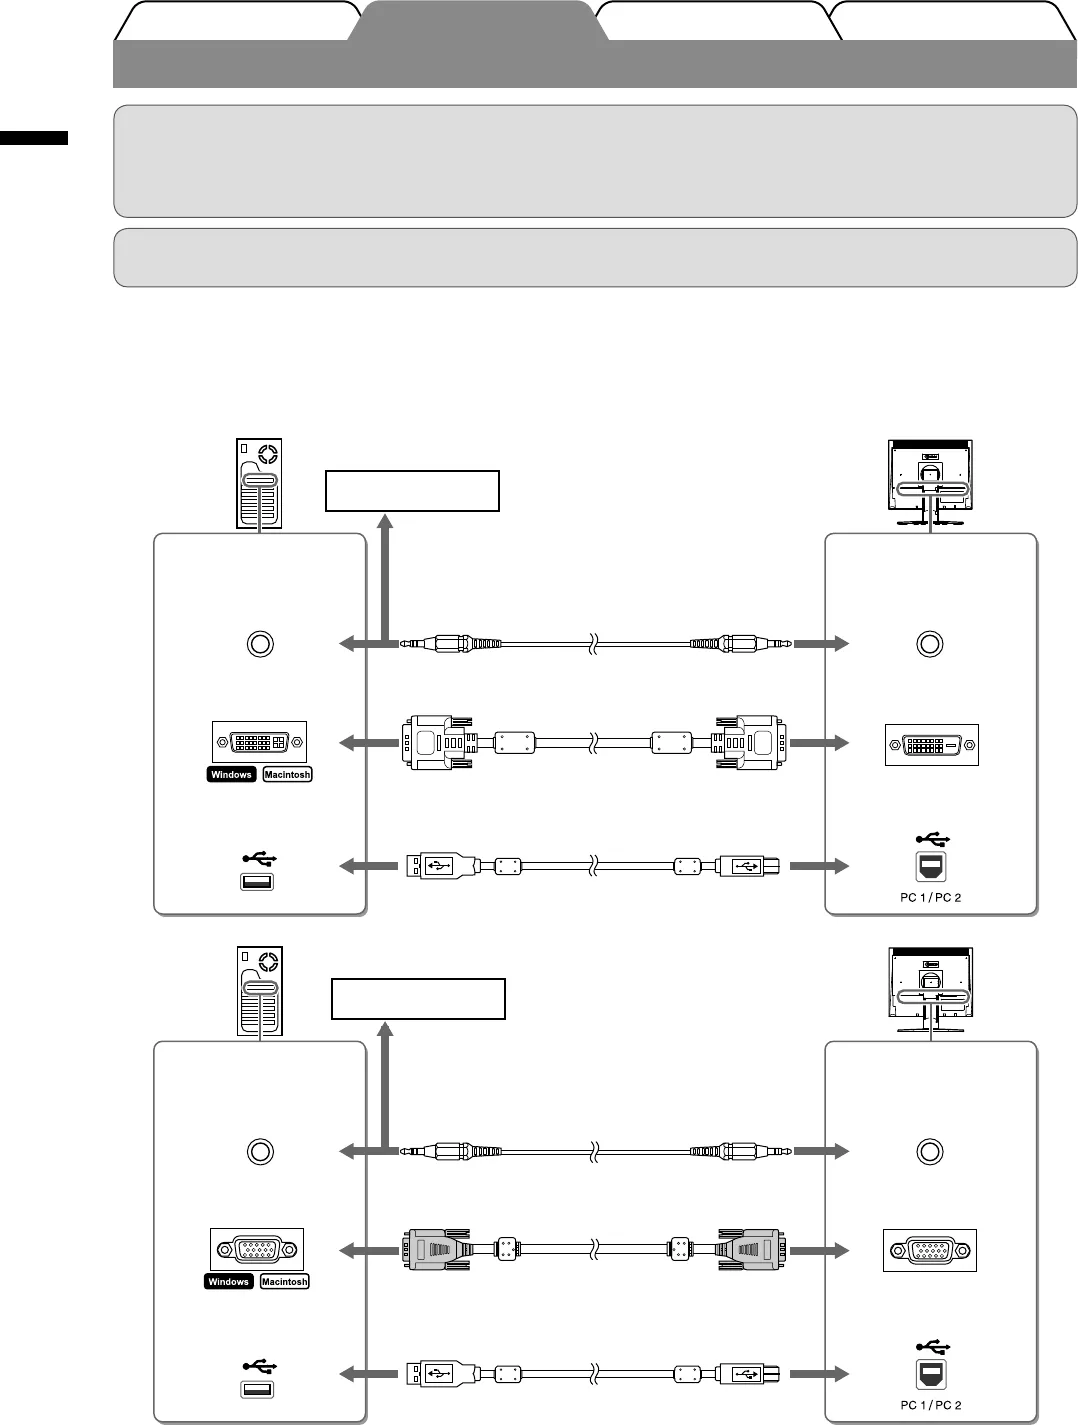
Connecting Cables
Attention
•WhenreplacingthecurrentmonitorwithaS1932monitor,besuretochangethePCsettingsfor
resolutionandverticalfrequencytothosewhichareavailablefortheS1932monitorreferringtothe
resolutiontable(backofcoverpage)beforeconnectingthePC.
NOTE
•WhenconnectingtwoPCstothemonitor,refertotheUser’sManualontheCD-ROM.
1
Check that the monitor and the PC are powered off.
2
Connect the monitor to the PC with a signal cable that matches the connectors.
Afterconnectingthecableconnectors,tightenthescrewsoftheconnectorstosecurethecoupling.
Connectors on
the PC
DVIconnector
USBDownstream
Connectors on
the monitor
DVI-Dconnector
USBUpstream
Stereo mini jack cable (supplied)*
1
EIZO USB cable MD-C93 (supplied)*
2
CD player, etc
Signal cable FD-C39 (supplied)
Audiooutput
connector
Audioinput
connector
Digital connection
Connectors on
the PC
D-Submini15-pin
connector
USBDownstream
Connectors on
the monitor
D-Submini15-pin
connector
USBUpstream
Stereo mini jack cable (supplied)
*
1
EIZO USB cable MD-C93 (supplied)
*
2
CD player, etc
Signal cable MD-C87 (supplied)
Audiooutput
connector
Audioinput
connector
Analog connection
*
1
Required to use the speaker of the monitor (page 6).
*
2
Required when performing the monitor adjustments using the ScreenManager Pro for LCD software. (Refer to
the User’s Manual on the CD-ROM.)
3
Plug the power cord into a power outlet and the Power connector on the monitor.


