4
w w w . b i s s e l l . c o m 8 0 0 . 2 3 7 . 7 6 9 1
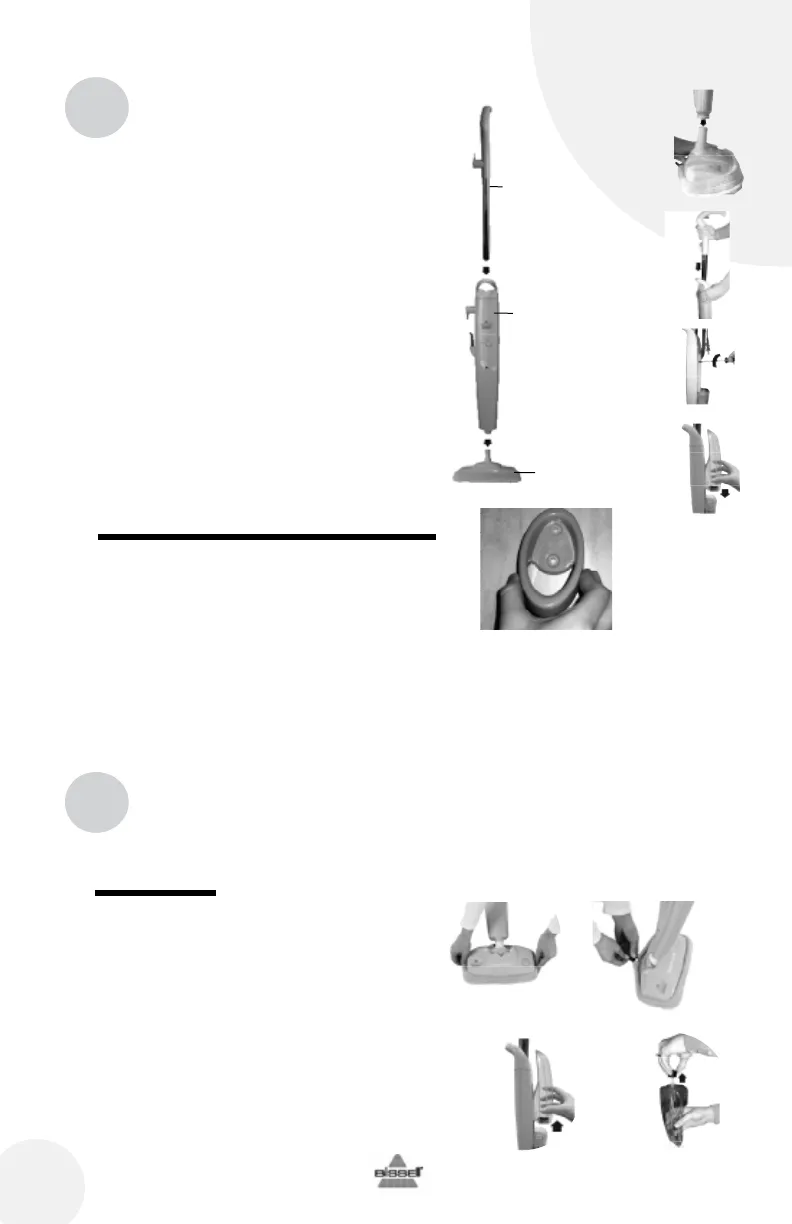
Getting ready
1. Attach mop pad.
A. Set swivel mop head in mop pad, mak-
ing sure toggle is located on the back.
B. Tighten mop pad by pulling on elastic
cord while pressing on toggle.
2. Fill the water tank
A. Remove tank by lifting straight up and
away from unit.
B. Unscrew cap at bottom of water tank and
remove the insert assembly. Fill water tank
with water. Replace insert assembly and cap,
tighten until snug. Replace water tank on unit.
Thoroughly sweep or vacuum floor prior to cleaning with the Steam Mop.
1. With the screw holes at the top, hold the Storage Hook in the location on the wall you want
it to hang. Be sure a stud has been located so it can hang securely. With a pencil, mark the
position of both screw holes
2. Drill 1/8” diameter holes in the center of the pencil marks.
3. Place storage hook over drilled holes and secure by screwing in place with the provided screws.
Wall Storage Hook (select models only)
Your BISSELL Steam Mop may have come with
a storage hook. The storage hook provides a
convenient way to store your Steam Mop. You
may choose to hang it in a closet, utility room, or
any location that works for you.
Operation
Handle Assembly
Lower Body
Swivel Mop Head
1
2
3
4
1A 1B
Your Steam Mop assembles quickly and easily.
The only thing you will need for assembly is a
Phillips head screwdriver.
Your
Steam Mop comes in three easy to assemble
components
Handle Assembly
Lower Body
Swivel Mop Head
1. Attach lower body to swivel mop head
and secure with small Phillips head screw.
Tighten until secure.
2. Slide handle assembly down into lower body
until it will go no further.
3. Secure the handle with large Phillips head
screw through the screw. Tighten until secure.
4. Slide water tank onto lower body by lining up
vertical glides and gently sliding tank into place.
Assembly
2A 2B


