-2
PRODUCT DISPOSAL
This product utilizes tin-lead solder, and lamp containing a small amount of mercury.
Disposal of these materials may be regulated due to environmental considerations. For
disposal or recycling information, please contact your local authorities, the Electronics
Industries Alliance: www.eiae.org, the lamp recycling organization www.lamprecycle.org,
or Sharp at 1-800-BE-SHARP.
U.S.A. ONLY
This SHARP projector uses an LCD (Liquid Crystal Display) panel. This very sophisticated panel contains 1,024,000
pixels (x RGB) TFT’s (Thin Film Transistors). As with any high technology electronic equipment such as large
screen TVs, video systems and video cameras, there are certain acceptable tolerances that the equipment must
conform to.
This unit has some inactive pixels within acceptable tolerances which may result in inactive dots on the picture
screen. This will not affect the picture quality or the life expectancy of the unit.
• Microsoft
®
and Windows
®
are registered trademarks of Microsoft Corporation in the United States and/or
other countries.
• PC/AT is a registered trademark of International Business Machines Corporation in the United States.
• Adobe
®
Reader
®
is a trademark of Adobe Systems Incorporated.
• Macintosh
®
is a registered trademark of Apple Computer, Inc. in the United States and/or other countries.
• PJLink is a registered trademark or an application trademark in Japan, the United States and/or other
countries/regions.
• All other company or product names are trademarks or registered trademarks of their respective compa-
nies.
Caution Concerning Lamp Replacement
See “Replacing the Lamp” on page 61.
E.U. ONLY
Authorized representative responsible for the European Union Community Market
SHARP ELECTRONICS (Europe) GmbH
Sonninstraße 3, D-20097 Hamburg
Downloaded From projector-manual.com Sharp Manuals
-32
Image Projection
END
TESTPATTERN
ADJUST
RESET
H&V KEYSTONE H: 0 V: 0
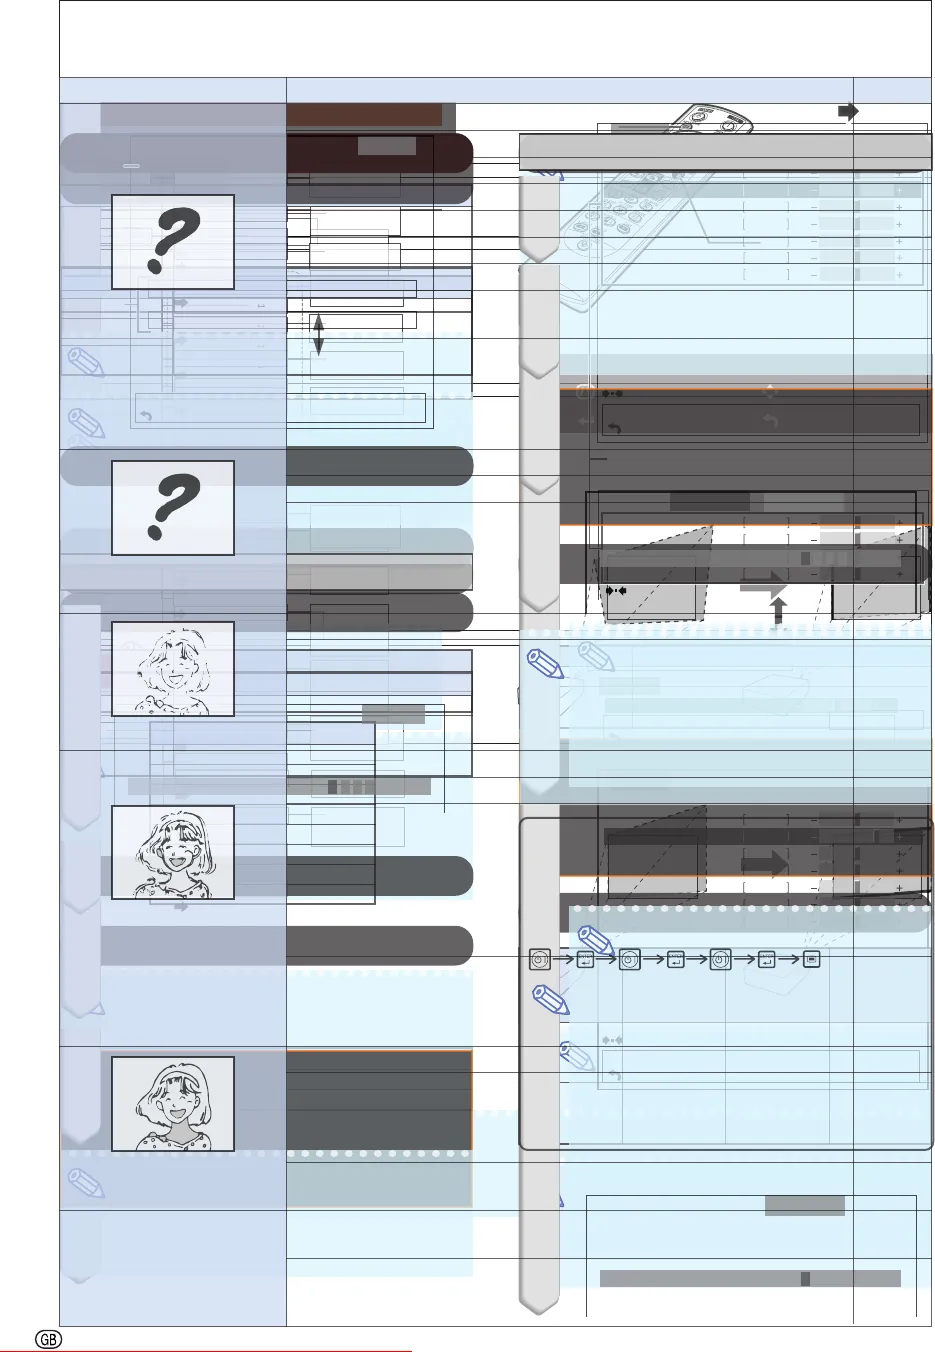
" On-screen Display (Keystone Correction mode)
KEYSTONE
button
MOUSE/Adjustment
buttons ( ' / " / \ / | )
RETURN button
• RETURN
•
•
When the image is projected either from the top
or from the bottom towards the screen at an angle,
the image becomes distorted trapezoidally.
The function for correcting trapezoidal distortion
is called Keystone Correction.
This projector is equipped with an ÒAuto V-Key-
stone CorrectionÓ function that automatically cor-
rects any trapezoidal distortion within the pro-
jected image. The correction is made automatically
provided the vertical incline or decline is within
±12 degrees.
•
When you want to make fine adjustments after the
Auto V-Keystone Correction function has been acti-
vated, or when you want to make corrections without
using the Auto V-Keystone Correction function, you
can make corrections manually using the following
procedure.
1
Press
on the remote
control to enter the Keystone Correc-
tion mode.
• KEYSTONE
2 Press ' or " to parallelize the
left and right sides, or press
\ or | to parallelize the upper
and lower sides of the projected
image.
•
''
''
'
""
""
"
\\
\\
\
||
||
|
3 Press .
•
• KEYSTONE
V ertical Keystone Correction
(Adjustment with
' / "
)
Horizontal Keystone Correction
(Adjustment with
\ / |
)
Downloaded From projector-manual.com Sharp Manuals
-40
Menu Items
The following shows the items that can be set in the projector.
ÒPictureÓ menu
+30-30
+30-30
+30-30
+30-30
+30-30
+30-30
Tint
Color
Reset
Sharp
Bright
+30-30
Contrast
Red
Blue
Progressive
Picture
Main Menu
Sub Menu
CLR Temp
Page 45
Page 45
Page 45
Page 45
Page 46
Page 45
Picture Mode
Standard
Presentation
Movie
Game
sRGB
*1
*2
*2
*2
*3
*3
3D Progressive
2D Progressive
5500K
6500K
7500K
8500K
9300K
10500K
Film Mode
Page 46
Auto
Off
Eco+Quiet Mode
Page 46
On
Off
DNR
Page 46
Off
Level 1
Level 2
Level 3
MNR
Page 46
Off
Level 1
Level 2
Level 3
*1 Item when inputting RGB signal through COMPUTER/COMPONENT 1, 2 or DVI-D
*2 Items when inputting Component signal through COMPUTER/COMPONENT 1 or 2, or when selecting VIDEO or
S-VIDEO
*3 “Progressive” and “Flim Mode” can be adjusted only when 480 I , 576I , 1035I or 1080I signal is input.
Downloaded From projector-manual.com Sharp Manuals
-42
ÒNetworkÓ menu
ÒProjecter adjustment (PRJ-ADJ)Ó menu
Main Menu
Network
Page 54
On
Off
IP Address
Subnet Mask
Gateway
Page 54
TCP/IP
Page 55
DHCP Client
Page 55
Page 55
Password
Old Password
New Password
Reconfirm
MAC Address
Page 55
Projector
*2
*1
*2
On
Off
Normal
High
LAN/RS232C
Monitor Out
RS-232C
PRJ-ADJ
Enable
Disable
9600 bps
38400 bps
115200 bps
Enable
Disable
Main Menu Sub Menu
Page 51
FAO
VAO
Audio Out
Page 51
Page 52
Page 51
Page 51
Speaker
Page 51
Fan Mode
Page 52
All Reset
Page 53
On
Off
On
Off
Lamp Timer (Life)
Auto Power Off
Old Code
New Code
Reconfirm
Page 53
System Sound
Page 51
Page 51
System Lock
Pages 52 and 53
On
Off
Auto Restart
Page 51
*1 Adjustable only when DHCP Client is set to “Off”
*2 Display only
Menu Items
Downloaded From projector-manual.com Sharp Manuals
-44
3 Press
''
''
' or
""
""
" and select
ÒBrightÓ to adjust.
• The selected item is highlighted.
To adjust the pro-
jected image while
watching it
Press ENTER .
• The selected item (e.g. “Bright”) is dis-
played by itself at the bottom of the
screen.
• When pressing
''
''
' or
""
""
" , the following
item (“Red” after “Bright”) will be dis-
played.
Note
• Press ENTER again to return to the
previous screen.
4 Press
\\
\\
\ or
||
||
| to adjust the item
selected.
• The adjustment is stored.
5 Press MENU .
• The menu screen will disappear.
Note
• Menu buttons do not function while the projector is operating the “Auto Sync”, “Break Timer”, “FREEZE”,
or “AV MUTE” functions.
The item displayed by itself
Press ENTER.
Using the Menu Screen
Downloaded From projector-manual.com Sharp Manuals
-46
44
44
4
Selecting the Progressive Mode
55
55
5
Selecting the Film Mode
This function provides high-quality playback of
images originally projected at 24 fps, such as
movies on DVDs.
Description
Films are detected automatically.
Films are not detected.
Selectable items
Auto
Off
Note
• When using progressive inputs, “Film Mode”
cannot be selected.
• The “Film Mode” function does not work when
“2D Progressive” is selected in “Progressive
Mode”.
66
66
6
Reducing Image Noise (DNR)
Video digital noise reduction (DNR) provides high
quality images with minimal dot crawl and cross
color noise.
Description
DNR does not function.
Sets the DNR level.
Selectable items
Off
Level 1–3
Note
• Set a level so as to view a clearer picture.
Make sure to set ÒDNRÓ to ÒOffÓ in the
following cases:
• When the image is blurry.
• When the contours and colors of moving im-
ages drag.
• When TV broadcasts with weak signals are pro-
jected.
77
77
7
Mosquito Noise Reduction (MNR)
The so-called Mosquito Noise (flickering) can be
reduced.
Description
MNR does not function.
Sets the MNR level for viewing a
clearer picture.
Selectable items
Off
Level 1-3
Menu operation
Page 43
Picture Adjustment (ÒPictureÓ menu)
Note
• When the image is blurred or noisy, switch to
the optimal mode.
• When using progressive inputs, inputs are di-
rectly displayed so that “2D Progressive” and
“3D Progressive” cannot be selected.
Description
Useful to display relatively slowmoving
images such as drama and documentary
more clearly.
Useful to display fast-moving images such
as sports and action films.
Selectable items
3D
Progressive
2D
Progressive
Note
• You can also use ECO+QUIET on the remote
control or on the projector to switch the Eco+Quiet
Mode. (See page 35.)
88
88
8
Eco+Quiet Mode Setting
Brightness
Approx. 80%
100%
Selectable
items
On
Off
Fan
Sound
Low
Normal
Lamp life
Approx.
3,000
hours
Approx.
2,000
hours
Info
• This function is available for all signals with
VIDEO or S-VIDEO.
• This function is available for 480I , 480P, 576I
and 576P signals with COMPUTER1/2 or DVI.
Info
• This function is available for all signals with
VIDEO or S-VIDEO.
• This function is available for 480I , 480P, 576I
and 576P signals with COMPUTER1/2 or DVI.
Downloaded From projector-manual.com Sharp Manuals
-48
Menu operation
Page 43
77
77
7
Checking the Input Signal
This function allows you to check the current in-
put signal information.
Note
• The Video signal can only be set in VIDEO or
S-VIDEO mode.
• When “Video System” is set to “Auto”, you may
not receive a clear picture due to signal differ-
ences. Should this occur, switch to the video
system of the source signal.
* When reproducing NTSC signals in PAL video
equipment.
Selectable items
Auto
PA L
SECAM
*NTSC4.43
NTSC3.58
PAL-M
PAL-N
PAL -60
66
66
6
Setting the Video System
The video input system mode is factory preset
to ÒAutoÓ; however, a clear picture from the con-
nected audio-visual equipment may not be re-
ceived, depending on the Video signal difference.
In that case, switch the Video signal.
Description
When the black levels of the image show
banding or appear faded, select the item
that results in the best picture quality. (In
most circumstances, “Standard” should
be selected.)
Selectable items
Auto
Standard
Enhanced
55
55
5
Selecting the Dynamic Range
An optimum picture may not be displayed if a
DVI-D-capable deviceÕs output signal type and the
projectorÕs input signal type do not match. If this
should occur, switch ÒDynamic RangeÓ.
Note
• The Dynamic Range can be selected only when
“DVI-D” input mode is selected.
Signal Adjustment (ÒSIG-ADJÓ Menu)
Downloaded From projector-manual.com Sharp Manuals
-52
Helpful Functions Set during Installation (ÒPRJ-ADJÓ menu)
Menu operation
Page 43
Setting/Changing the keycode
1 Select ÒSystem LockÓ, then press
ENTER or
||
||
| .
2 Select ÒNextÓ, then press ENTER .
• The screen for entering the keycode appears.
3 Press the 4 buttons on the remote
control or on the projector to enter
the preset keycode in ÒOld CodeÓ.
• When setting the keycode for the first time,
press " on the projector for four times.
• If you input a wrong keycode, the cursor
returns to the first point of the ÒOld CodeÓ.
• The preset keycode is 4 " buttons on the
projector . When you press the " b utton four
times, the keycord input screen disappears.
4 Press the 4 buttons on the remote
control or on the projector to enter
the new keycode in ÒNew CodeÓ.
• Y ou cannot use the following buttons for
ke ycode: STANDBY/ON, ON, STANDBY,
ENTER, L-CLICK, R-CLICK/RETURN,
MENU, ECO+QUIET and BREAK TIMER
• System lock function recognizes each
button on the remote control or on the
projector as an individual button, even if
they share the same button name. If you
used the buttons on the projector in set-
ting your keycode, the keycode cannot
be canceled with the remote control.
Selecting the Transmis-
sion Speed (RS-232C)
Make sure that both the projector and computer
are set for the same baud rate.
Description
Tr ansmission speed is slow.
Tr ansmission speed is rapid.
Selectable items
9600 bps
38400 bps
115200 bps
Note
• Refer to the ÒSETUP MANUALÓ contained on
the supplied CD-ROM for RS-232C Specifica-
tions and Command Settings.
• Refer to the computerÕs operation manual for
instructions for setting the computerÕ s baud rate.
Fan Mode Setting
This function changes the fan rotation speed.
Description
Suitable for normal environments.
Select this when using the projector at
altitudes of approximately 1,500 meters
(4,900 feet) or more.
Selectable items
Normal
High
When ÒFan ModeÓ is set to ÒHighÓ, the fan rotation
speeds up, and the fan noise becomes louder.
System Lock Function
This function prevents unauthorized use of the
projector. Once this function is activated, users
must enter the correct keycode each time the pro-
jector is turned on. We suggest you record the
keycode in a safe place where only autho-
rized users have access.
Info
• If you lose or forget your keycode, contact your
nearest Sharp A uthorized Projector Dealer or Ser-
vice Center (see page 68). Even if the product
warranty is valid, the keycode reset will incur a
charge.
Downloaded From projector-manual.com Sharp Manuals
-54
Setting up the Projector Network Environment (ÒNetworkÓ menu)
11
11
1
Setting a Password
If you do not want others to change the setting
for the ÒNetworkÓ menu, set a password.
Setting a Password
1 Select ÒPasswordÓ, then press
||
||
| .
•
2 Press
''
''
' or
""
""
" to set the first digit in
ÒNew PasswordÓ, then press
||
||
| .
3 Enter the remaining 3 digits, then
press ENTER .
• \
4 Enter the same password in
ÒReconfirmÓ, then press ENTER .
•
•
Changing the Password
1 Select ÒPasswordÓ, then press
||
||
| .
•
2 Enter the password in ÒOld Pass-
wordÓ using
''
''
' ,
""
""
" ,
||
||
| and
\\
\\
\ , then
press ENTER .
3 Enter the password in ÒNew Pass-
wordÓ using
''
''
' ,
""
""
" ,
||
||
| and
\\
\\
\ , then
press ENTER .
4 Enter the same password again in
ÒReconfirmÓ using
''
''
' ,
""
""
" ,
||
||
| and
\\
\\
\ ,
then press ENTER .
•
ENTER
RETURN
If you forget the password
If you forget the password, perform the following
procedure to delete it, then set a new password.
On the projector, press
•
ENTER
53
•
Menu operation
Page 43
Downloaded From projector-manual.com Sharp Manuals
-66
Troubleshooting
Check
• Projector power cord is not plugged into the wall outlet.
• Power to the external connected devices is off.
• The selected input mode is wrong.
• The AV MUTE function is working.
• Cables incorrectly connected to the rear panel of the projector.
• Remote control batteries have run out.
•
External output has not been set when connecting notebook computer.
• The filter cover, lamp unit cover or lamp housing cover is not
installed correctly.
• If the connected DVI digital equipment is turned on before the
“DVI-D” input mode is selected on the projector, the image may
not be projected properly or may not be displayed at all. Ensure
that the appropriate input mode has been selected on the
projector before you turn on the connected equipment.
• Cables incorrectly connected to the rear panel of the projector.
• “Bright” is set to minimum position.
• Depending on the computer you are using, an image may not
be projected unless the signal output setting of the computer is
switched to the external output. Refer to the computer’s
operation manual for how to switch its signal output settings.
• Image adjustments are incorrectly set.
(Video, S-Video Input only)
• Video input system is incorrectly set.
(COMPUTER/COMPONENT 1, 2, DVI-D only)
• Input signal type (RGB/Component) is incorrectly set.
• Adjust the focus.
• The projection distance exceeds the focus range.
• There is fog on the lens. If the projector is carried from a cold
room into a warm room, or if it is suddenly heated,
condensation may form on the surface of the lens and the
image will become blurred. Please set up the projector at least
one hour before it is to be used. If condensation should form,
remove the power cord from the wall outlet and wait for it to
clear.
(Computer Input only)
• Perform “SIG-ADJ” Adjustments. (“Clock” Adjustment)
• Perform “SIG-ADJ” Adjustments. (“Phase” Adjustment)
• Noise may appear depending on the computer.
• Cables incorrectly connected to the rear panel of the projector.
• Volume is set to minimum.
• When the projector is connected to an external device and the
volume is set to minimum, the sound is not output even if you
turn up the volume of the external device.
• “Speaker” is set to “Off”.
• Make the necessary adjustments of each item in the “SIG-ADJ”
menu.
• Depending on the computer you are using, the output resolution
signal may be different from the one you have set. For details,
refer to the operation manual of the computer.
Problem
Data image is not
centered.
Page
30
—
34
34
23-29
15
23
60
24
23-29
45
—
45
48
47
33
19
—
47
47
—
23-29
34
51
47
—
No picture and no sound
or projector does not start.
Color is faded or poor.
Picture is blurred;
noise appears.
Sound is heard but no
picture appears.
Picture appears but no
sound is heard.
Downloaded From projector-manual.com Sharp Manuals


