- Door
Support Bracfcet
FIgu» 2
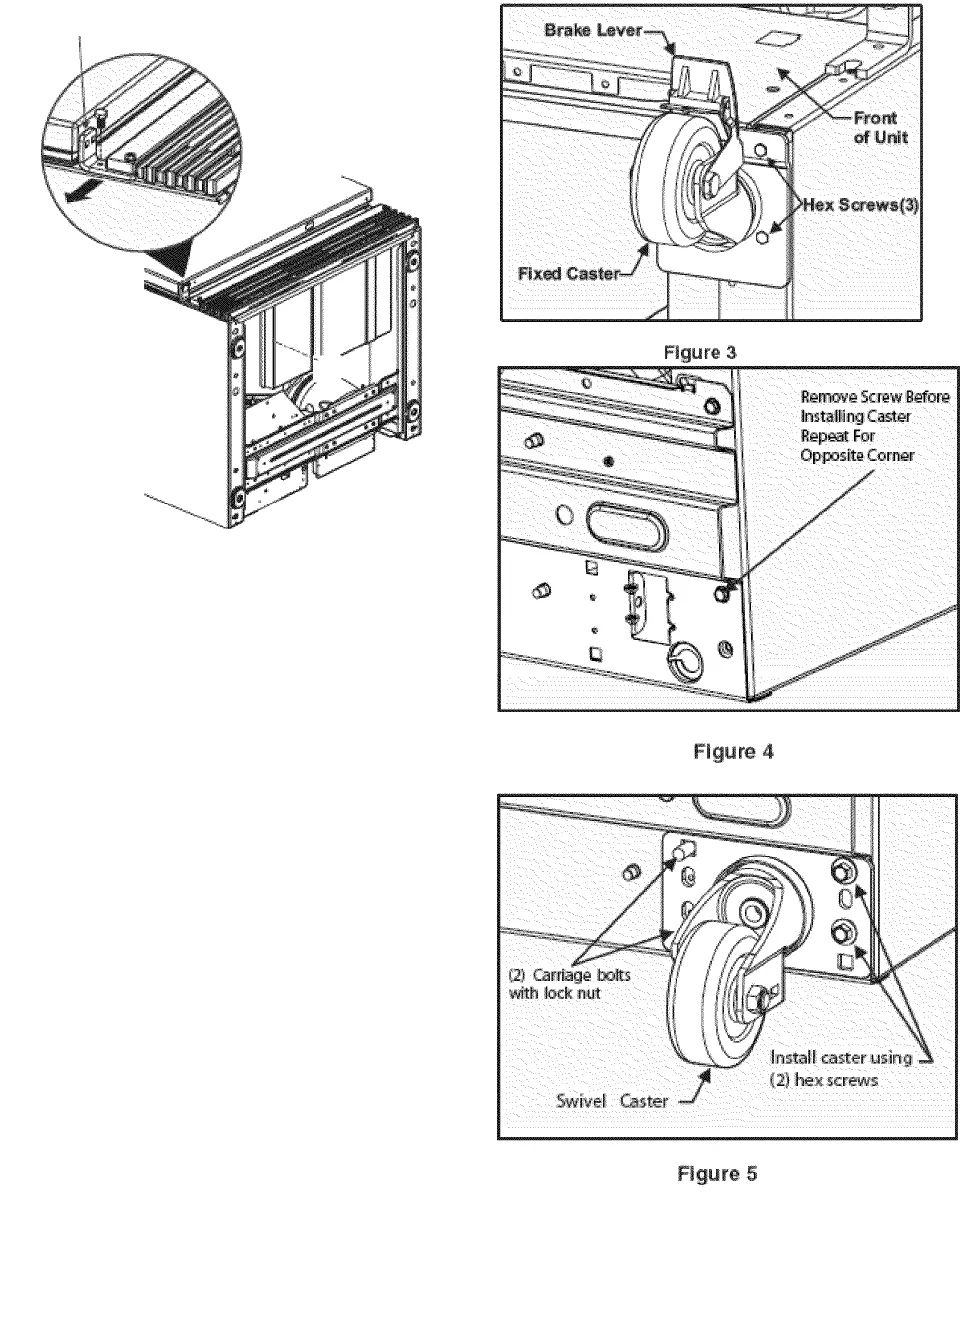
FRONT FIXED CASTER INSTALLATION
• Locate and align fixed caster (with brake lever facing
front of unit - see Figure 3) over the same mounting
holes from front brackets in Figure 1 using six hex
screws (3 for each caster). Secure the screws snug
using a 3/8” open end wrench. Repeat the same
procedure for opposite corner. DO NOT
OVERTIGHTEN.
REAR SWIVEL CASTER
INSTALLATION
• Remove and discard the screws shown in Figure 4
from each bottom corner using a 5/16” socket wrench.
• Locate and align swivel caster over the holes and
install with two hex screws. Secure the screws snug
using a 3/8” socket wrench.
DO NOT
OVERTIGHTEN.
• On the opposite side of the swivel caster plate, insert
two carriage bolts through the compressor support rail
and swivel caster plate. Use a lock nut on each bolt
and tighten securely using a 9/16” socket wrench.
See Figure 5.
• Repeat the same procedure for the opposite rear
corner.
• With the help of an assistant, carefully upright the
unit. Reassemble rear access guard with screws.
^ CAUTION
Unit will roll forward as it is tipped yp.
Appliance Placement
Leave a one (1) inch space on all sides and the back
of the cabinet for ease of installation, proper air
circulation and electrical connections. DO NOT block
the front grill on the lower front of your appliance.
Sufficient air circulation is essential for the proper


