EN9
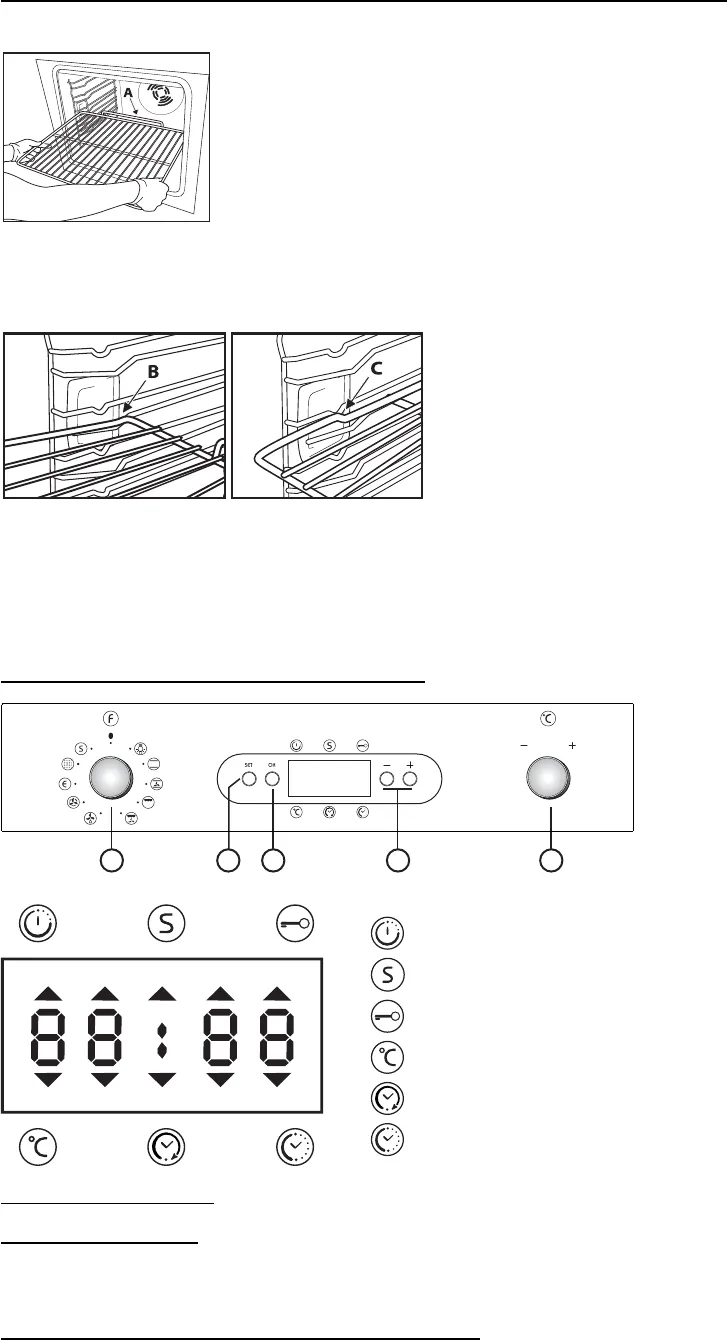
INSERTING RACKS AND OTHER ACCESSORIES IN THE OVEN
The rack and other accessories have a locking system to prevent their inadvertent removal.
1. Insert the rack horizontally, with the raised part "A" upwards (Fig. 1).
2. Tilt the rack when it reaches the locking position "B" (Fig. 2).
3. Return the rack to the horizontal position and push it in fully "C" (Fig. 3).
4. To remove the rack, proceed in reverse order.
The other accessories, such as the drip-tray and baking tray, are inserted in exactly the same way. The
protrusion on the flat part enables locking.
DESCRIPTION OF CONTROL PANEL
USING THE OVEN
Oven activation
When the oven is connected to the power supply for the first time, or after a power failure, the display
indicates "12:00”.
Selecting and changing the clock time:
1. Press button “-” or “+” to set the hour.
2. Press “set” and “-” or “+” to set the minutes.
3. Press “OK” to confirm.
To change the time:
Keep the “OK” button pressed for 3 seconds, until the time flashes on the display. Repeat the steps
described above.
Fig. 1
Fig. 2 Fig. 3
1. Function selector knob
2. Programming button ("set")
3. Confirmation button (“ok”)
4. Buttons for changing time ("-" "+")
5. Thermostat knob
Minute Minder
Special functions
Child safety
Cooking function selection knob
Cooking time
End of cooking time


