Wireless Access Point
Installation Guide
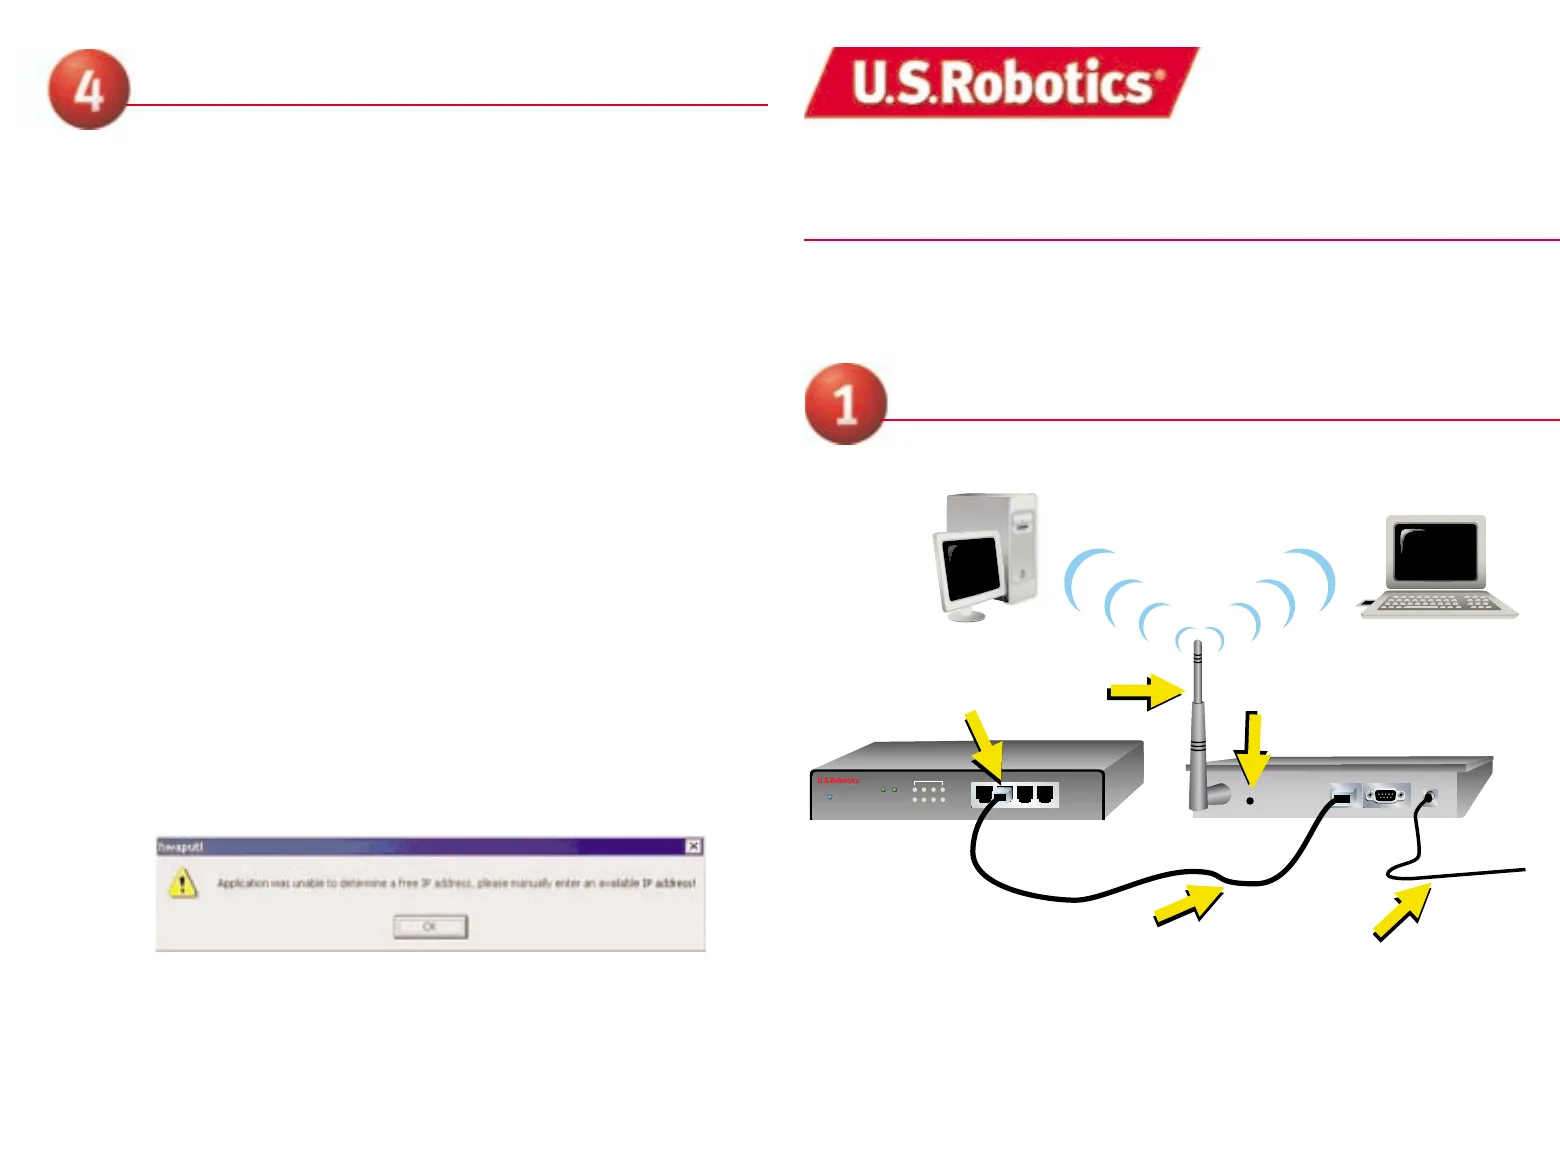
• Use the Ethernet port and an RJ-45 cable to connect the Wireless Access Point to
one of the following devices: a cable or DSL modem with routing capabilities, a hub,
a bridge, an existing Ethernet LAN, or a router.
• Attach the antenna to the Wireless Access Point.
• Attach the power supply to the Wireless Access Point.
Connect the Wireless Access Point
Ethernet Port
Antenna
RJ-45 Cable
Power
Configuration of the Wireless Access Point
After the Wireless Access Point is installed, click Windows Start, Programs, and WLAN
Access Point Utility to launch the Access Point Configuration Utility. Click AP in the
toolbar and then click Scan. This will search for the Wireless Access Point in the network.
If a Wireless Access Point is detected, the WLAN Access Point Utility will display the
Wireless Access Point information.
If you are using multiple Wireless Access Points, you must know the MAC address of the
Wireless Access Point you are currently configuring. The MAC address is located on the
bottom of the Wireless Access Point case and in the WLAN Access Point Utility in the
State field. Locate the correct Wireless Access Point in the list that appears. If the listed
Wireless Access Point does not match the MAC address on the bottom of the correct
Wireless Access Point, refer to the Troubleshooting section in the Companion Reference
Guide or to the User Guide on the Installation CD-ROM for more information.
Double-click the correct Wireless Access Point in the list. If the Wireless Access Point in
the list has an IP address, the Access Point Web Configurator will launch in your default
Web browser.
Congratulations! You have finished installing your hardware and the necessary software.
You should now be able to connect your Wireless Access PC Cards and PCI Adapters to
the Wireless Access Point.
To access the Access Point Web Configurator, double-click the name of the correct
Wireless Access Point in the list. The WLAN Access Point Utility automatically links to
the Login Page of the Access Point Web Configurator server using the Windows default
browser. Type the Password WLAN_AP and then click Login. If you are also prompted
for a user name, type Default. The Password and User Name fields are case-sensitive.
If you see a window stating that a free IP address could not be determined when you
double-click the Wireless Access Point in the Access Point Configuration Utility, you need
to manually assign an IP address to complete the installation procedure. Refer to the
Assigning an IP address to the Wireless Access Point section in the Companion
Reference Guide.
For more detailed information about the Installation procedure, the Access Point Web
Configurator, Troubleshooting, and Support, refer to the Companion Reference Guide
or to the User Guide on the Installation CD-ROM.
R24.0257.00
Reset
Printed in Taiwan